MODULE "ADDING CHARACTERISTICS BY THE SELLER" FOR MULTI-VENDOR
The module allows sellers to create characteristics from the product, assign them to specific categories. New characteristics are checked by the marketplace administrator. Only after the approval of the new characteristics, they become available to other sellers. The module also allows sellers to add value variants from the product to the characteristics, which can also be checked by the marketplace administrator.
Description
Characteristics are of great importance for the work of the marketplace. It is based on the characteristics that filters are formed to search for products on the site. Buyers rely on them when choosing the right product. They compare several products with each other.
Therefore, before starting work, administrators are often forced to create a cloud of characteristics for the main categories of goods. However, it is still impossible to predict in advance all the characteristics that sellers may need.
Sellers in the CS-Cart Multi-Vendor platform have recently become available to create characteristics and variants of characteristic values if they are allowed certain options. This is convenient for sellers, but not very convenient for the marketplace. Tracking the creation of characteristics is almost impossible. As a result, the marketplace has a huge number of disordered characteristics, which prevents, first of all, buyers from finding the right product.
To streamline the work with characteristics and give administrators a control tool, we wrote the module "Adding characteristics by the seller".
Functionality and features
Our module allows sellers to create new characteristics directly from the product of two main types: "Characteristic as a variation" and "Characteristic for search". The seller can choose the purpose of creating a characteristic, the type of display and link it to specific categories.
There are several different purposes for which characteristics are created:
- To search for a product through filters;
- To create a variation as one product;
- To create variations as multiple products;
- Brand;
- Additional information.
If the purpose of the characteristic is to search through a filter, then a filter for site search and several types of characteristics are created on its basis: Color; Numeric input, Input Field; Multiple choice; Free input field.
Based on the characteristics for variation, variations of goods with similar parameters are created, but differing in several characteristics, for example, clothing: one model, one color, and different size. Or a smartphone: the manufacturer and model are the same, but the amount of memory differs. Variations can be collected into one product, or they can exist as separate products, between which the buyer can switch, changing characteristics.
Brand - allows you to display in the product card not only the name of the brand, but also its logo and some information about it, as well as create a landing page with brand products.
Additional information is used when it is necessary to convey to the buyer some voluminous information about the product, for example, in 300 characters.
And now try to tell each seller what settings you need to set in one case or another and make him do everything right as only you need!
Limitation of goals and types of characteristics for the seller
When filling out the options for the value of a characteristic, it is very important to take into account its type. For example, if you enter text information into a characteristic with a numeric input, it will not work.Faced with such a restriction, the seller may consider it an incorrect work of the marketplace, will be upset, will be forced to solve their tasks differently. At the same time, the administrator does not even know that such a situation has arisen.
To avoid this, we gave the administrator the opportunity to restrict sellers' choice of types of characteristics. You can leave it to sellers to create characteristics of only certain types.
At the same time, the administrator still has the opportunity to create characteristics with any settings.
Restrictions are configured through privileges in user groups. That is, you can give different groups of sellers different opportunities.
Privilege settings for the user group type "Seller"
Interface for adding "Characteristics" for product search or "Characteristics for variation"

Interface for adding "Characteristics"
Accessibility in the interface of the "Target", "Appearance" and "Filter type" is configured through the privileges of the user group
Interface for adding "Characteristics for variation"
Accessibility in the interface of the "Target", "Appearance" and "Filter type" is configured through the privileges of the user group
Moderation of characteristics
After creating a characteristic, it gets to moderation. The administrator studies the characteristic: the name, purpose and type, the given variants of values, the categories for which it is assigned, and, if everything is fine, approves it. After that, the characteristic becomes available to all sellers.
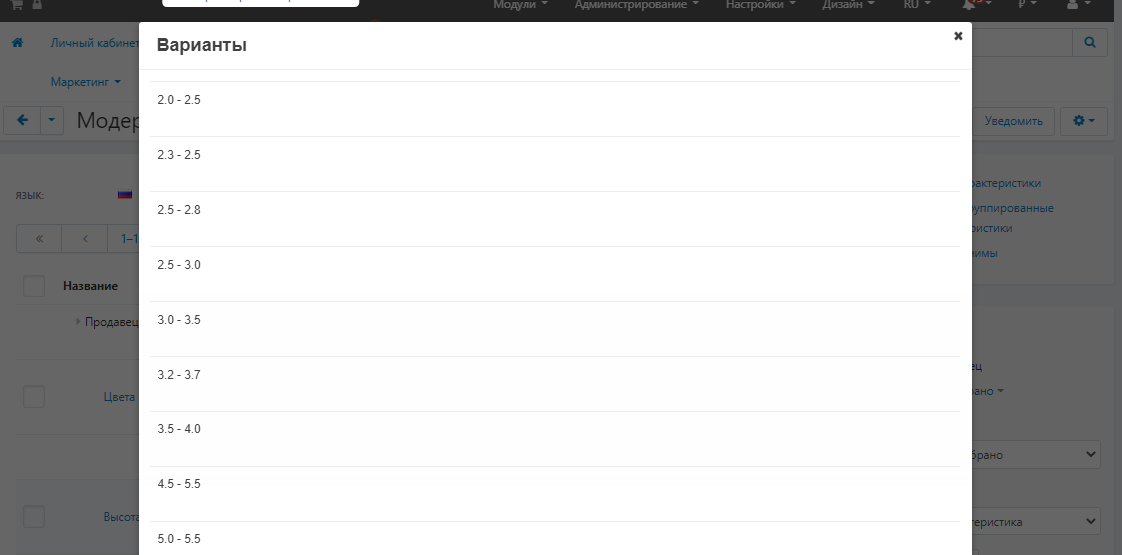
Interface for checking the "Variant" of the characteristic
Interface for checking "Categories" of characteristics

Notification of moderation
If something in the setting of the characteristic does not suit, the administrator rejects it, indicating the reason for the rejection.
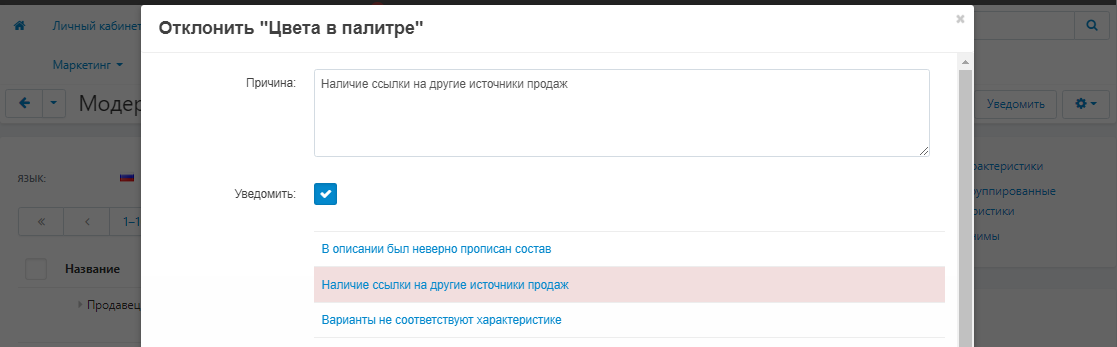
To do this, you can use pre-prepared templates or enter your comment in a free form in a special field.
Adding templates for notifications
CONTACTS
Up-to-date information about changes in the module's functionality, as well as compatibility with other modules, is published in our Telegram channel and in the VKONTAKTE
Telegram t.me/maurisweb
VKONTAKTEvk.com/maurisweb
You can submit a request to the support service, ask questions to the managers about the work or completion of the module via messengers, the groupVKONTAKTE and mail.
- WhatsApp +7-923-364-90-07
- Telegram t.me/mauriswebru
- Telegram +7-923-364-90-07
- VKONTAKTEvk.com/maurisweb
- E-mail: info@maurisweb.ru
Detailed instructions for working with the module
The instruction is current at the time of publication. The module is regularly updated and improved. There may be minor differences in the control of the module.
Adding a characteristic by the seller
A module for assigning characteristics to the seller.
SCOPE OF APPLICATION
The module is designed to allow vendors to create their own specifications.
APPLICATION EXAMPLE
The administrator lets the vendor create characteristics with the "Image" appearance and the "Checkbox" filter type.
SPECIFICATIONS
- Gives the vendor the ability to create characteristics;
- Gives the vendor the ability to create options for characteristics;
- Allows the administrator to restrict vendor creation of characteristics via the Privileges section;
- Adds the ability to create moderation templates;
- Adds admin moderation to vendor-generated features and options.
MODULE SETTINGS
1. To configure a module, go to the "Modules" tab, in the pop-up menu, select "Modules Management" and the "MAURISWEB" section.

2. In the list that opens, select the module you are interested in and click on its name, highlighted in blue or black.

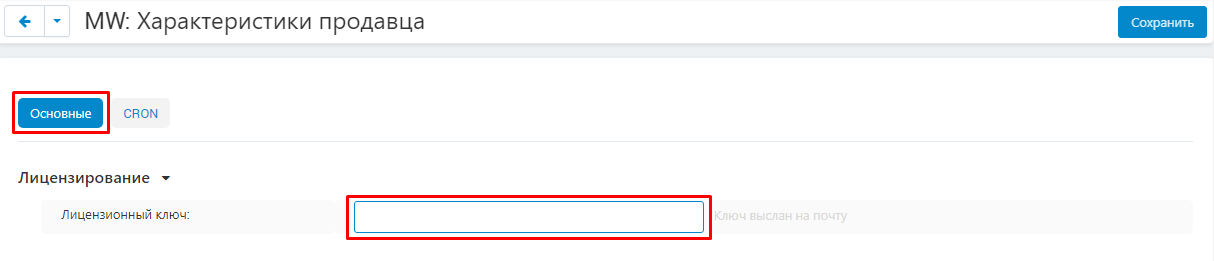
3. On the page that opens, select the "General" tab, go to the "Licensing" section and in the "License key" field, enter the license key that is available in your account at www.maurisweb.ru in the list of purchased modules and also sent to you by e-mail.
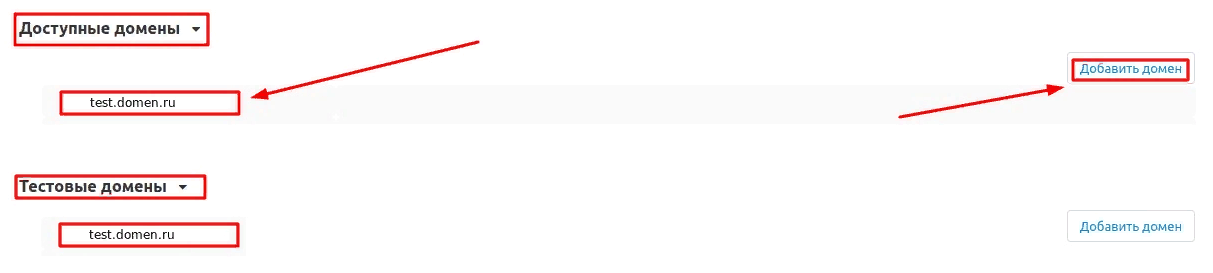
4. In the "Available domains" and "Test domains" sections, check the correctness of the specified domains. You can add additional domains by clicking on the white "Add Domain" button on the right side of the page. The total number of domains should not exceed three.
5. Go down below, select the "Basic settings" section and tick the box "Save data when removing the module" so as not to lose them when reinstalling the module.

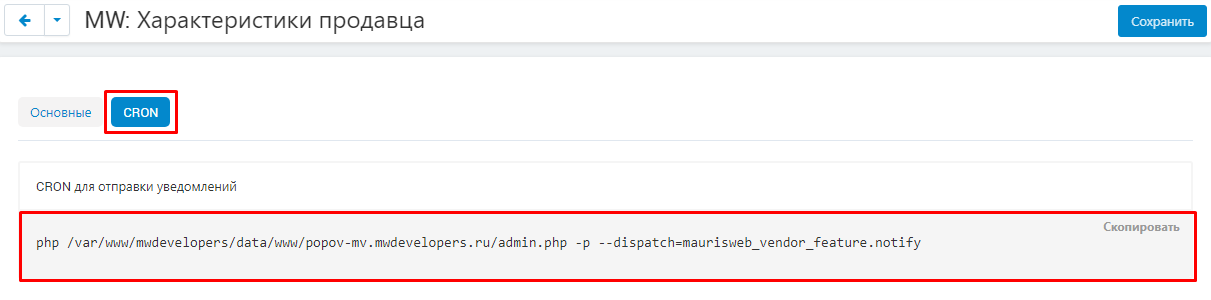
6. Go to the "CRON" tab. To set up notifications, enter the appropriate command in the scheduler.
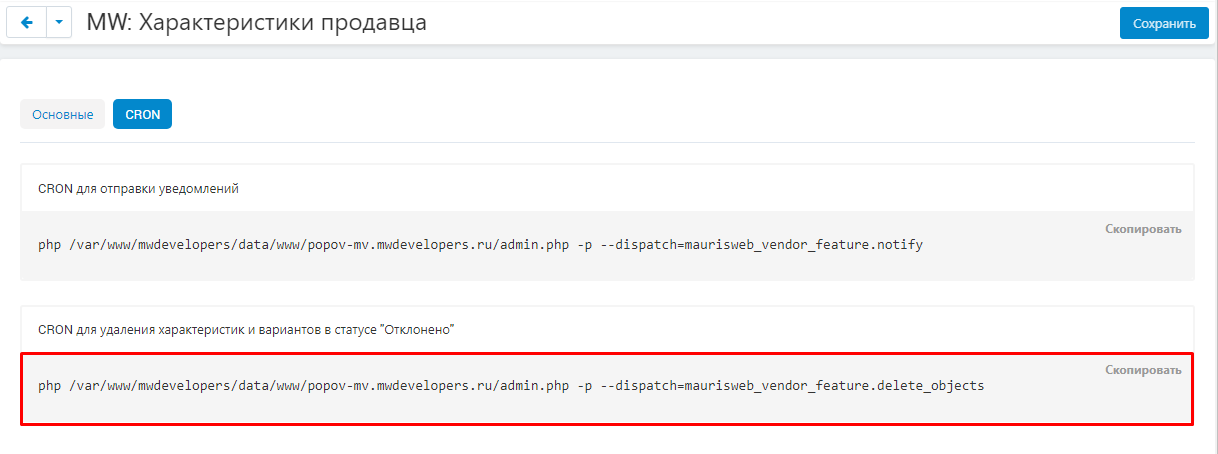
7. To configure the deletion of characteristics and variants with the "Rejected" status, enter the appropriate command in the CRON scheduler.
8. Save the module settings by clicking on the blue "Save" button at the top right of the panel.

PRIVILEGE
ADMINISTRATOR'S PRIVILEGES
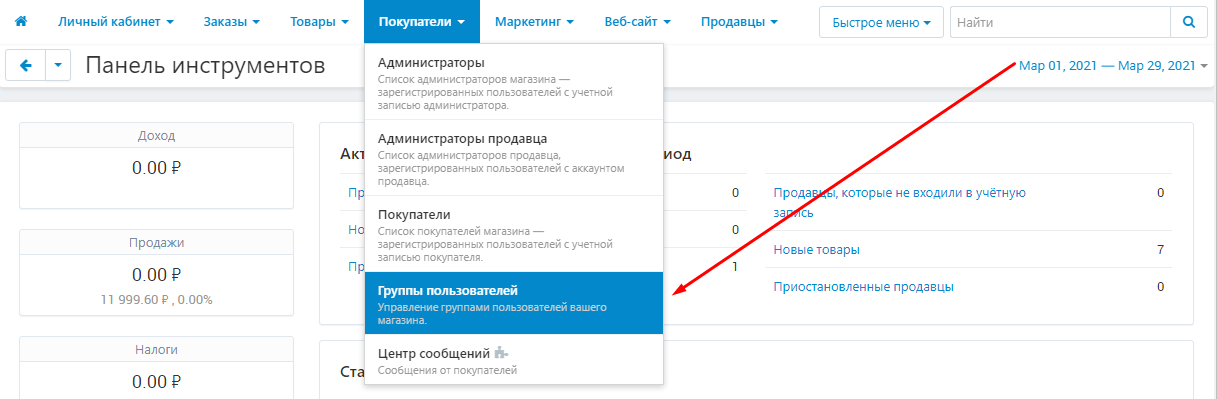
1. To set up administrator privileges, go to the "Customers" tab and select the "User Groups" section.
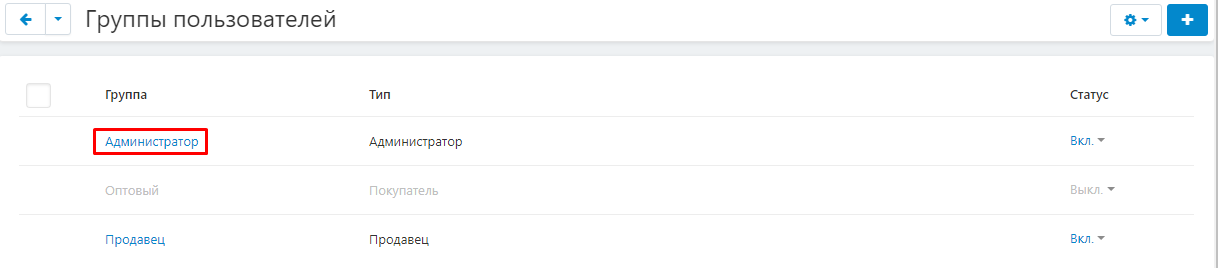
2. Select the required user group. To do this, click on its name highlighted in blue. Make sure the group is of type "Administrator".
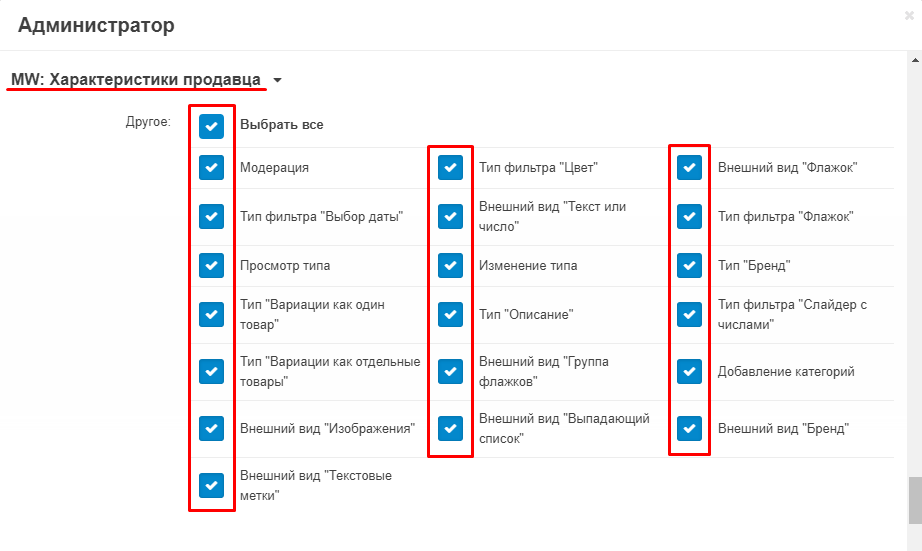
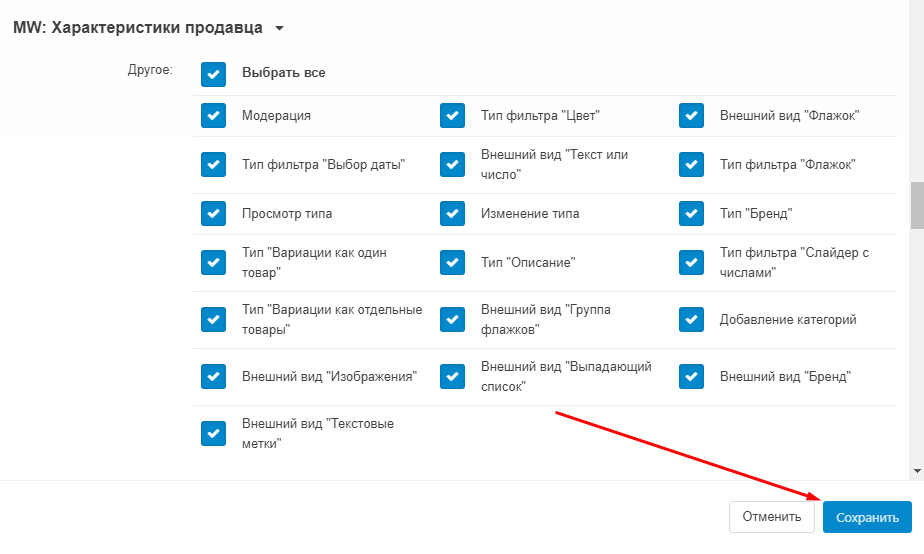
3. Go to the section "MW: Seller characteristics" and tick the boxes that you want to give the group access to: "Moderation", "Filter type" Date selection "," View type "," Type "Variations as one product" , "Type" Variations as individual products "," Appearance "Images", "Appearance" Text labels "," Filter type "Color", "Appearance" Text or number "," Change type "," Type "Description "," Appearance "Checkbox group", "Appearance" Drop-down list "," Appearance "Checkbox", "Filter type" Checkbox "," Type "Brand", "Filter type" Slider with numbers "," Adding categories "," Appearance "Brand".
4. Save your changes by clicking on the blue "Save" button in the lower right corner.
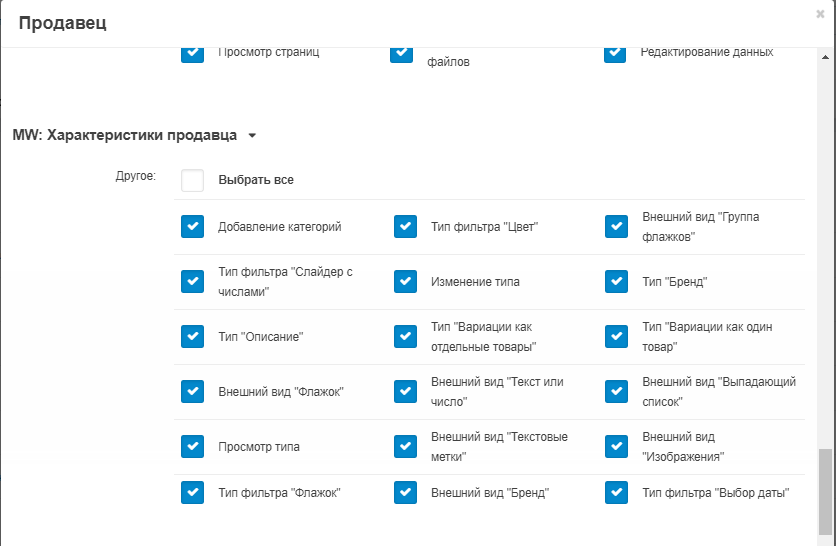
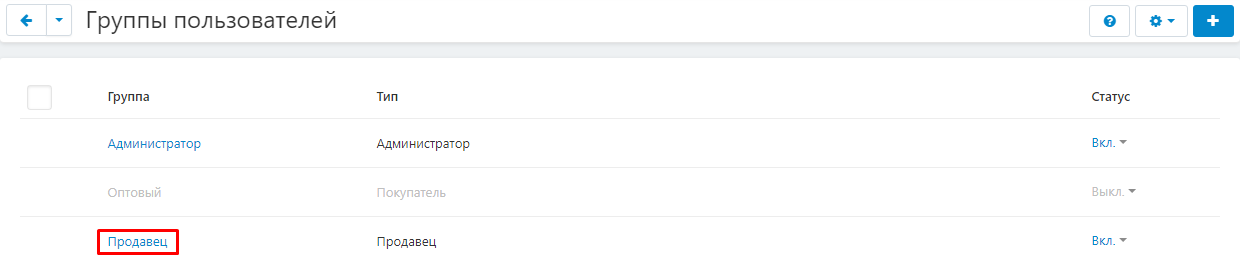
SELLER PRIVILEGES
1. To set up seller privileges, go to the "Buyers" tab and select the "User Groups" section.
2. Select the required user group. To do this, click on its name highlighted in blue. Make sure that the group has the type "Seller".
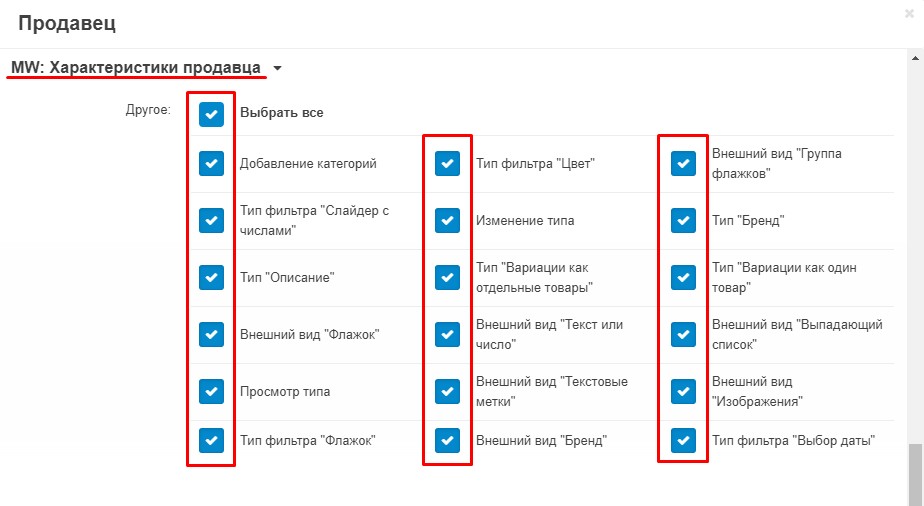
3. Go to the section "MW: Seller characteristics" and tick the boxes to which you want to give the group access: "Add categories", "Filter type" Slider with numbers "," Type "Description", "Appearance" Checkbox "," View type "," Filter type "Checkbox", "Filter type" Color "," Change type "," Type "Variations as individual products", "Appearance" Text or number "," Appearance "Text labels "," Appearance "Brand", "Appearance" Group of flags "," Type "Brand", "Type" Variations as one product "," Appearance "Drop-down list", "Appearance" Images "," Filter type "Date picker".
FUNCTIONALITY OF THE MODULE
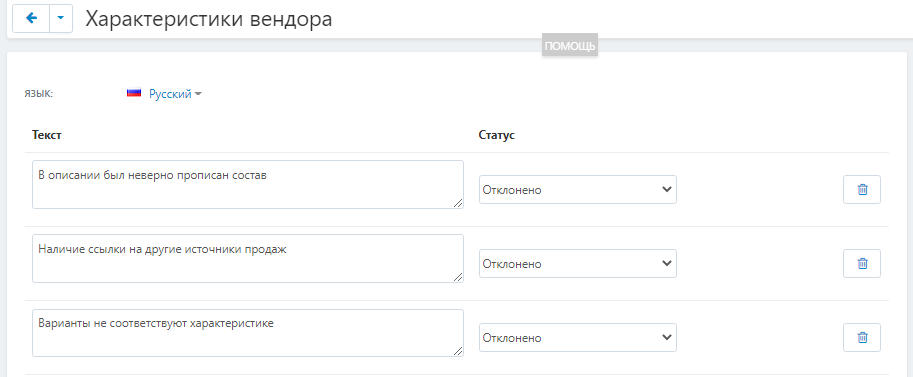
CREATING A MODERATION TEMPLATE
1. Return to the admin panel. Go to the "Modules" tab, select the "MW: Moderation Templates" and "Vendor Characteristics" section.

2. In the "Text" field, enter the text content of the template.

3. In the "Status" item, expand the additional menu and select one of two options: "Approved" or "Rejected".

4. If necessary, use the buttons "Add", "Duplicate", "Delete" (the button in the form of a trash can) on the right side of the line.

5. Click on the blue "Create" button in the upper right corner of the panel.

SELLER SPECIFICATIONS
1. Go to the "Products" tab and select the "Products" section.
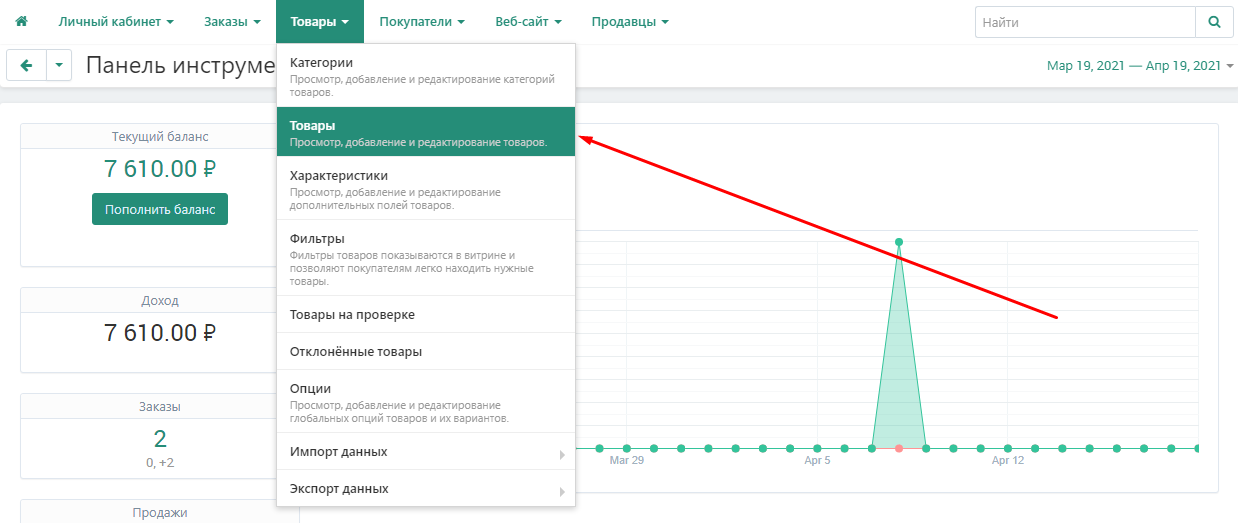
2. Select the desired item. To do this, click on its name highlighted in green.
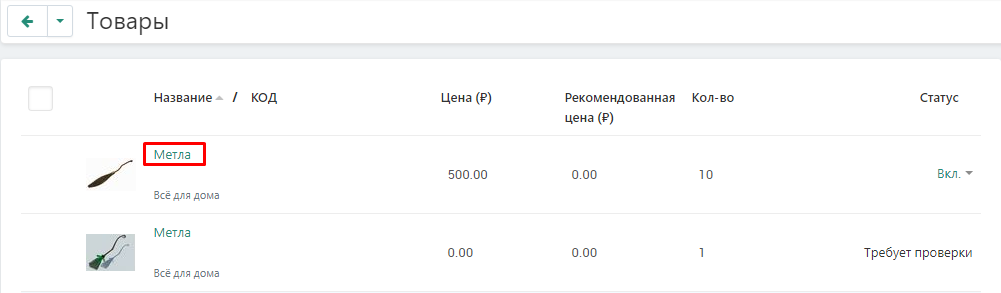
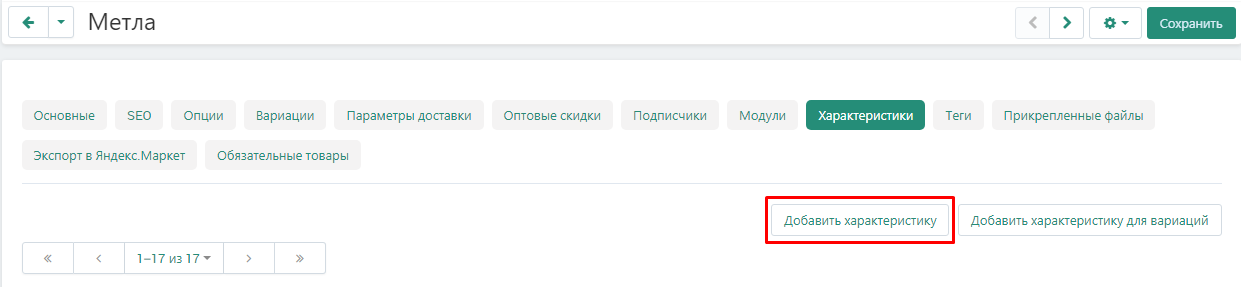
3. Go to the "Characteristics" tab.

4. To add a new characteristic, click on the white "Add characteristic" button.
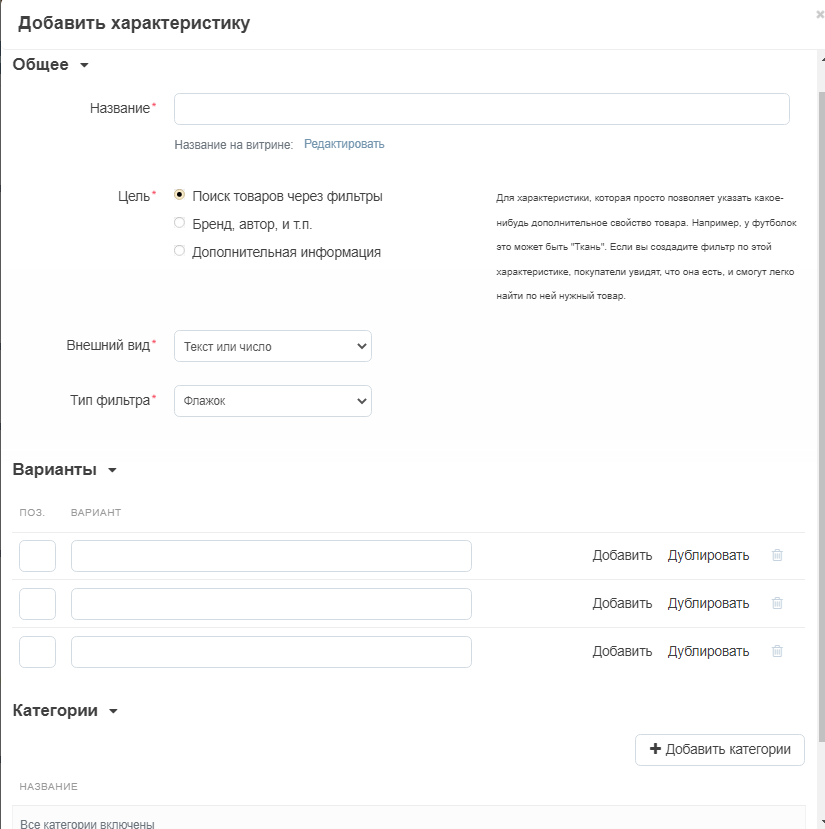
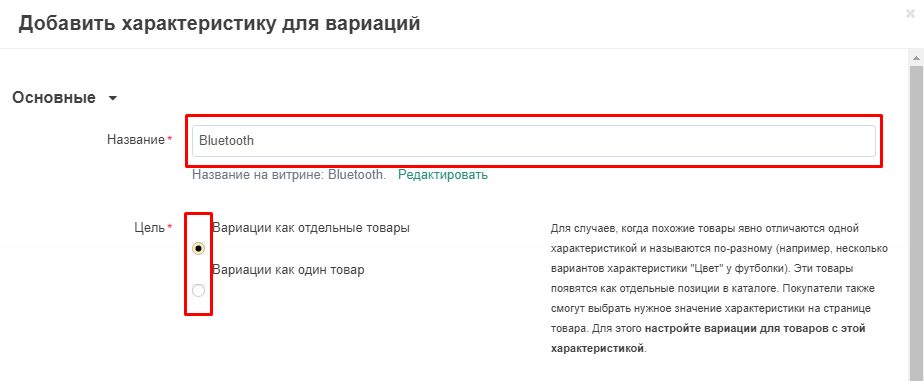
5. In the "Name" field, enter the name of the characteristic.
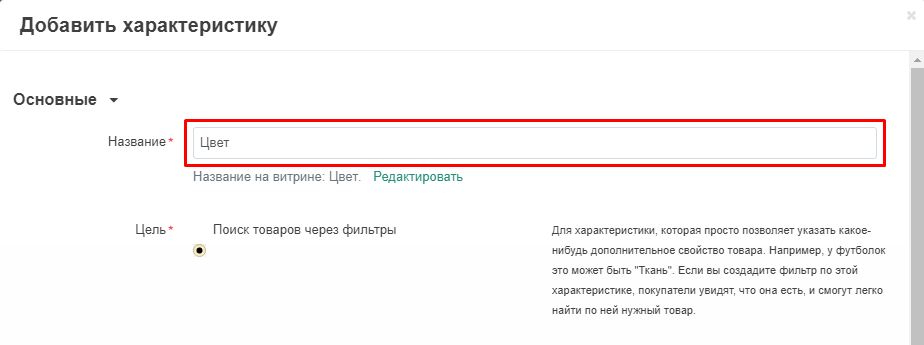
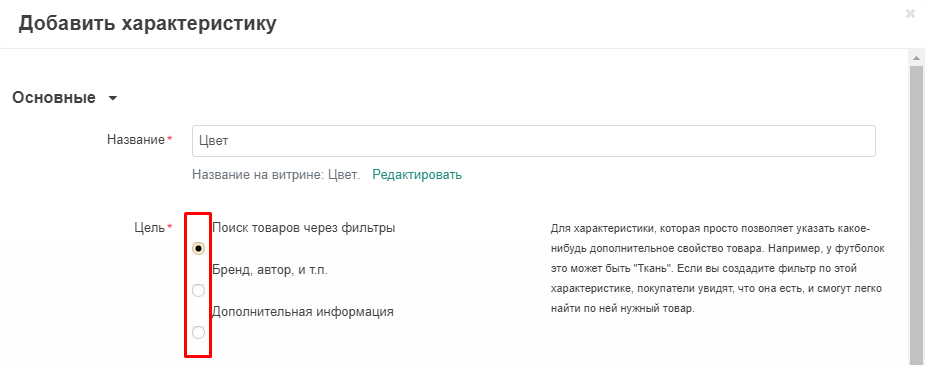
6. In the "Purpose" section, select one of the possible options: "Search for products through filters", "Brand, author, etc.", "Additional information".
Important! You can limit the seller's choice of goals in privileges.
7. In the "Appearance" item, open the additional menu and select one of the possible options: "Text or number", "Checkbox", "Group of checkboxes". You can also limit the choice in this paragraph through the seller's privileges.

8. In the "Filter type" item, open the additional menu and select one of the possible options: "Checkbox", "Date selection", "Slider with numbers", "Color". You can also limit the choice in this paragraph through the seller's privileges.

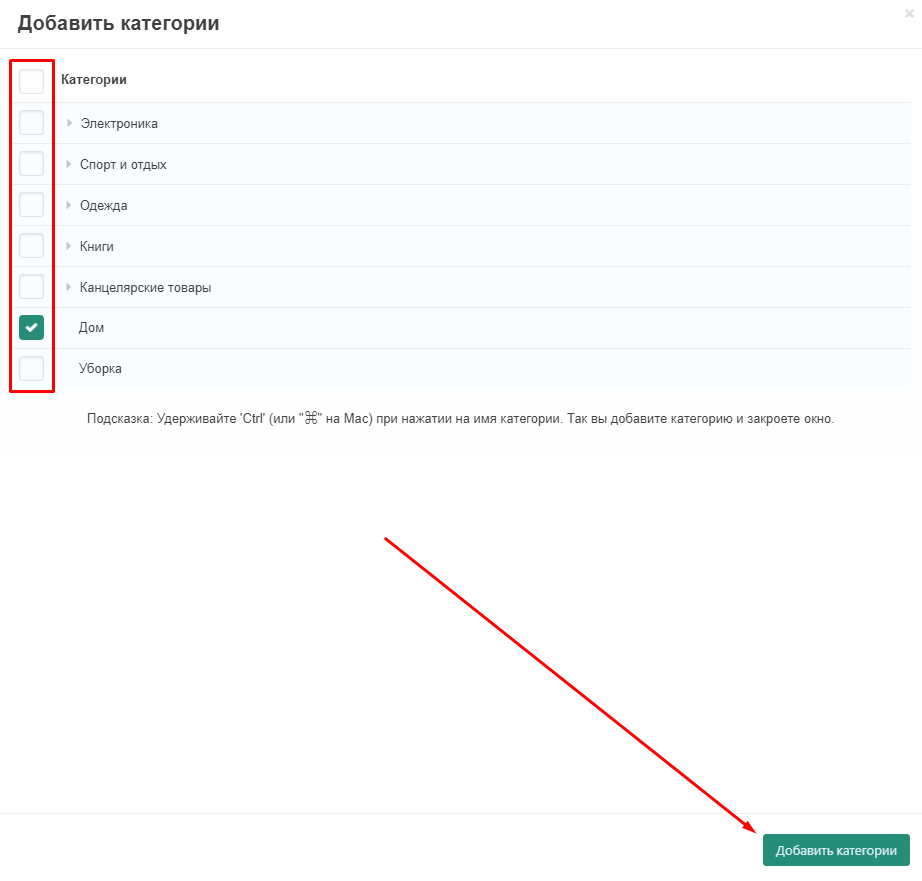
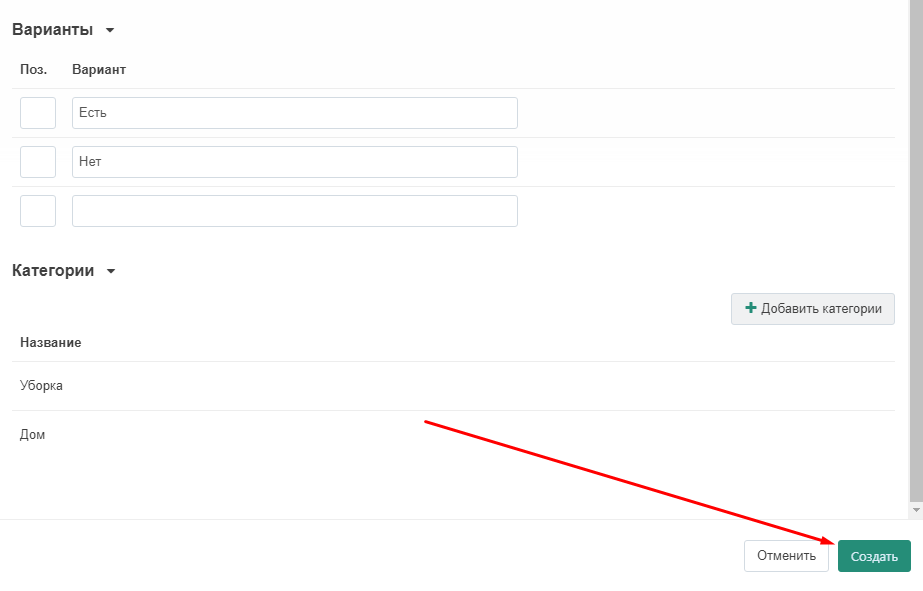
9. Expand the "Categories" section and click on the white "Add Categories" button.
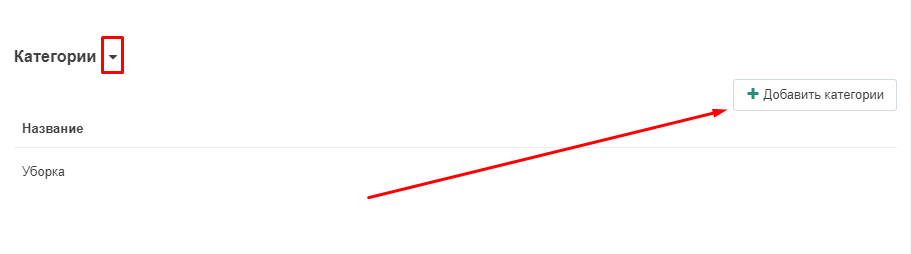
10. In the window that appears, select the desired category by ticking it and click on the green "Add Categories" button in the lower right corner.
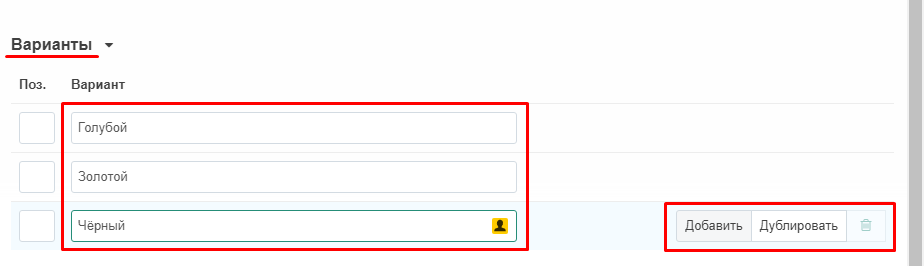
11. In the options section, fill in the fields with the name of the options. If necessary, use the buttons "Add", "Duplicate", "Delete" (the button in the form of a trash can) on the right side of the line.
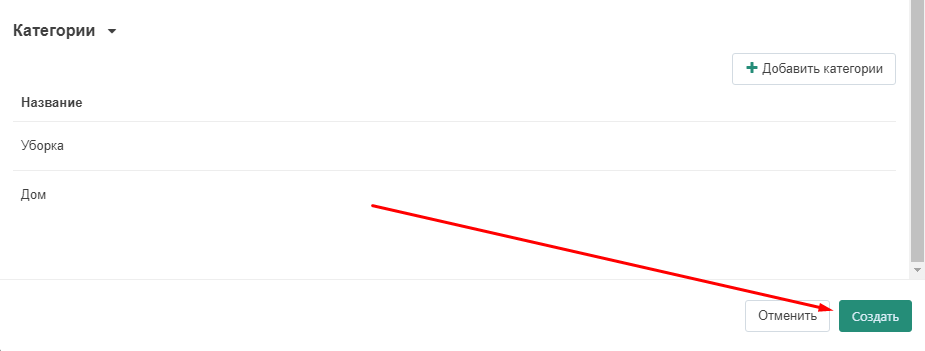
12. After filling in all the fields, click on the green "Create" button in the lower right corner of the window.
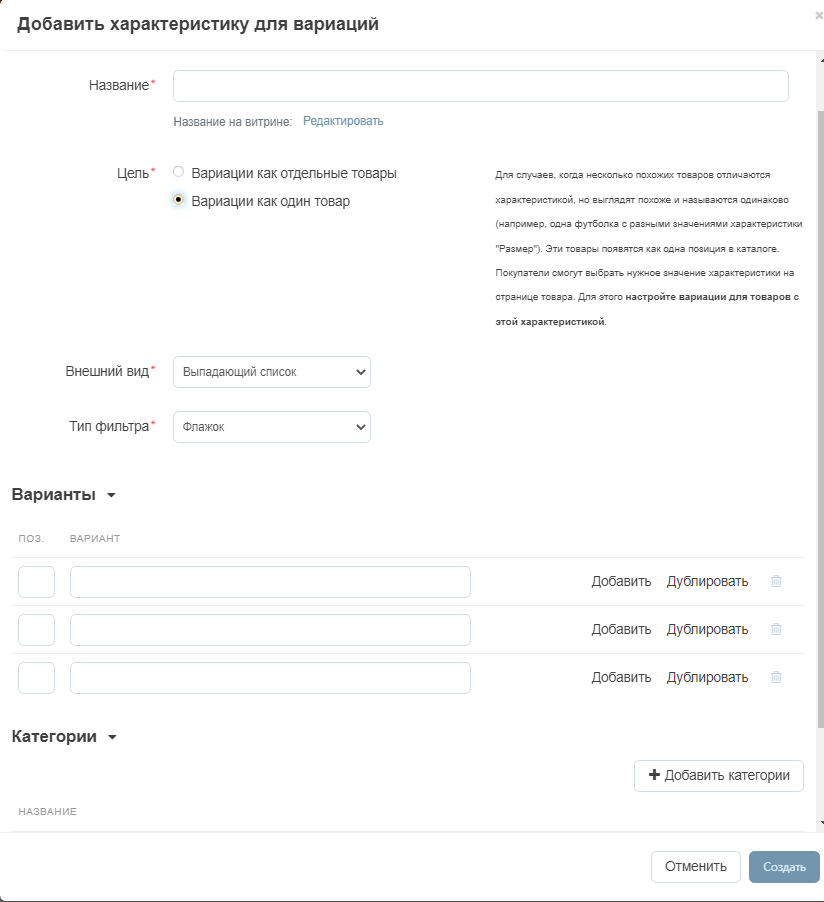
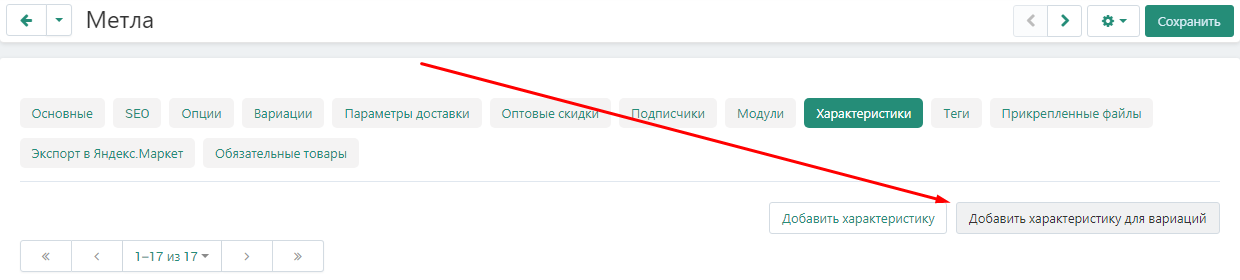
13. To add a characteristic for variations, click on the white button "Add characteristic for variations".
14. Enter a name and select a target from two options: "Variations as separate products" and "Variations as one product". It is also possible to limit the choice through privileges.
15. In the "Appearance" item, open the additional menu and select one of the possible options: "Drop-down list", "Images", "Text labels". You can also limit the choice in this paragraph through the seller's privileges.

16. In the "Filter type" item, open the additional menu and select one of the possible options: "Checkbox", "Slider with numbers", "Color".

17. If necessary, add categories and enter the names of the options, then click on the green "Create" button in the lower right corner of the window.
18. You can add a variant in the "Characteristics" tab itself in the product card. Click on the field next to the name of the characteristic and enter the value, then click on the inscription "Add ..." highlighted in blue.

19. Save changes by clicking on the green "Save" button in the upper right corner of the panel.

20. A warning appears stating that the feature must be approved by the administrator and a link to products awaiting approval.

21. The link will take you to the "Products under check" tab. The goods will have the status "Requires verification".

MODERATION
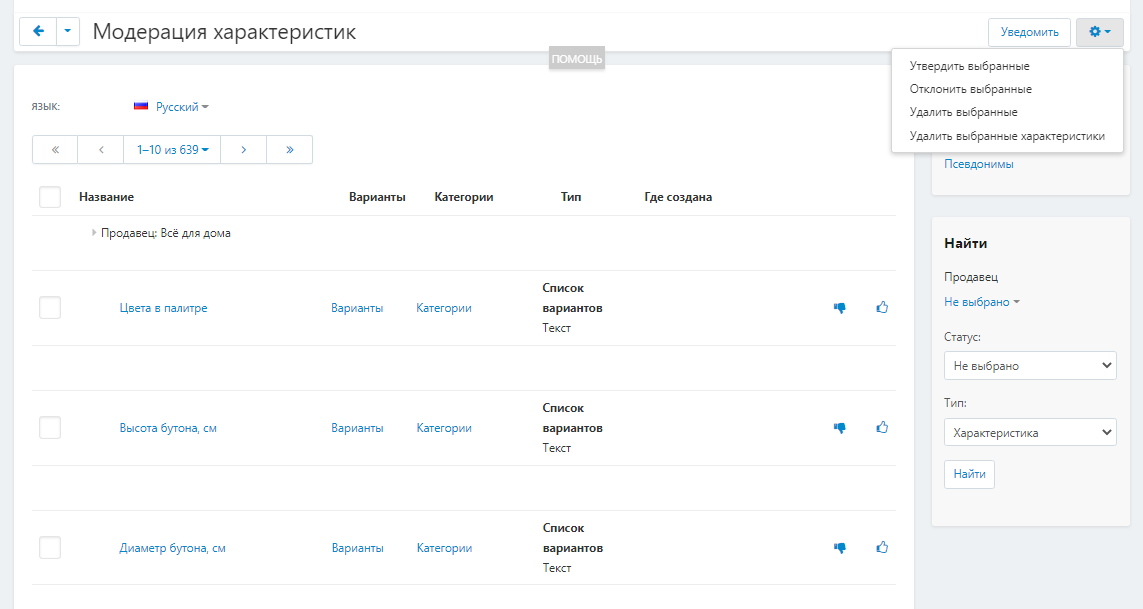
1. To moderate the characteristics, go to the "Modules" tab, select the "MW: Moderation" and "Seller characteristics" section.

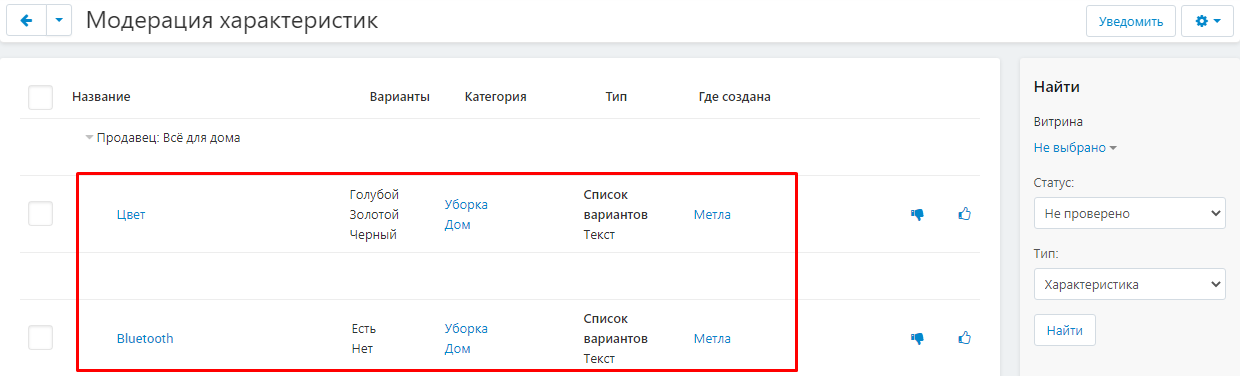
2. A list of sellers who have added characteristics will appear on the opened page. Expand the menu by clicking on the gray arrow next to the title.

3. All the characteristics added by the vendor will appear, indicating their names, variants, categories, types and products for which they were created.
4. To approve or reject the created characteristics, click on one of the buttons: "Decline" (thumbs down) or "Approve" (thumbs up).
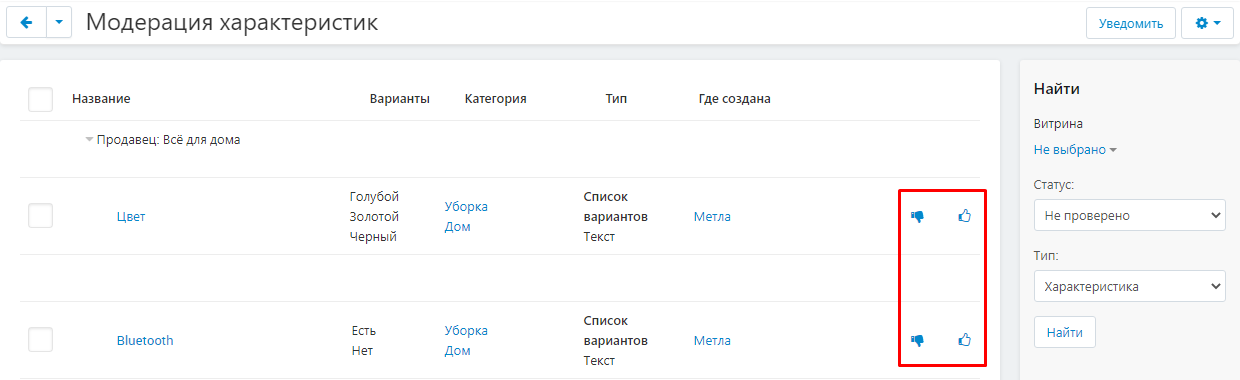
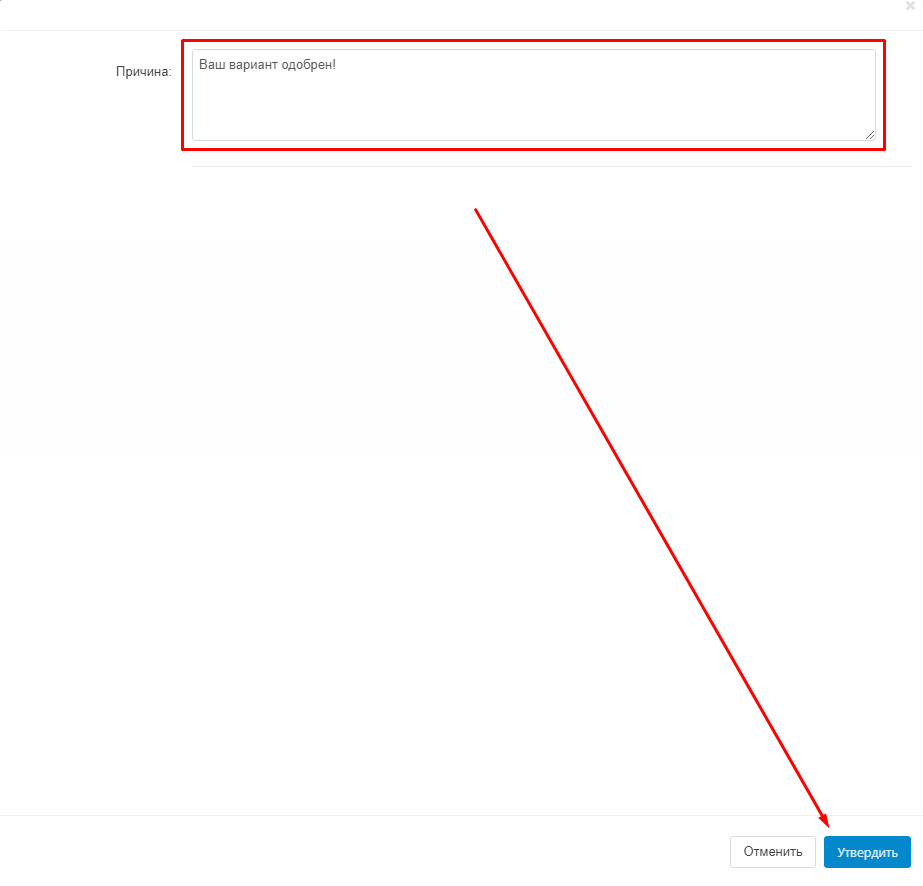
5. Fill in the "Reasons" field and click on the blue "Approve" / "Reject" button in the lower right corner of the window.
6. After approval of the characteristic, it will disappear from the general list.

7. To conduct a group moderation, tick the required characteristics, click on the blue gear button and select one of the options: "Approve Selected", "Reject Selected", "Delete Selected".
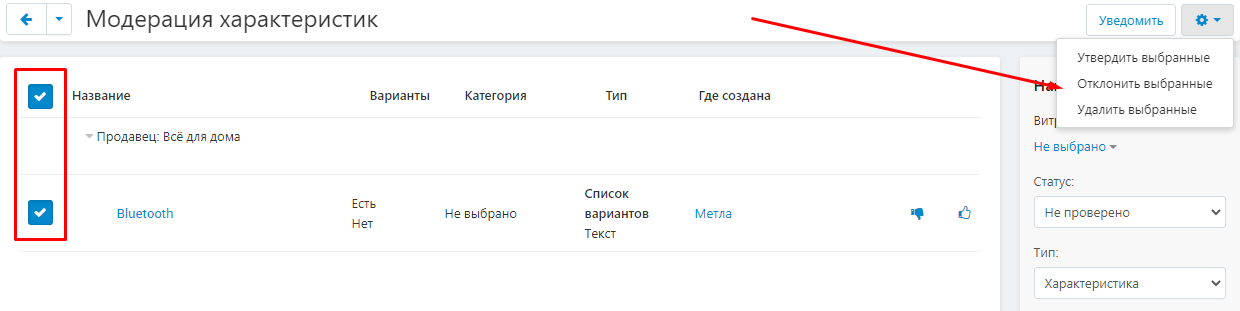
8. To send a notification to the vendor, click on the white "Notify" button in the upper right corner of the panel.

9. To moderate the characteristics options, go to the "Modules" tab, select the "MW: Moderation" and "Seller characteristics options" section.

10. On the page that opens, a list of the characteristics options entered by vendors will appear, indicating the name, type and characteristics for which they were created.
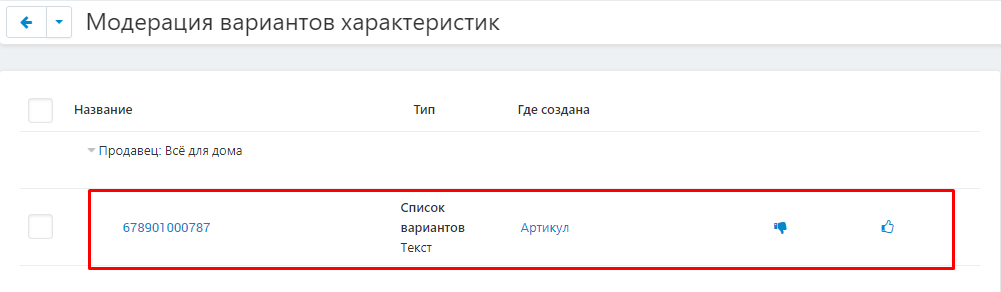
11. To approve or reject the created options, click on one of the buttons: "Decline" (thumbs down) or "Approve" (thumbs up).

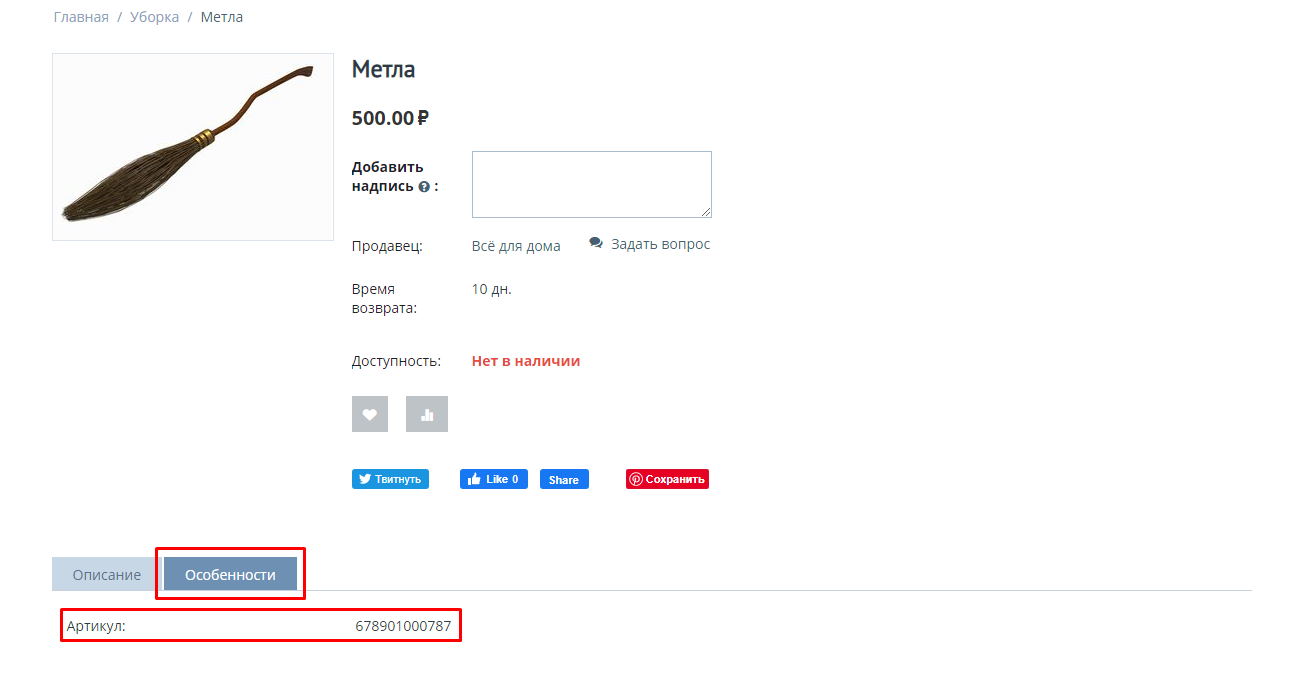
12. After approval, the "Features" tab will appear on the storefront, in which the new characteristic will be displayed.