Модерация и конвертация для CS-Cart
IMAGE MODERATION AND CONVERSION for CS-Cart
The module adds additional moderation of images and the ability to convert them.
SCOPE OF APPLICATION
Improving the quality and size of images loaded externally.
EXAMPLES OF APPLICATION
After importing, the module processes the uploaded images according to the specified requirements and distributes them according to their quality and size. The administrator or responsible employee reviews the data, approves / rejects the images and, if necessary, performs the conversion.
SPECIFICATIONS
- Collects information about uploaded images;
- Distributes images according to settings;
- Adds the ability to moderate images;
- Converts images by quality and size;
- Converts GIFs;
- Works on CRON (updates data, deletes rejected ones, converts, deletes original images).
MODULE SETTINGS
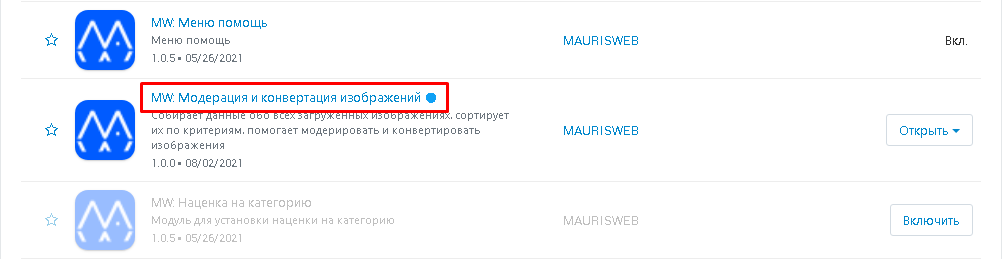
1. Go to the "Modules" tab, in the drop-down menu select "Manage modules" and "MAURISWEB".

2. In the list that opens, select the module you are interested in and click on its name.
3. Go to the "License" tab. If the license key is not set automatically and the module settings will be blocked, go to your account at www.maurisweb.ru, copy the license key and paste it into the appropriate item. The key has also been sent to your email.

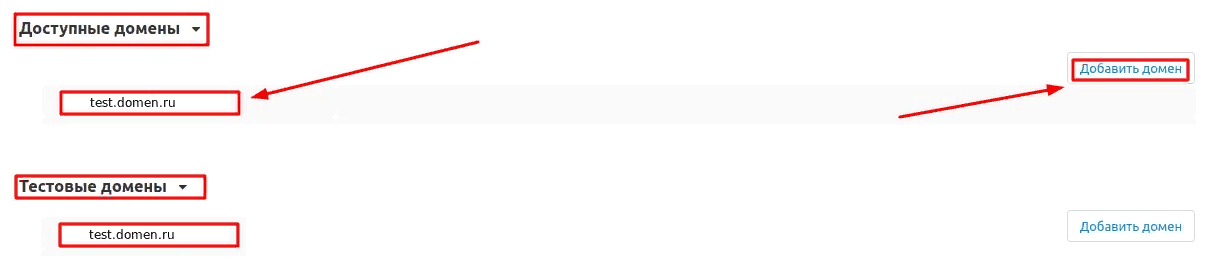
4. In the "Available domains" and "Test domains" sections, check the correctness of the specified domains. You can add additional domains by clicking on the white "Add Domain" button on the right side of the page. The total number of domains should not exceed three.
5. Go to the "Global Settings" tab. From here you can control the main functions of the module.

6. Go to the "Global Settings" tab. From here you can control the main functions of the module.
Set the color of the moderation notifications.
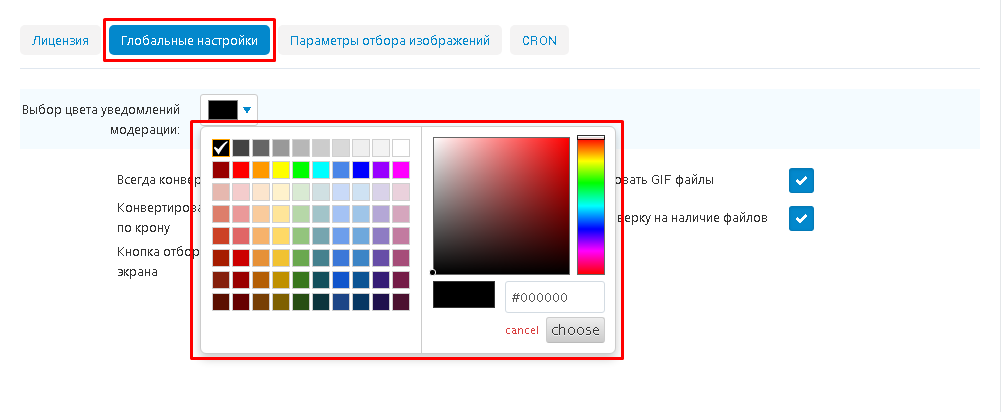
After saving, moderation notifications will be colored in the specified color

7. The option "Always convert images" will be checked automatically. This setting speeds up the process of selecting images for conversion.
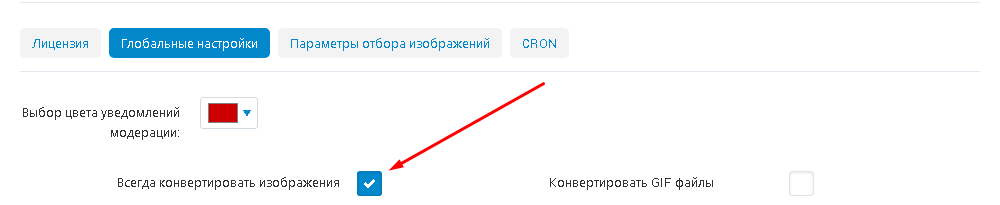
All photos that do not match the specified parameters will be automatically marked for conversion.

8. If you check the box "Convert images only by crown", then the functions of converting by button will be disabled, everything will be done only by CRON.
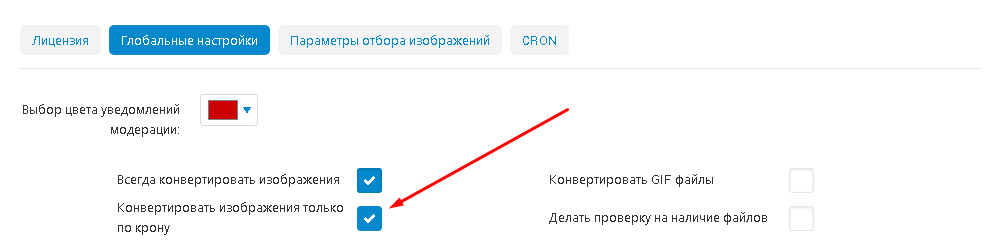
If the checkbox is checked, the "Convert" button will not appear.

9. Check the box next to "Screen center selection button" so that the image selection button is in the middle.
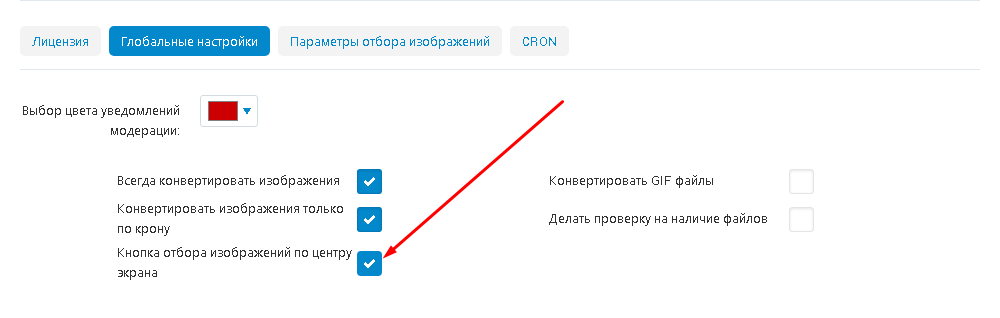
If the checkbox is not checked, the selection button will be located on the left.

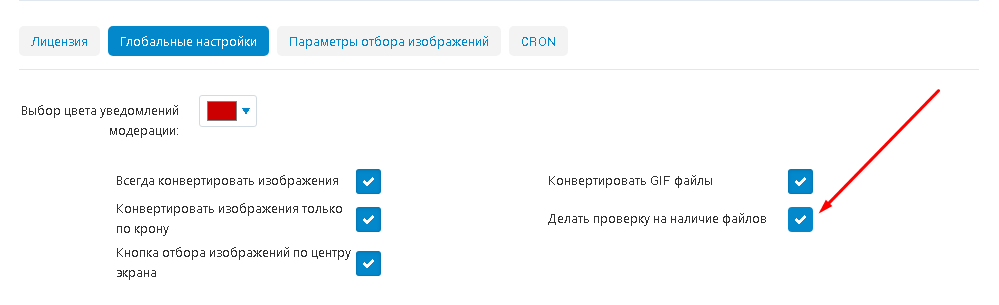
10. Check the "Convert GIFs" checkbox to enable the option to convert GIF images.

Otherwise, files of this type will not be converted.
11. Check the box "Scan for files" for the module to start the scan. In this case, the module will regularly update information about existing images (remove deleted ones, add new ones).
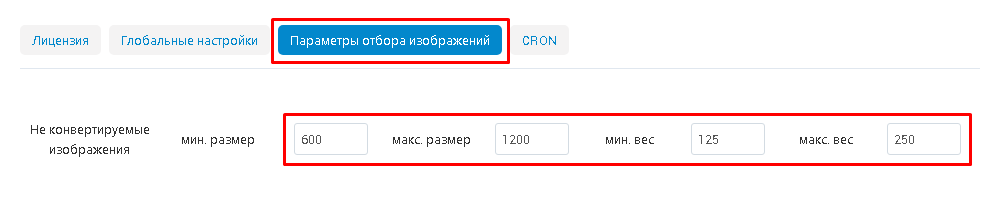
12. Go to the "Image selection settings" tab. The default settings for converting images are set here.
First of all, adjust the values for images that do not require conversion: minimum and maximum size (in pixels), minimum and maximum weight (in kilobytes).
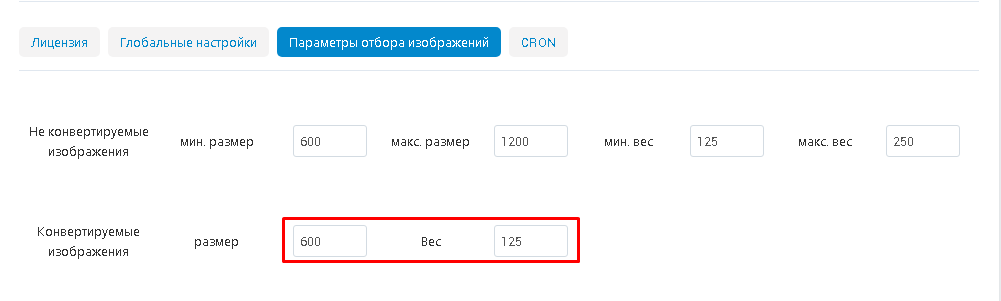
13. Now specify the values at which the images will be sent for conversion. Write down the size (in pixels) and weight (in kilobytes).
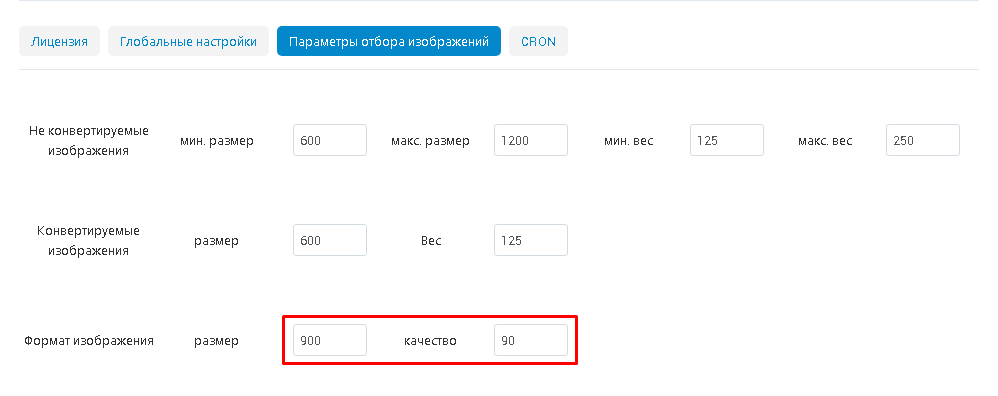
14. In the "Image format" item, specify the data to which the images will be converted after conversion.
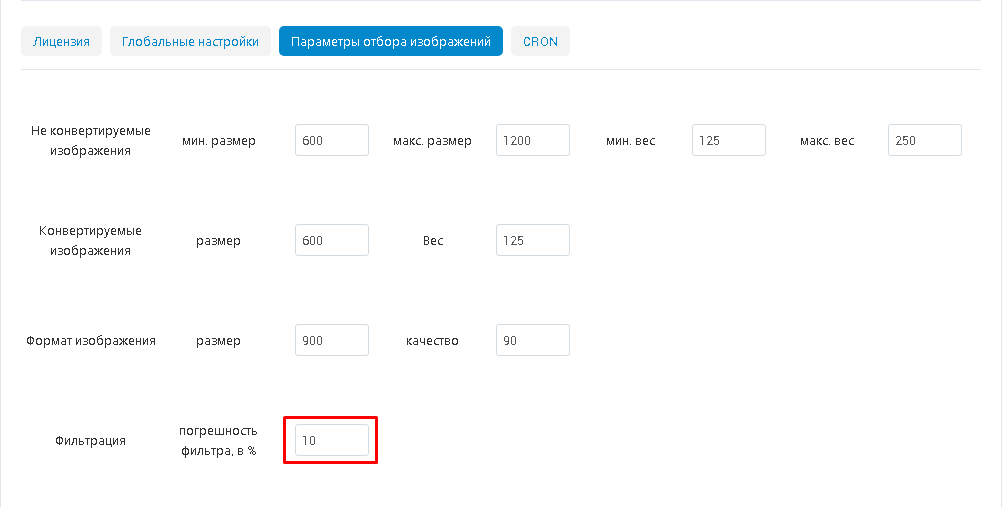
15. Write down the percentage of the filter error in numbers.
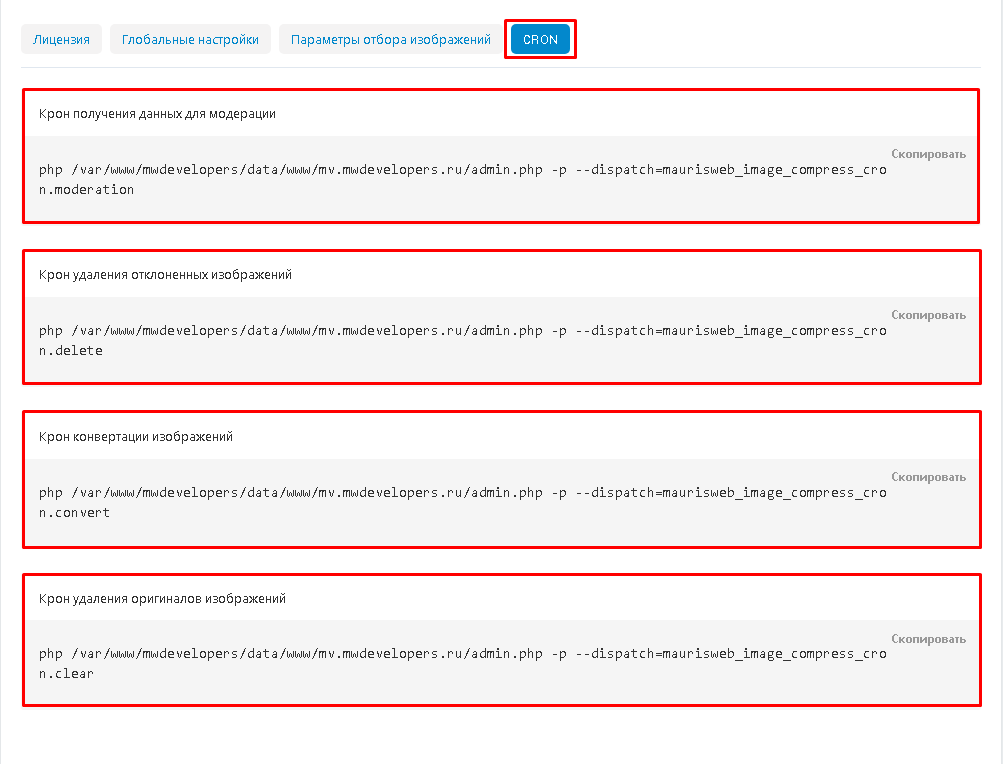
16. Go to the "CRON" tab and enter the commands for the scheduler:
- receiving data for moderation;
- removal of rejected images;
- converting images;
- deleting the originals of the images.
17. Save the module settings by clicking on the "Save" button at the top right of the screen.

IMAGE MODERATION
1. Go to the "Modules" tab, select the "Moderation" and "Image Moderation" section.

2. To manually start the first image check, click on the "Refresh data" button in the upper right corner of the panel.

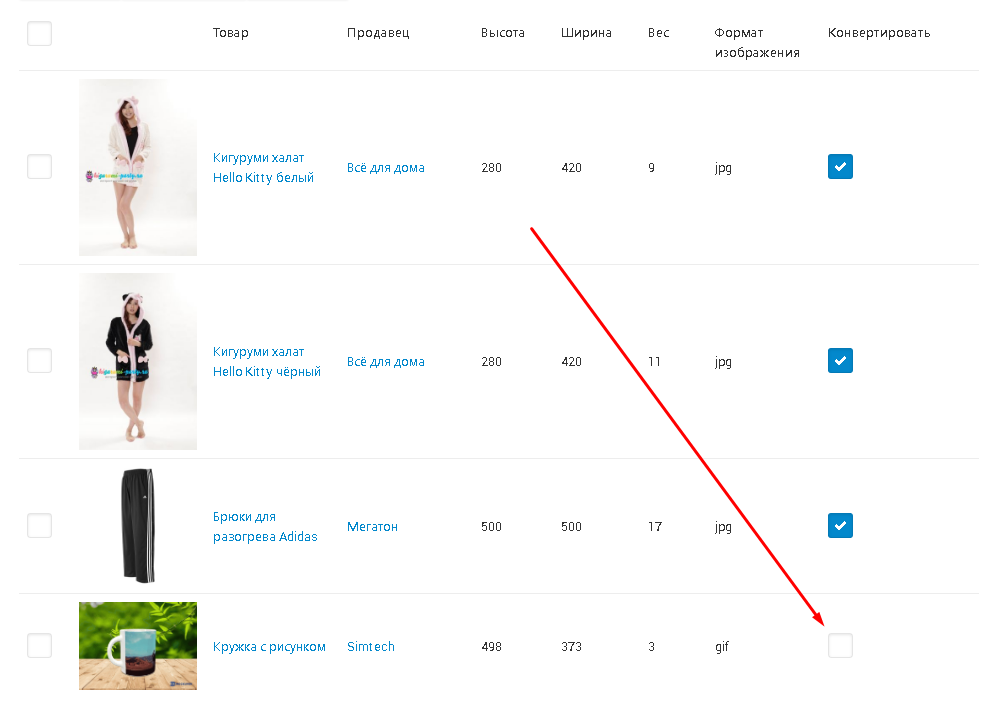
3. In the "On check" tab, the products matching the selection conditions will be displayed. The data corresponds to the "Not convertible" item in the module settings. These images can also be converted (for the order of changes, see p. 9-19).

4. In the "Required control" tab, all goods that are determined by the system as requiring conversion will appear.

5. If you have enabled the "Always convert image" setting ("MODULE SETTINGS", clause 7), then all products in the tab will be marked with check marks. Otherwise, items must be marked manually.

6. Check the checkbox of the images you want to process or select all.

7. Use the filters on the right side of the window to simplify the process of selecting images. Mark the required value with a tick and click the "Filter" button.

8. Click on the "Approve" button in the upper right corner of the panel.

9. To mass approve images, click on the gear-shaped button and select the "Approve Selected Images" or "Approve All Images" commands (in this case, you do not need to check the boxes).

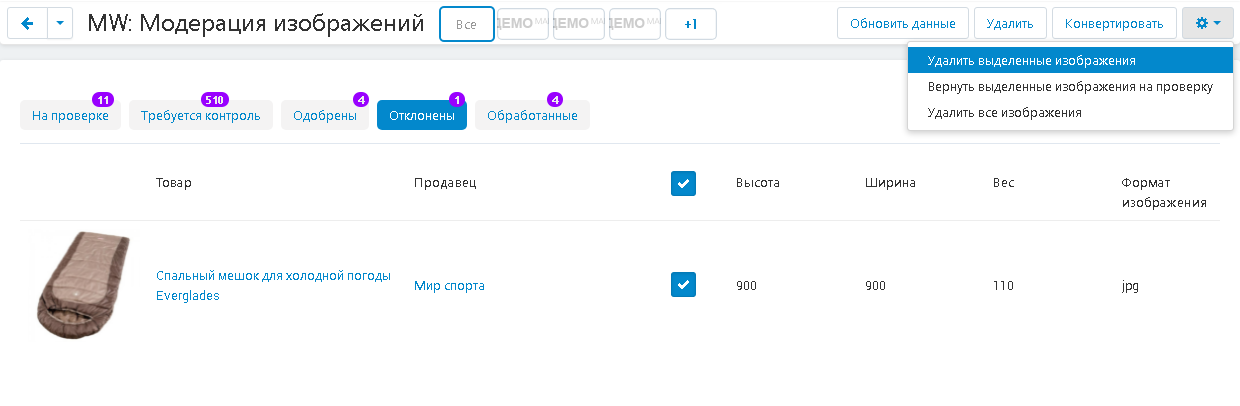
10. To massively reject images, click on the gear-shaped button and select the "Reject Selected" or "Reject All Images" commands (in this case, you do not need to select them).

11. Rejected images will appear in the Rejected tab.

12. To clear the tab, click on the gear-shaped button and use the commands "Delete selected images" or "Delete all images" (in this case, you do not need to select them). They will be deleted with no refund.
In case of error or rechecking, use the "Return selected images for verification" function.
13. Approved images will appear in the Approved tab. To continue working with images, check the boxes.

14. Press the gear-shaped button and select the desired function. To convert, use the "Convert selected images" or "Convert all images" commands (in this case, it is not necessary to select them).

15. In case of error or rechecking, select the "Return Selected Images For Verification" command.

16. Click on the "Convert" button (see p. 8 "MODULE SETTINGS") to update the data.

17. Converted images will be moved to the "Processed" tab.

18. The returned images will appear in the "Control Required" tab, where their data can be changed.

19. To clear the data of the "Processed" tab, mark the images with checkboxes, click on the gear-shaped button and select the "Clear Selected" function.
