MODULE "IMAGE GALLERY FOR WEBSITE AND IMAGE OPTIMIZATION" FOR MULTI-VENDOR
ADDS A PHOTO GALLERY:
- to the product card before the description
- to the product card after the description
- to the product card tab
- on the page before the main content
- on the page after the main content
- on the blog pages before the main content
- on the blog pages after the main content
- insert through the block in any place
FLEXIBLE CONFIGURATION OF GALLERY PARAMETERS FOR THE PRODUCT, CATEGORY AND THE ENTIRE STORE:
- module settings
- gallery display settings in a separate category
- display settings in the product card
- display settings on a separate page
- display settings in the blog
- setting for each block
ADDITIONAL:
Changes the size of uploaded product images by width and/or height in manual or automatic mode.
Distribution of privileges for adding and editing for sellers
MODULE PARAMETER SETTINGS:
- width of images in the gallery
- height of images in the gallery
- margins
- number of columns
- number of automatically loaded elements
- shows the image as slider
- enlarges the image when clicked
Detailed step-by-step instructions for the module can be found at Maurisweb.ru/help - section"Help".
CONTACTS
Up-to-date information about changes in the functionality of the module, as well as compatibility with other modules, is published in our Telegram channel and in the group VKONTAKTE
Telegram t.me/maurisweb
VKONTAKTEvk.com/maurisweb
You can submit a request to the support service, ask questions to the managers about the work or completion of the module via messengers, the groupVKONTAKTE and mail.
- WhatsApp +7-923-364-90-07
- Telegram t.me/mauriswebru
- Telegram +7-923-364-90-07
- VKONTAKTEvk.com/maurisweb
- E-mail: info@maurisweb.ru
Detailed instructions for working with the module
The instruction is current at the time of publication. The module is regularly updated and improved. There may be minor differences in the control of the module.
Image gallery for site and image optimization
The module expands the capabilities of the standard image gallery.
SCOPE OF APPLICATION
Suitable for creating catalogs where it is important to present the product from different angles or its full functionality.
EXAMPLES OF APPLICATION
Multi-tool presentation;
Sets of kitchen utensils;
Car presentation;
Presentation of the apartment.
SPECIFICATIONS
The module adds photos to the gallery:
- In the product card before the description;
- In the product card after the description;
- To the product card tab;
- On the page in front of the main content;
- On the page after the main content;
- On blog pages in front of the main content;
- On blog pages after main content;
- Insert through the block anywhere.
Flexible configuration of gallery parameters for a product, category and the entire store:
- Module settings;
- Gallery display settings in a separately set category;
- Setting up the display in the product card;
- Setting up display on a separate page;
- Setting up the display in the blog;
- Tincture for each block.
MODULE SETTINGS
1. To configure a module, go to the "Modules" tab, in the pop-up menu, select "Modules Management" and the "MAURISWEB" section.

2. In the list that opens, select the module you are interested in and click on its name, highlighted in blue or black.

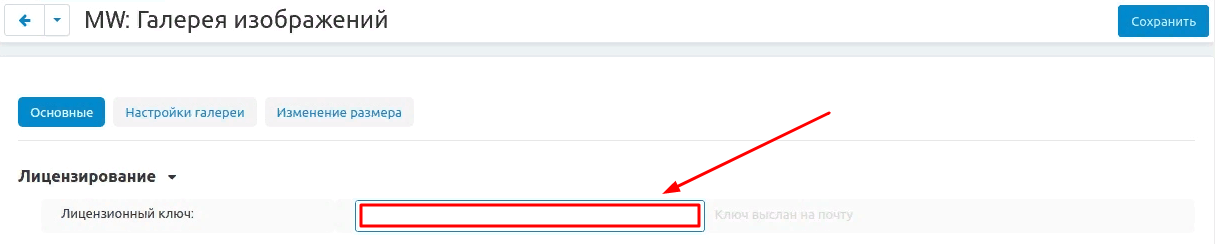
3. On the page that opens, select the "General" tab, go to the "Licensing" section and in the "License key" field, enter the license key that is available in your account at www.maurisweb.ru in the list of purchased modules and also sent to you by e-mail.
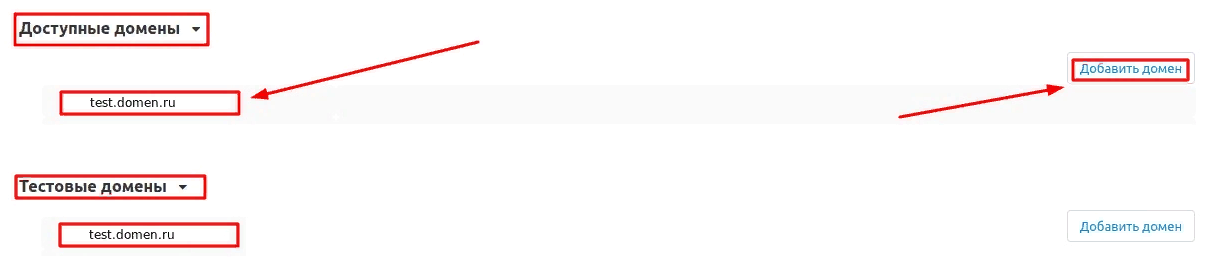
4. In the "Available domains" and "Test domains" sections, check the correctness of the specified domains. You can add additional domains by clicking on the white "Add Domain" button on the right side of the page. The total number of domains should not exceed three.
5. Go down below, select the "Basic settings" section and tick the box "Save data when removing the module" so as not to lose them when reinstalling the module.

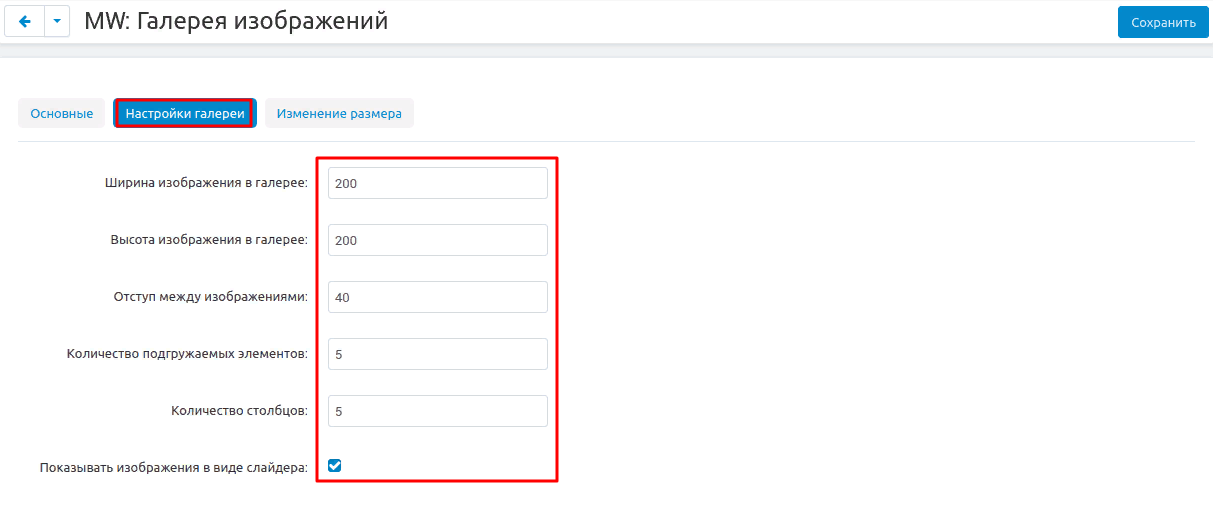
6. Go to the "Gallery Settings" tab.

8. By default, values are already set in the fields "Image width in gallery" and "Height of image in gallery". If other parameters are required, they can be changed manually.
Note: All values are expressed in pixels.

9. In the same way, you can change the parameters in the "Spacing between images", "Number of loaded elements" (number of images) and "Number of columns" fields.

10. Check the box "Show images as a slider" if you want to use this function.

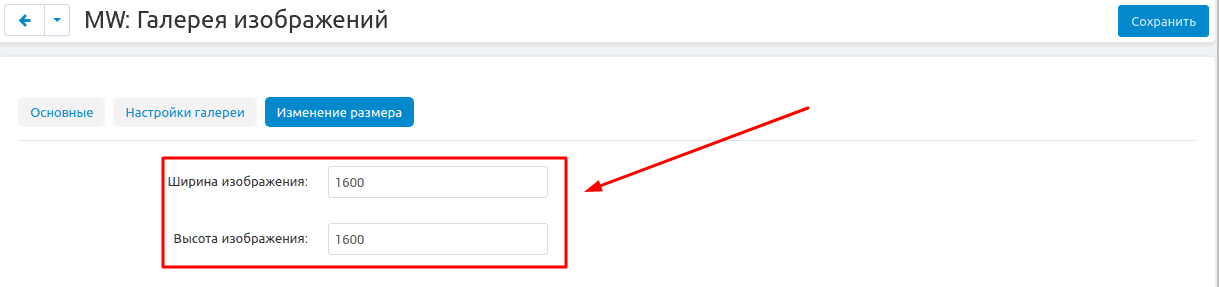
11. Go to the "Resize" tab.

12. The "Image Width" and "Image Height" fields are set by default and can be changed manually. Check the "Apply for uploaded images" box to automatically match the uploaded images.

13. Save the module settings by clicking on the blue "Save" button at the top right of the screen.

PRIVILEGE
The functionality of this module is available only to the administrator, so the privilege settings are also configured only for this group.
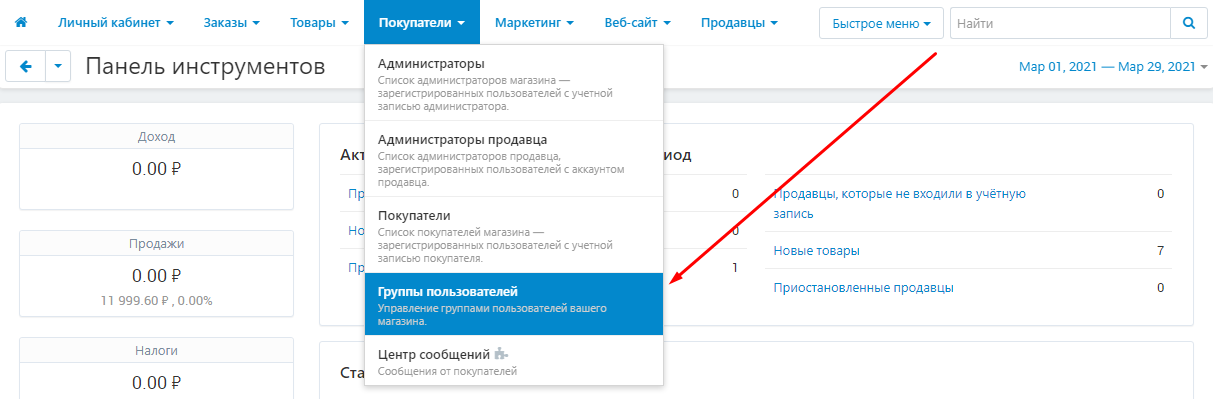
1. In order to set up privileges, go to the "Customers" tab and select the "User groups" section.
2. Select the required user group by clicking on its name highlighted in blue. Make sure the group is of type Administrator.

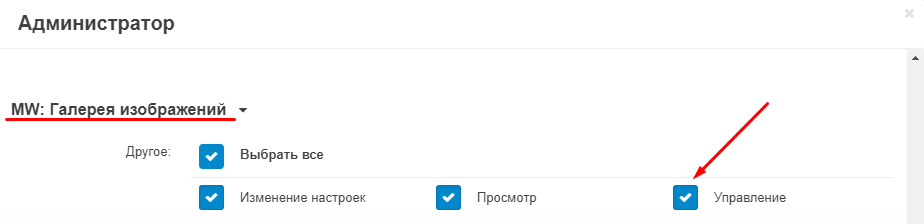
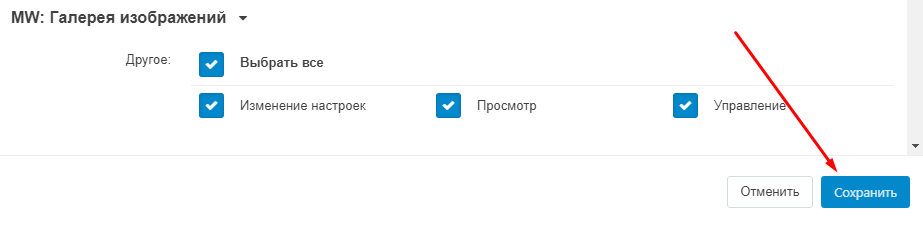
3. Select the "MW: Image Gallery" section and tick the boxes that you allow the group to access: "Change settings", "View", "Control". Or click "Select All" to check all the items.
4. Save your changes by clicking on the blue "Save" button in the lower right corner of the window.
FUNCTIONALITY OF THE MODULE
CATALOG
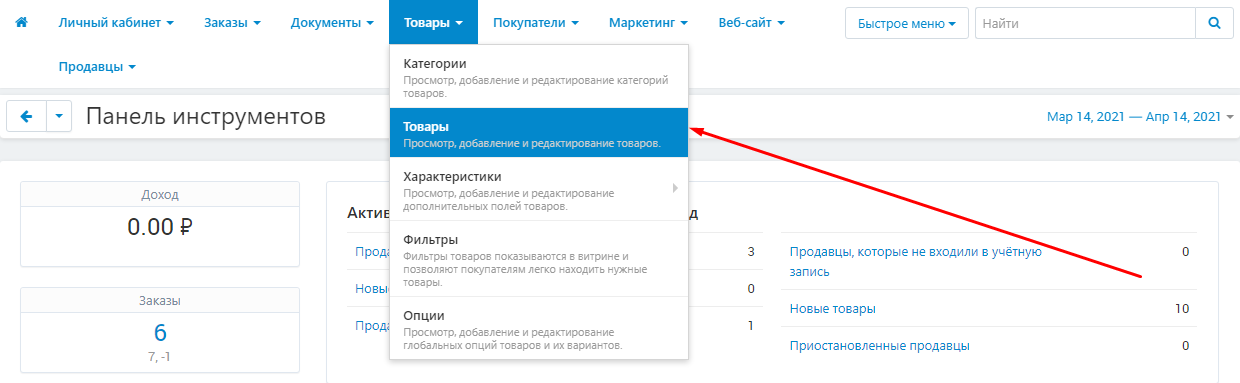
1. To set up a gallery of images in the catalog, go to the "Products" tab and select the "Products" section.
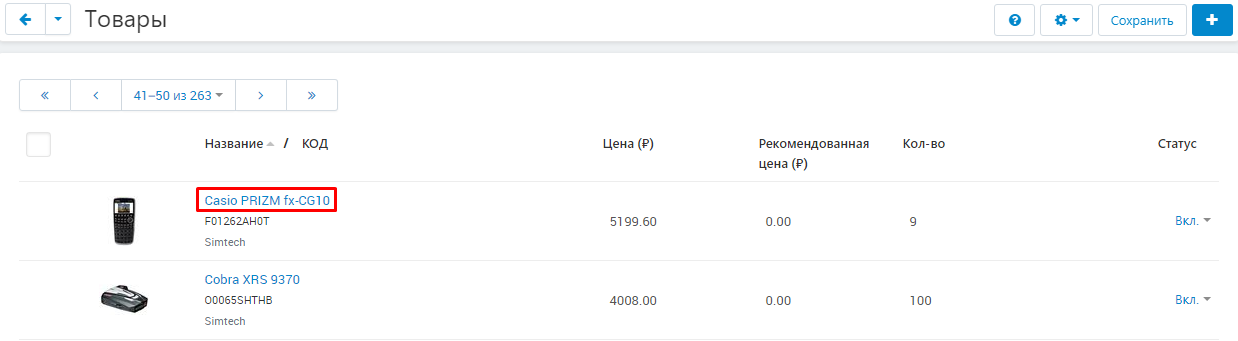
2. On the page that opens, select the product to which you want to add an image by clicking on its name, highlighted in blue or black.
3. In the product card that opens, go to the "General" tab.

4. In the product card that opens, go to the "General" tab.

4.1. You can load the required image by dragging its icon onto the image loading window.
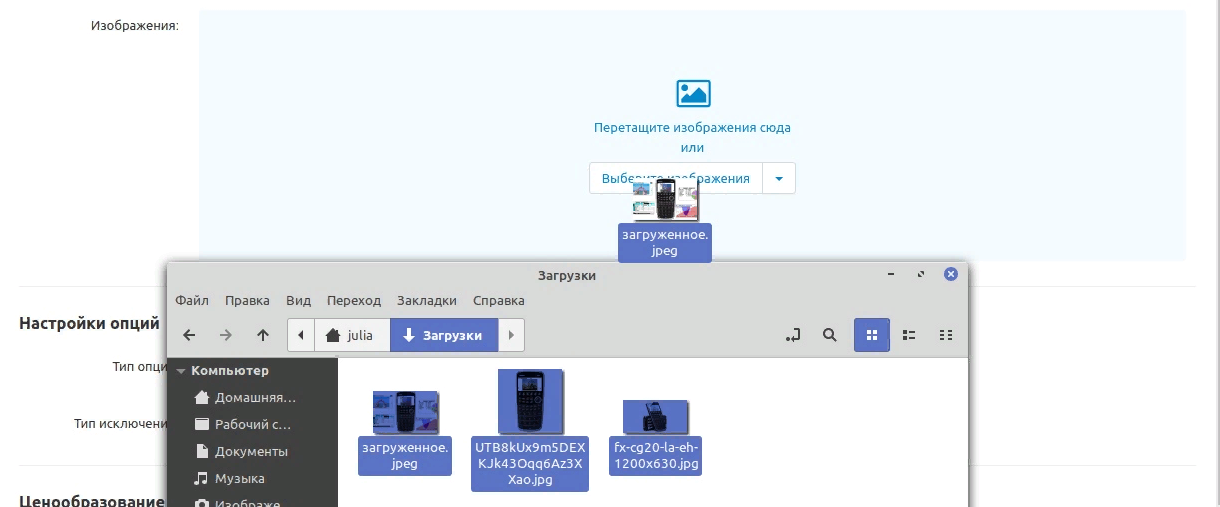
4.2. Or by clicking on the "Select Image" button. In the window that appears, select the desired picture and click "Open".

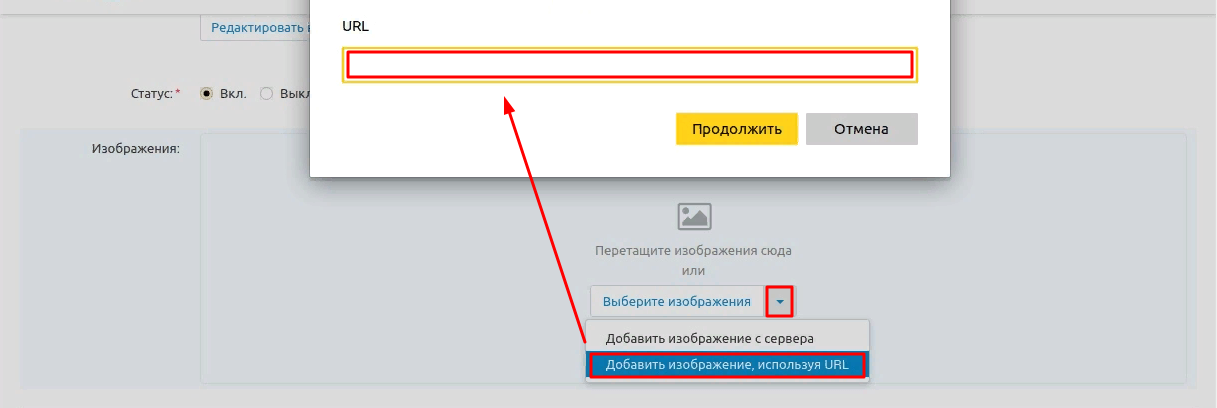
4.3. And also enter the URL of the image by clicking on the arrow and selecting the item "Add image using URL".
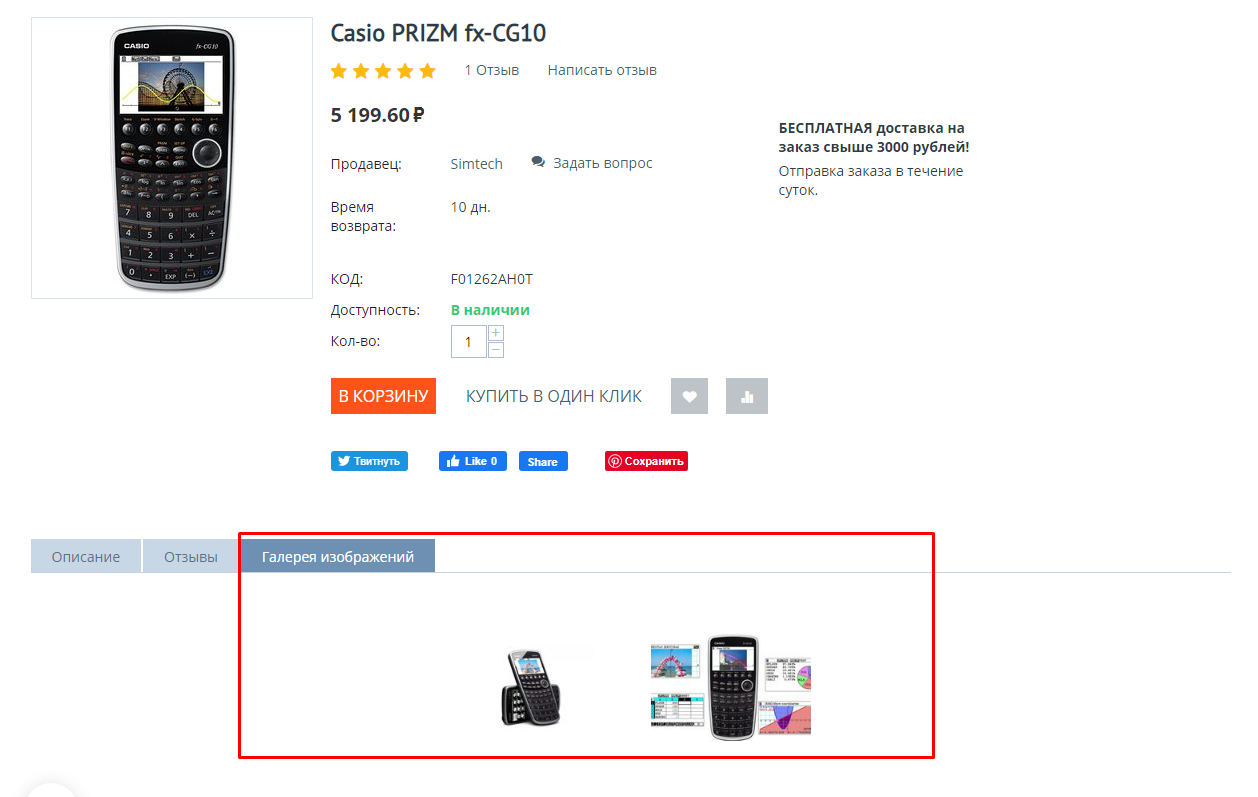
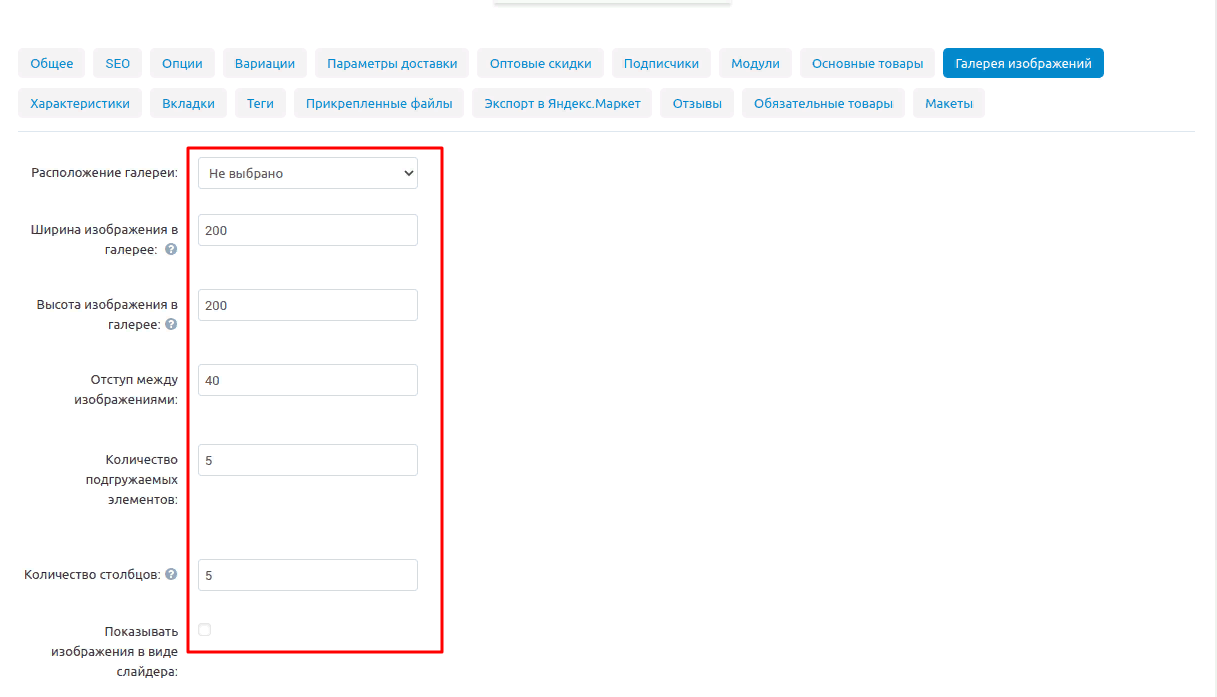
5. Go to the "Image Gallery" tab.

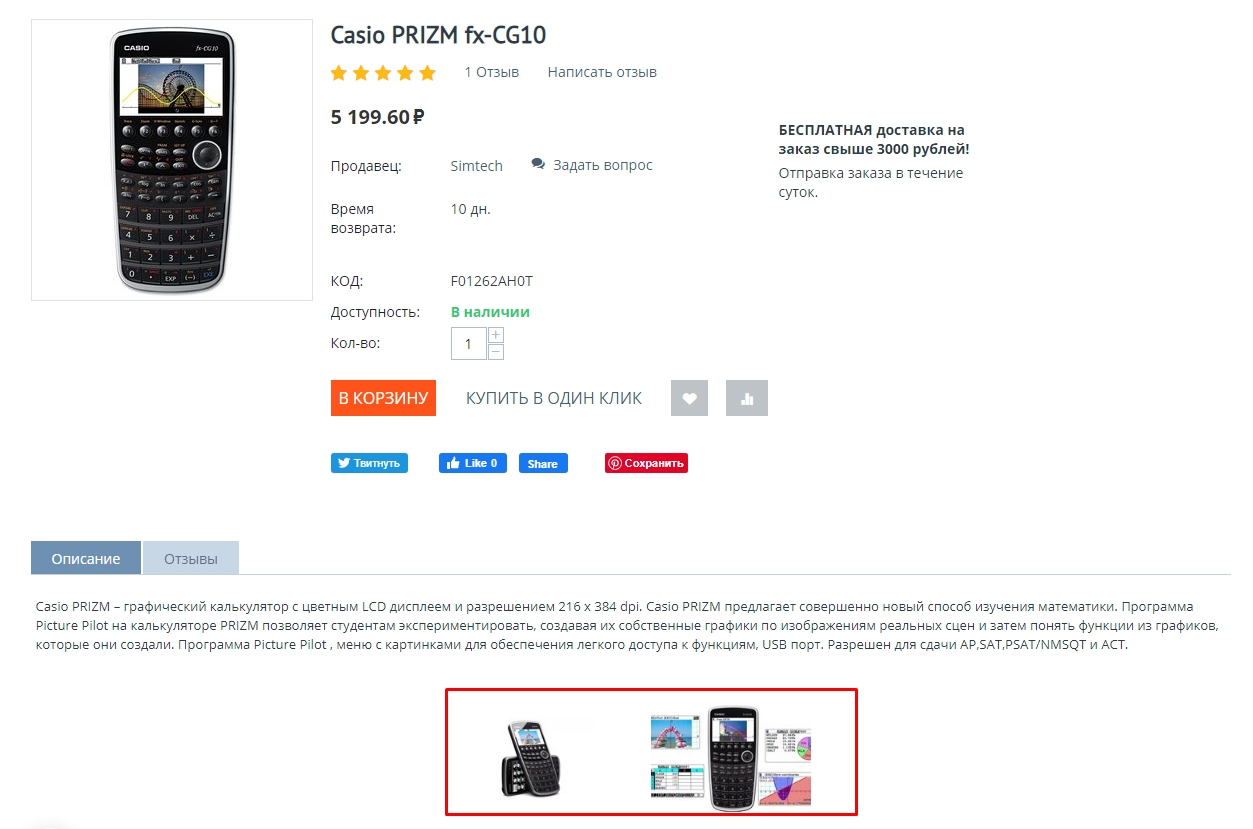
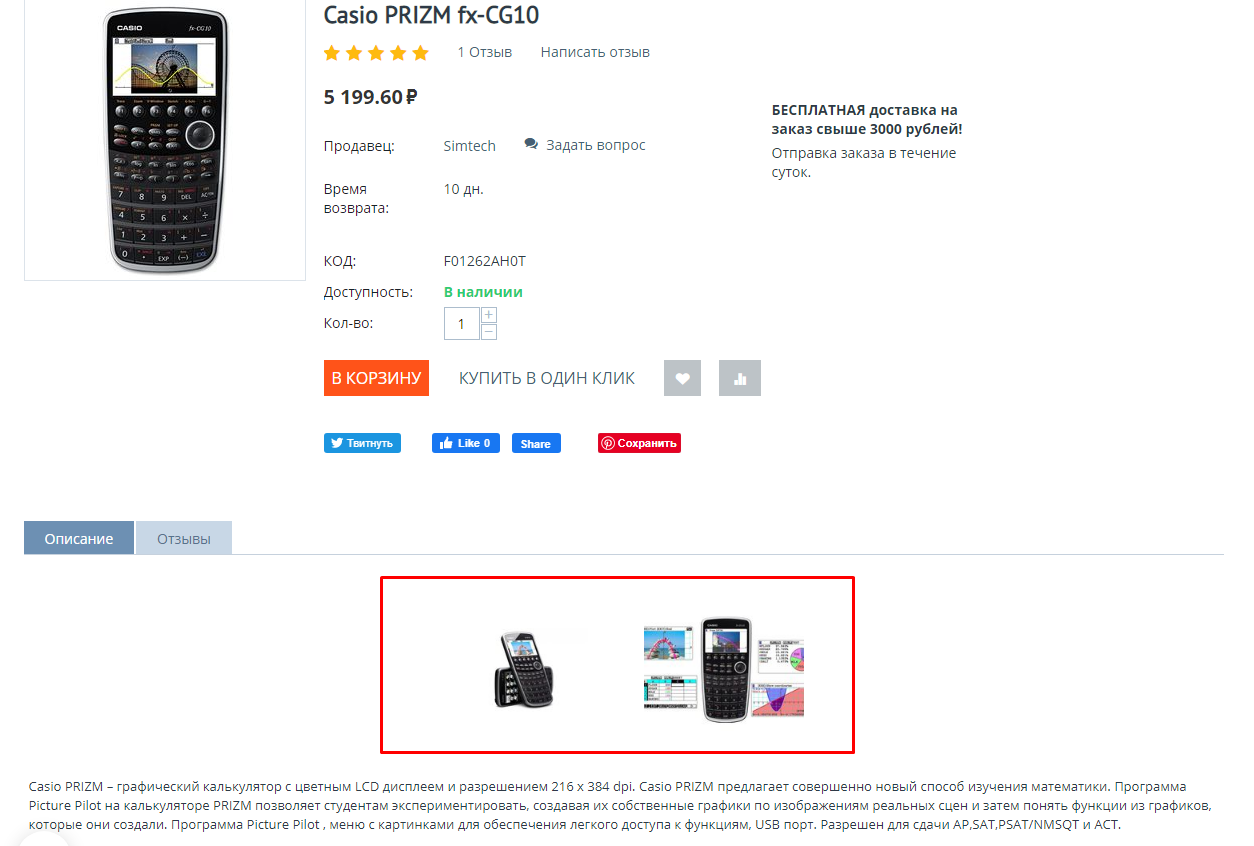
6. In the item "Location of the gallery", you must select one of the following options:
"Tab" - creating a separate tab in the product card;
"In the description above" - displaying the gallery above the description;
"In the description below" - displaying the gallery below the description.

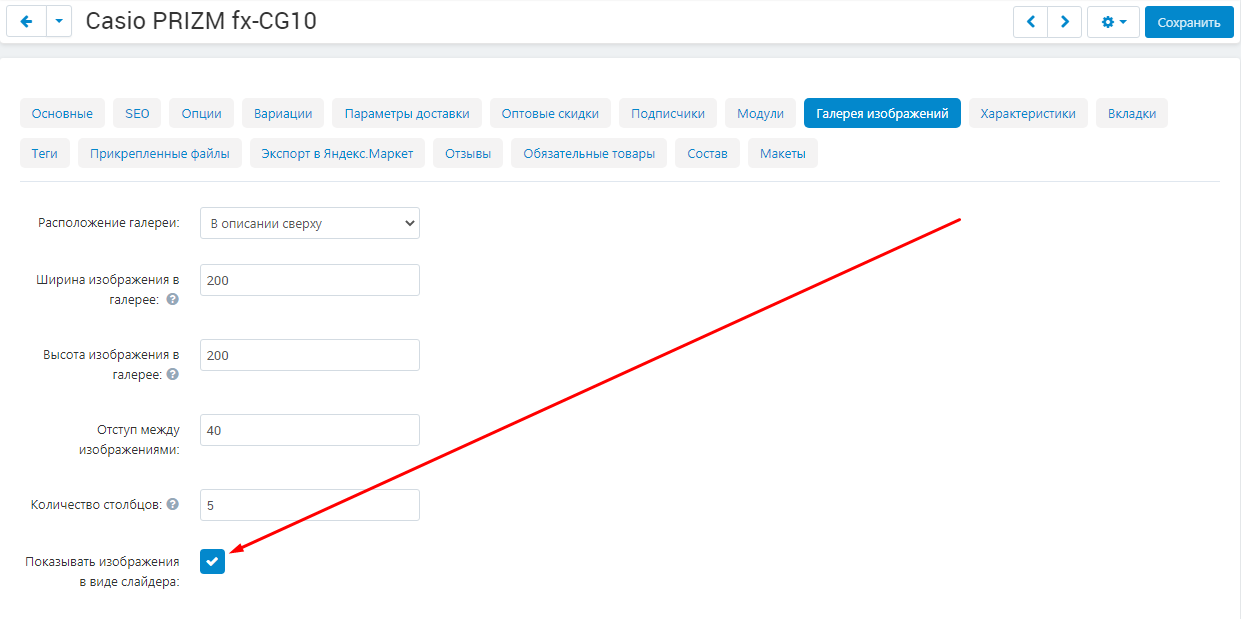
7. To display images as a slider, check the corresponding box. Note that the "Zoom in on click" item will disappear.
8. To enlarge the image on click, check the corresponding box. When you click on the picture, it will increase, and the gallery can be scrolled using the arrows.
For this function to work correctly, install and enable the "Product enlarged images" module.
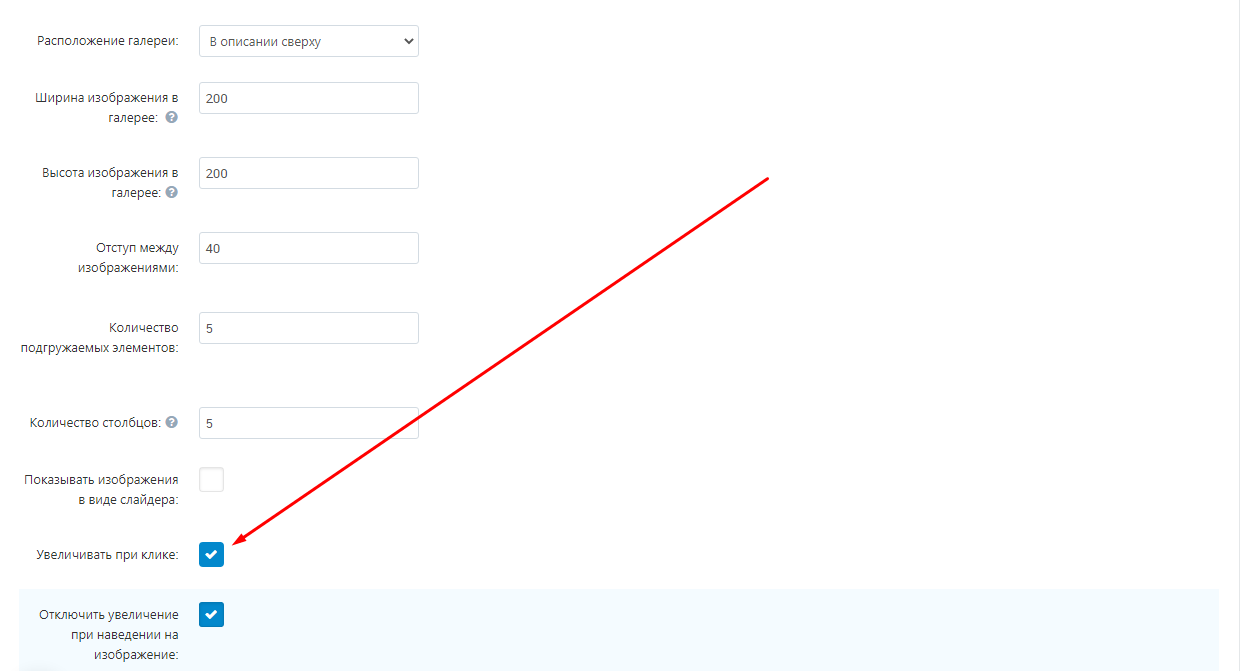
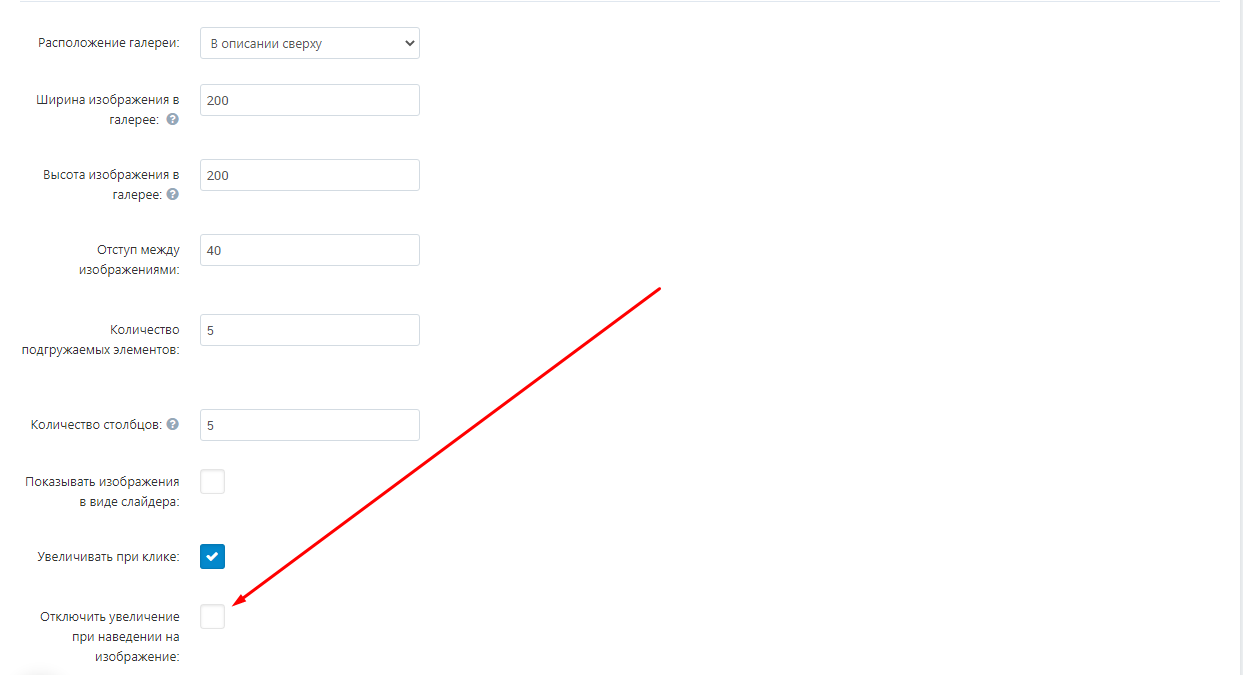
9. By default, the item "Disable zoom when hovering over the image" is already there. To re-enable this function, uncheck the box.
10. To complete your changes, click the blue Save button in the upper right corner of the panel.

VERIFICATION OF THE RESULT
1. After saving your changes, click on the arrow next to the white gear-shaped button at the top right of the panel and select the "Preview" section.

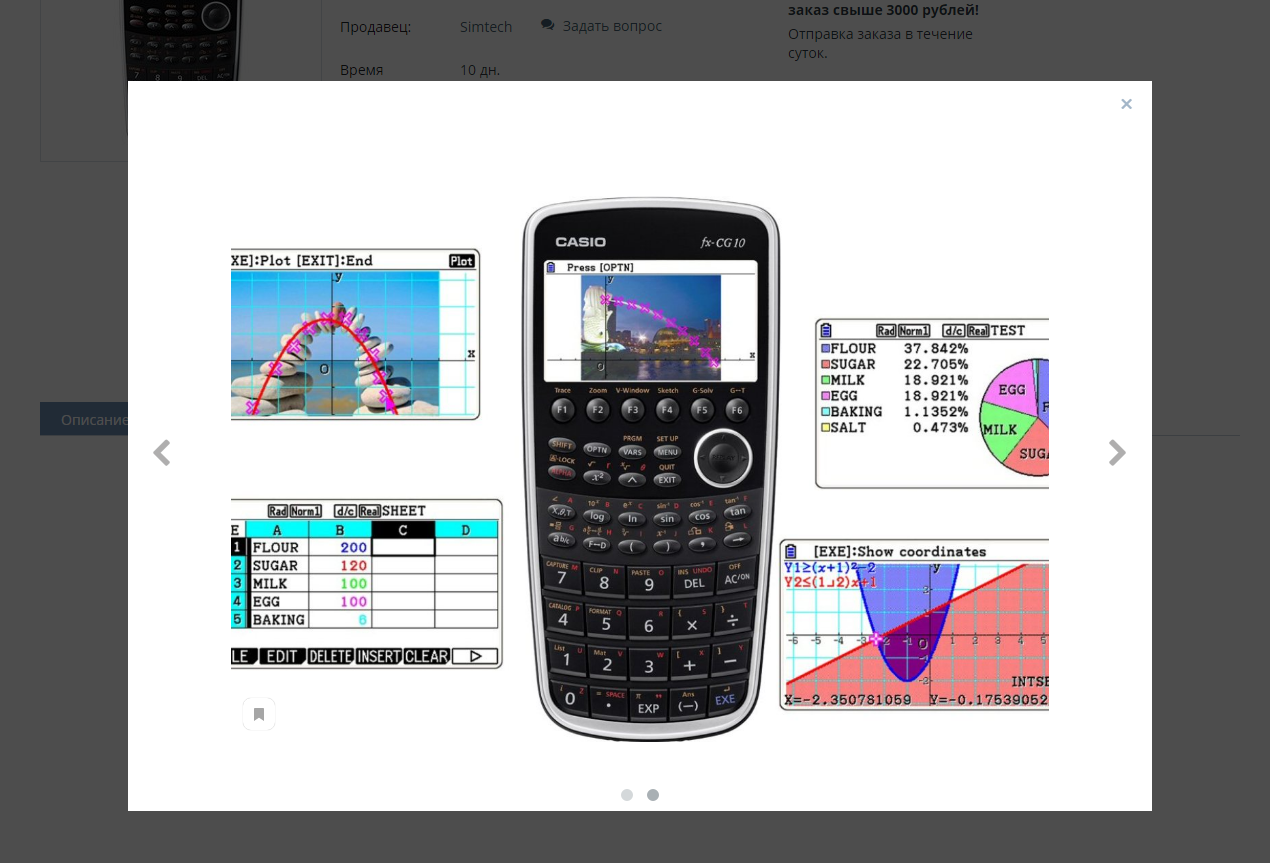
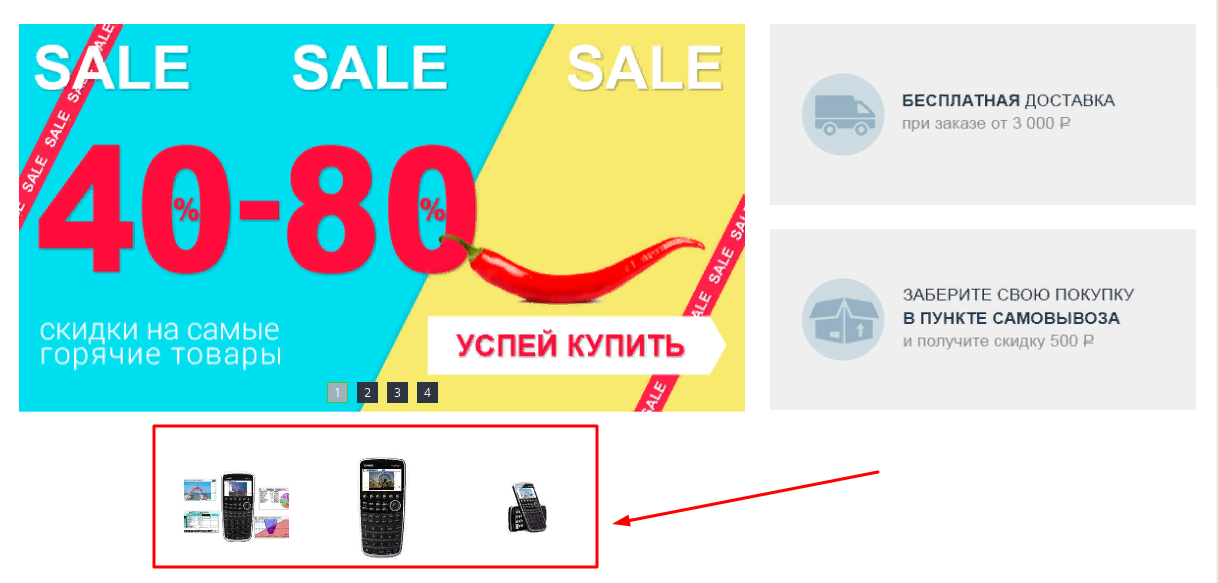
2. The gallery of images will be displayed according to the specified location.
"TAB":
"IN THE DESCRIPTION BELOW":
"IN THE DESCRIPTION ABOVE":
"SHOW IMAGE AS A SLIDER":
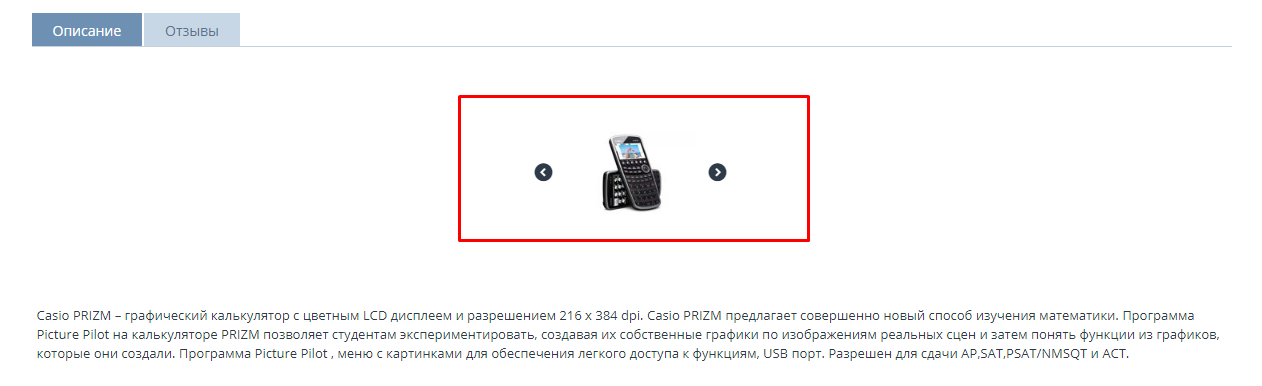
"ZOOM ON CLICK":
CATEGORY
The module sets the location of the gallery for the entire category, excluding those products that have been configured manually.
1. To customize the location of the image gallery for the entire product category, go to the "Products" tab and select the "Categories" section.
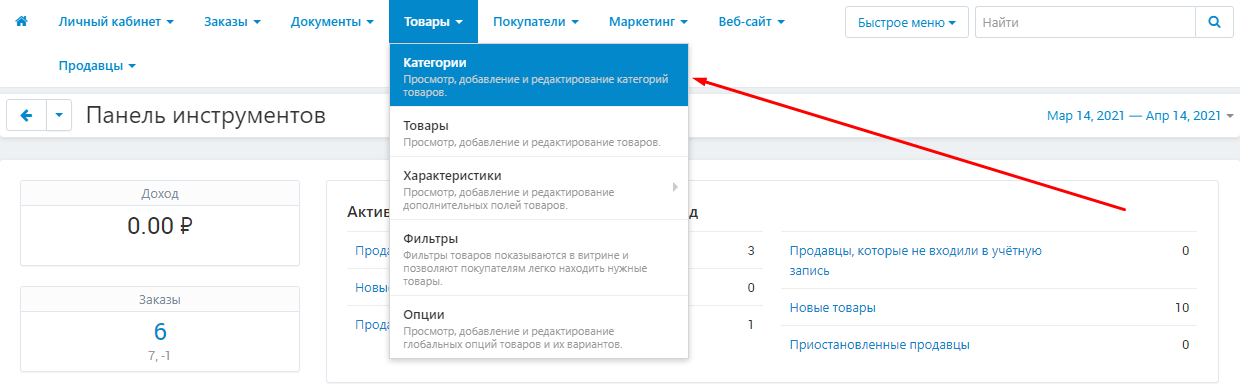
2. In the list that opens, select the required category by clicking on its name highlighted in blue.

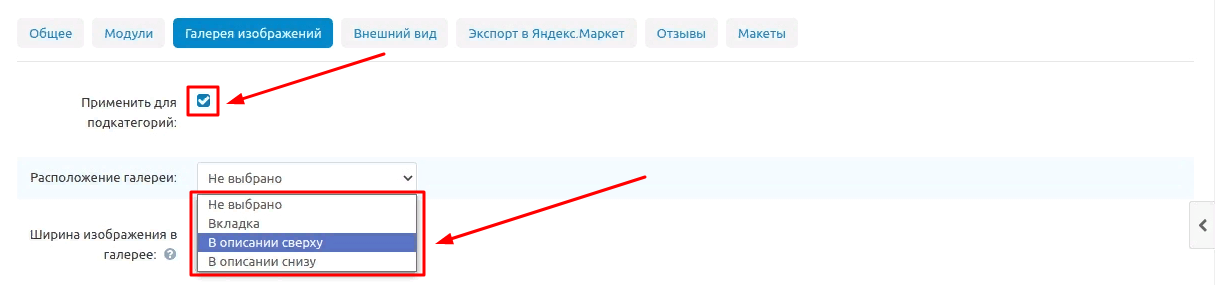
3. On the page that opens, select the "Image Gallery" tab.

4. To apply the image gallery location to the entire category, check the "Apply to subcategory" box and select the desired value in the "Gallery location" field.
5. When you have finished configuring all values, click the blue Save button at the top right of the panel.

After saving the settings, the location of the image gallery will be applied to the entire category, except for products in which the gallery has been manually changed.
LAYOUT
The module creates a gallery block that can be placed anywhere on the site being created.
1. To create a gallery block, go to the "Marketing" tab and select the "Image gallery" section.

2. To add a new gallery, in the window that opens, click the blue button with a plus sign in the upper right part of the panel.

3. On the page that opens, in the "Name" field, enter the name of the gallery you are creating.

4. In the "Image" field, add images:
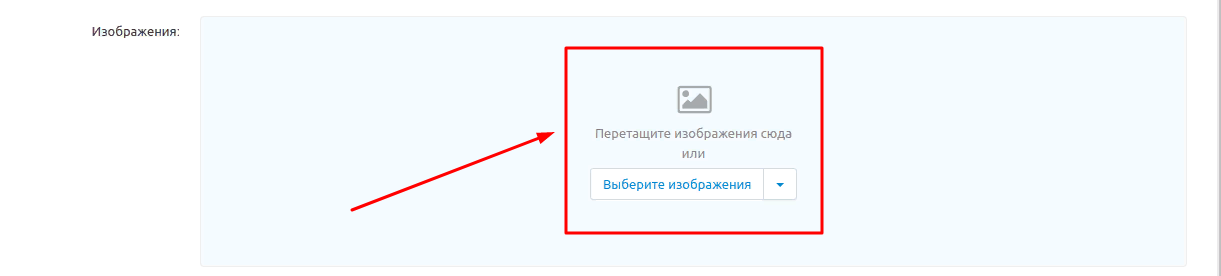
5. In the "Description" field, you can also add a description of the created gallery block.

6. After filling in all the required fields, click the blue "Create" button in the upper right corner of the panel.

7. Go to the "Design" tab, select the "Layouts" section, the "Layouts" subsection.

8. On the layout editing page that opens, select the page where you want to insert the created gallery and go to the tab with its name.

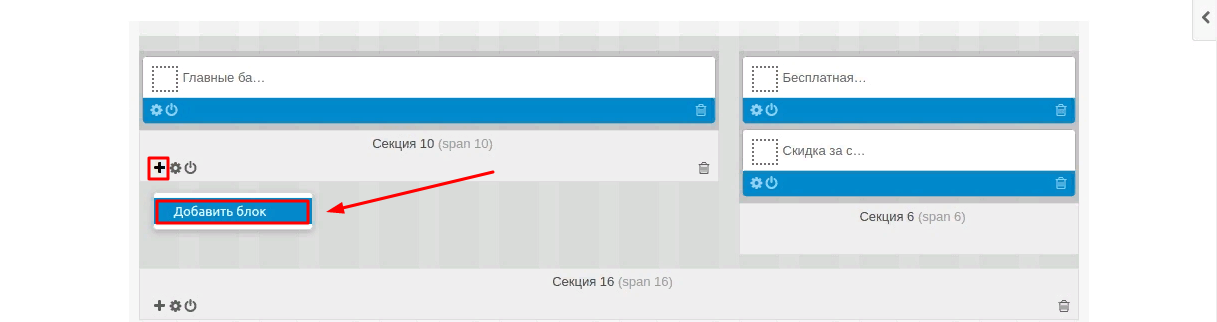
9. Scroll down and select the section where you want to add a new block. When you hover your cursor, three buttons appear in the lower left corner. Click on the plus-shaped button and select "Add block" in the drop-down menu.
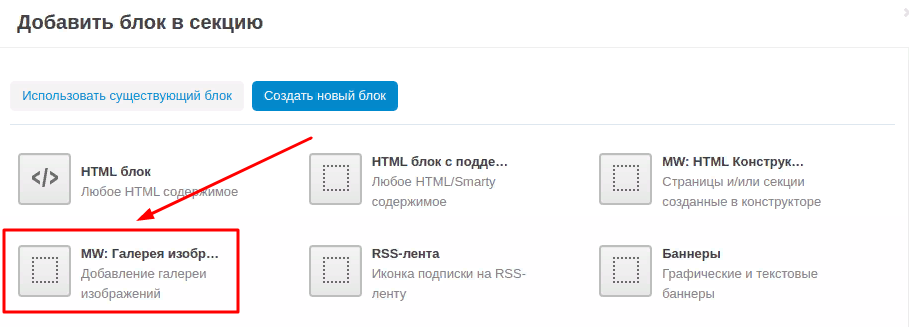
10. In the window that appears, select the "Create a new block" tab.

11. In the list that appears, select "MW: Image Gallery".
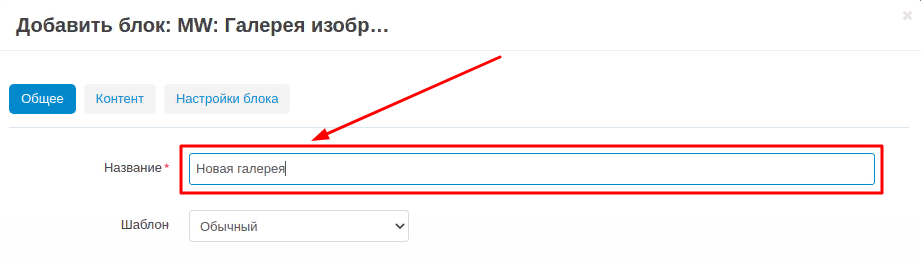
12. In the window that opens, select the "General" tab and in the "Name" field, enter the name of the created block.
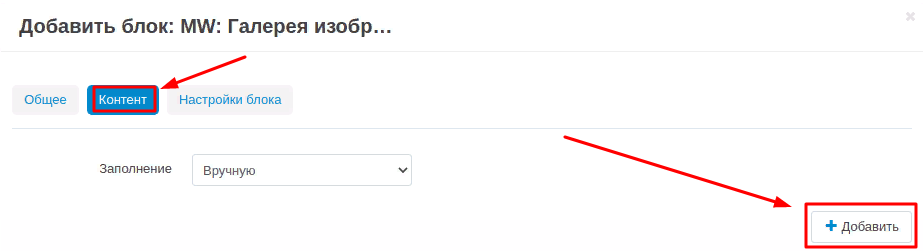
13. Go to the "Content" tab and click the white "Add" button in the lower right corner to add the created gallery to the block.
14. In the list that opens, select the desired gallery by marking it with a tick.

15. If there are many galleries in the list, you can use the search menu.

16. There are two blue buttons in the lower right corner. Click "Add & Close" if you have completed your selection. Click "Add" if you plan to add more options.

17. Back in the "MW: Image Gallery" window, complete the creation of the new block by clicking the blue "Create" button in the lower right corner of the window.

VERIFICATION OF THE RESULT
1. Click on the arrow next to the white gear-shaped button at the top right of the panel and select the "Preview" section.

2. The gallery of images will be displayed at the bottom of the opened showcase.
EDITING THE GALLERY
The module can be customized by changing the size of the images and the spacing between them. The settings can be applied to both the product and the category.
1. Standard settings for the parameters of the width, height of images, margins, the number of loaded elements and the number of columns, as well as the ability to display images as a slider, are available in the "Gallery settings" tab in the module settings (see the "MODULE SETTING" section p. 8, 9, 10 ).
2. If necessary, the above settings can be changed. To do this, go to the product card and select the "Image gallery" tab. All the necessary settings are there.
3. Also in this tab it is possible to apply two additional items "Zoom in on click" (the image will zoom in when you click on it) and "Disable zoom when hovering over the image". But these functions will be unavailable when you select the item "Show images in the form of a slider ".

4. The parameters can be configured in the same way during category editing (see the CATEGORY section, p. 1, 2, 3, 4).
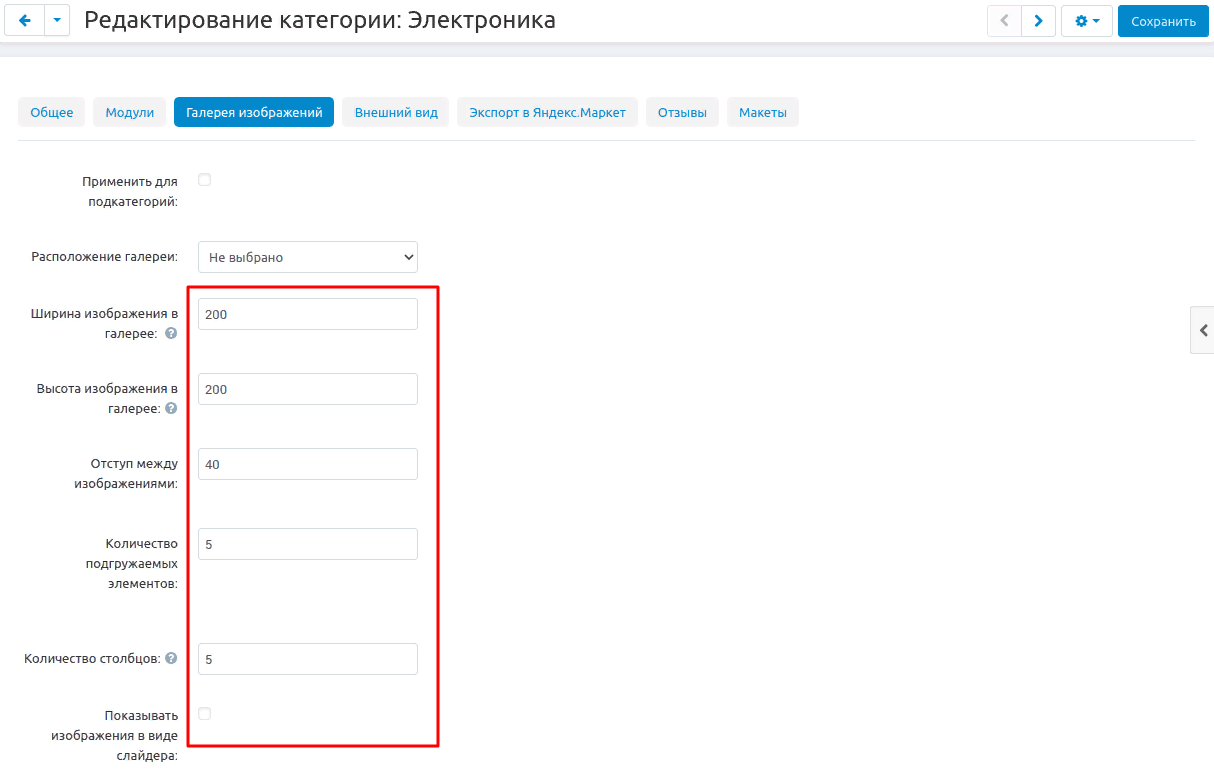
IMAGE COMPRESSION
The module compresses the loaded images to any set values..
1. Standard values are already specified in the module configuration (see the MODULE CONFIGURATION section, p. 11,12). They can be changed manually.
2. After saving the standard settings, go to the "Products" tab, the "Products" section. To apply the new settings, click the white gear-shaped button at the top right of the panel and select the "Resize Detail Images" function.

After processing, all images in the gallery will take the specified size..