ApiShip is, perhaps, the largest consolidator of transport companies, facilitating the interaction of an online store with delivery services. He united more than 40 transport companies.
Our module integrates the ApiShip service into the website of your online store, thanks to which your customers will receive a huge selection of delivery methods, and you will be able to automate the process of delivering orders to customers as much as possible. You will be able to manage delivery from your admin panel without going to the delivery service sites.
One module for 40 transport companies instead of an individual module for each. This significantly speeds up the work of the site, unloads the server, eliminates the conflict of different modules with each other.
The module automatically calculates the cost of delivery, forms an order to a transport company based on customer data, prepares accompanying documents, and automatically changes delivery statuses.
You conclude contracts with transport companies directly.
Aggregator and consolidator
An aggregator is a company that enters into contracts with transport companies, agrees with them on special conditions for itself, connects customers to its service and forms orders from its contract. They offer on average more pleasant conditions for customers than the delivery services themselves due to the mass nature of orders. However, they will not offer customized terms for large clients.
The consolidator automates interaction with delivery services, but at the same time customers conclude contracts with them independently on their own terms. That is, large online stores can negotiate a deal directly with a transport company.
List of delivery services
- 5Post,
- Accotdpost;
- Axilog;
- Az.Express;
- B2Cpl;
- BoxBerry;
- CheckBox;
- CityExprass;
- CSE;
- Dalli-Service;
- Dostavista;
- Dostavka-Club;
- Dostavka.GURU;
- DPD;
- DRH Logistic;
- EASY BULKY;
- Gett;
- Hermes Russia;
- IML;
- Logsis;
- MaxiPost;
- NEPPOST;
- On-Time;
- OZON Roket;
- PickPoint;
- Pony Express;
- SmartDostavka;
- SmartSend;
- TopDelivery;
- Viehaly;
- Vozovoz;
- Business lines;
- E-KIT;
- TAKE IT.RU;
- To-Place;
- L-Post;
- Russian post;
- PEC Easywey;
- RU-DELIVERY;
- Sberbank statistics;
- SDEC.
Working process
The buyer puts the goods from your site in the cart and begins to place an order. He is shown all available delivery methods with the already calculated cost, taking into account the weight and size of the goods and the delivery address. He chooses the most convenient delivery method for him and places an order. If you have two-factor payment enabled, then at this moment the money is frozen on the buyer's account.
The module collects data about the order and forms and sends the order for delivery to the transport company. After you pack the goods and upload information about the number of boxes and their contents to the module, it will generate accompanying documents: a bill of lading, a certificate of acceptance and transfer, address labels. They will need to be printed out. Stick the stickers on the boxes, put the rest of the documents inside. After that, the order can be transferred to the courier or handed over to the sorting center.
At this moment, the module changes the order status to "Transferred to the transport company". If you have two-factor payment enabled, at this moment the frozen payment is unblocked and transferred to your account.
Then both you and the buyer can track the order movement by automatically changing statuses in your personal account. After the goods are handed over to the buyer, the closing receipt is knocked out.
If the buyer did not pick up the order in the PVZ, it is returned to you by the same delivery service after the expiration of the storage period. The money for the order is returned to the buyer.
Calculation of the cost of delivery and transfer of data to the transport company
To calculate the cost of delivery, the module requests information on the website of the transport company. However, this site may not be available for a number of reasons: due to technical work, server restarts, network errors, and so on. In this case, the buyer may not receive timely information about the cost of delivery.
In order to avoid such problems, our module stores information about tariffs in its memory, and if the delivery service website is not available, calculates the cost of delivery based on the stored information. It also stores its calculations in memory, and when access to the site is restored, it immediately sends order information there.
This allows you not to lose customers due to problems on third-party resources.
Tracking compliance of shipments with tariff requirements
The module contains a constantly updated tariff directory. When you fill in the information about the number and size of boxes in the order, it automatically checks the size of each box for compliance with the tariff conditions.
If the box does not match the tariff for some parameter, the module allocates this parameter. You will immediately notice the error and will be able to correct it in a timely manner.
Order validation before packing
Before you start processing the order, our module will make sure that delivery is possible to the address specified by the buyer. Unfortunately, buyers do not always fill in their address correctly:
< / p>
- Write numbers in words;
- Do not separate the street name, house number and apartment with commas;
- They write with typos.
It also happens that in different transport companies and maps the same building has a different address. A striking example is, for example, the address of the new fulfillment warehouse of the Russian Post – Vnukovo-2. Even in different maps it is indicated differently. So, in "Google maps" the address is indicated: Naro-Fominsky district, 102976, village. Marushkinskoye, d, Sharapovo, Moscow region, 143390, and Yandex.Maps indicate a different address: Russia, Moscow, Marushkinskoye settlement, block No. 63, dv1s2.
The module automatically checks the address with the database of the transport company, and if there is no such address in the database, it will offer the buyer to correct the address. < / p>
Sending the order only after confirmation
It happens that the buyer is not completely sure about the order, and wants to discuss the choice of goods with the manager. He makes out some of the goods, and contacts the manager about the rest. After the consultation, you will have to make changes to the order, and this is extra time. And not all transport companies support this possibility. That is, you will have to place a second order, which is also associated with additional hassle for the buyer. < / p>
That's why the ApiShip module sends order information to the delivery service only after you review the order, make sure that all the goods are in stock, and the buyer no longer plans to order anything, and set the status "Ready for transfer to the transport company". < / p>
Separate cargo space
By default, all products from the order are packed in one or more boxes all together. However, there are categories of goods with which such tactics can be losing. < / p>
For example, it can be household appliances, or small furniture, or small furniture: chairs or ottomans. You can't put them in one box with T-shirts or books. And they do not need additional packaging, except for the factory. < / p>
For such goods, we have added the ability to ship them as a separate cargo place. This means that they will not be repackaged and combined with other goods, but immediately reserve a separate cargo space for it. < / p>
You can also edit the cargo space, if necessary, by changing the dimensions or weight of the goods. In some cases, the manufacturer does not correctly indicate the dimensions of the goods, and when transferring the order to the transport company, it is important to specify the correct data. < / p>
Default dimensions
When setting up each tariff, you must specify the default dimensions of the cargo. This is necessary in two cases:
< / p>
- If the product card does not specify any of the dimensions or weight;
- If one of the parameters is less than the minimum allowable value for the transport company.
Unfortunately, the supplier does not always fill out the product information in good faith. Of course, the information will still have to be updated as much as possible, but if you did not manage to do it in time, the module will substitute the information specified in the default dimensions. < / p>
The module also allows you to send even the smallest loads, such as seeds or spare parts for electronics.
< / p>
Order communication
Sometimes it may be necessary to make changes to an already created delivery order. For example, if the buyer decided to increase or decrease the quantity of the ordered product. Or if something from the ordered is not available. However, information about this order in this form already appears in many documents. < / p>
Therefore, the Apiary module, instead of changing the initial order, creates a new one and calls it with the first one. To do this, you just need to specify the ID of the original shipment in the appropriate field. < / p>
Tariff Guide
We have added a tariff directory to the module. When filling out information about the order packaging, the module checks the dimensions of the boxes, the weight and the cost of the shipment and compares them with the tariff restrictions. If the shipment does not meet these requirements, the module will highlight the corresponding field in red. < / p>
Prefixes
We have added the ability to create prefixes to the module. By the prefix, the seller will immediately understand at which site the order was created and to which transport company it will be sent. < / p>
Cargo pickup from the warehouse
If you and your customers often use the services of the same transport company, then instead of independently delivering orders to the sorting center or giving couriers each order separately, you can use the service of picking up cargo from the seller's warehouse. < / p>
In this case, the courier will arrive at your warehouse 1-2 times a day, depending on the number of orders, and pick up all orders prepared by this time. It will cost much cheaper than calling a courier personally for each shipment, and will give you much less trouble. This will significantly reduce the cost of delivery for the end customer. < / p>
Setting up additional services
Each transport company has its own set of additional services:
- Cash on delivery;
- Payment by card upon receipt;
- Delivery of several items for fitting;
- Product control;
- Partial issuance and so on.
All additional services can be configured for each tariff in the personal account on the marketplace website for a specific transport company and a specific tariff. You get the most flexible tool for setting up all transport companies in one place. < / p>
Compatibility
In combination with the Logistics module, it automatically makes delivery from the seller's warehouse. < / p>
The module is also compatible with the following modules:
< / p>
- Assembly order (collection of cargo to the final buyer);
- Purchase order (collection of orders to the sorting point for sorting and delivery to the buyer);
- Delivery order (collection of cargo to the sorting point for repacking and delivery to the buyer);
- Order for acceptance (collection of cargo for moving between warehouses).
MODULE SETUP
1. After installing the module, go to the "Modules" tab, select "Module Management" and "MAURISWEB" from the drop-down menu.< / p>

2. In the list that opens, select the module you are interested in and click on its name, highlighted in blue or black.

3. Go to the "Main" tab. If the license key is not set automatically and the module settings are blocked, log in to your account at www.maurisweb.ru copy the license key and paste it into the appropriate item. The key has also been sent to your email.

4. Go down below, select the "Basic Settings" section and tick the "Save data when deleting the module" item so as not to lose them when reinstalling the module.

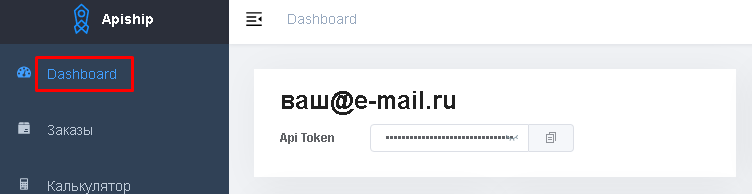
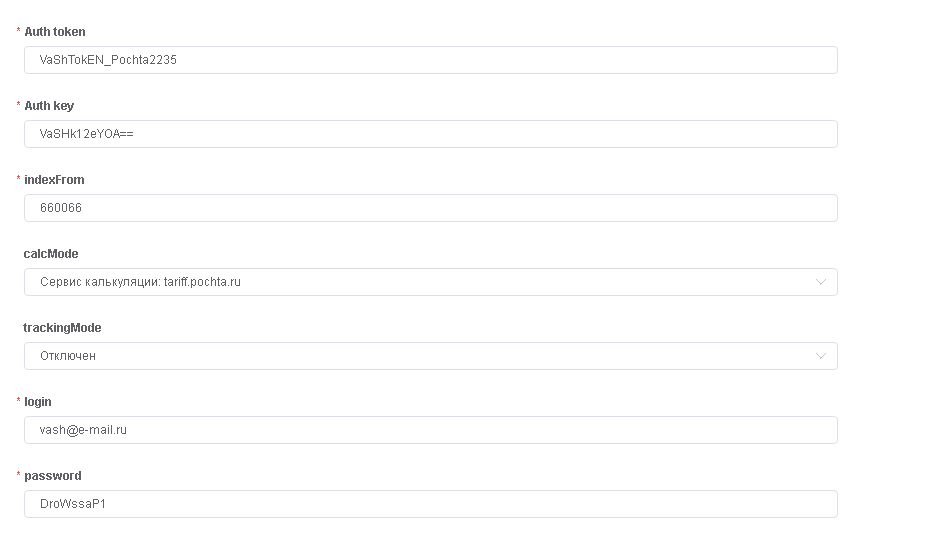
5. Go to the "Authorization" tab. Enter your username, password and API token to log in to your ApiShip Personal Account. This is necessary to synchronize the marketplace with the service.
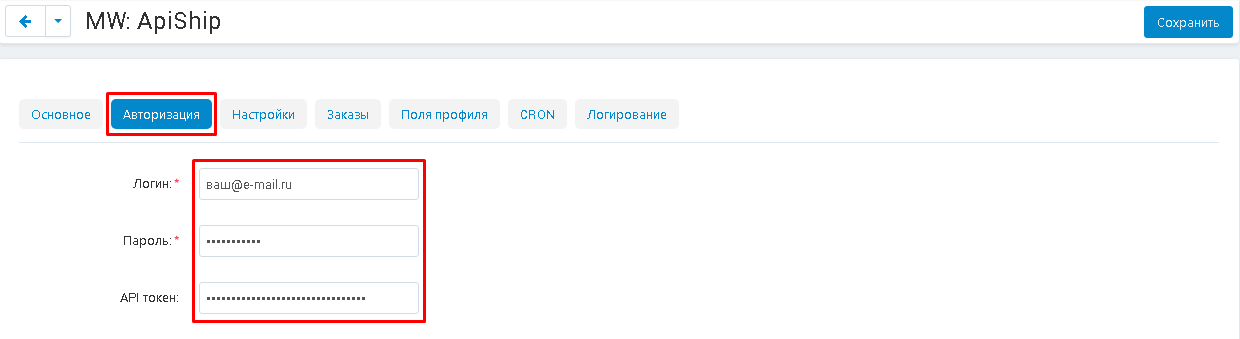
This data is contained in the "Control Panel" section in the Apiship Personal Account.
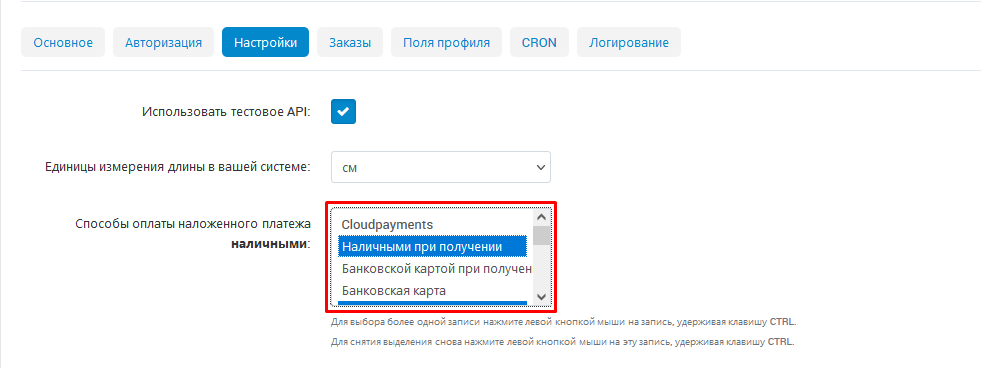
6.Go to the "Settings" tab. Check the box if you will use the test API. If you are using a test version of a Personal Account of a transport company, then check the box, if the version is combat, then do not put it.

<N>7. you expand the additional menu in the item "Units of length measurement in your system" and select one of the suggested values: "mm", "cm", "m".
In
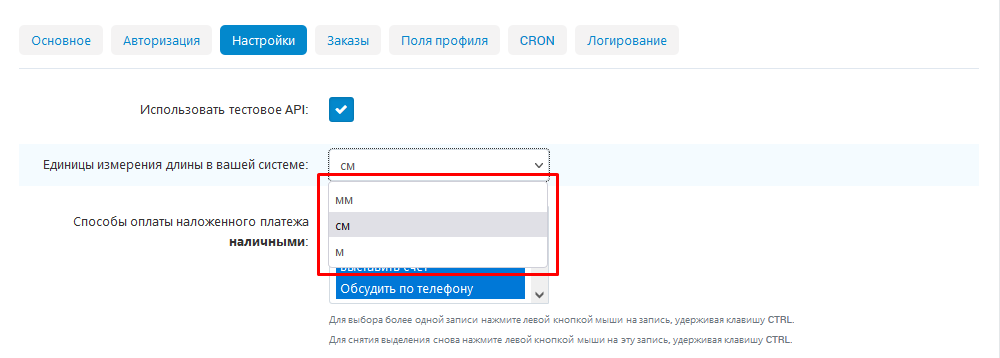
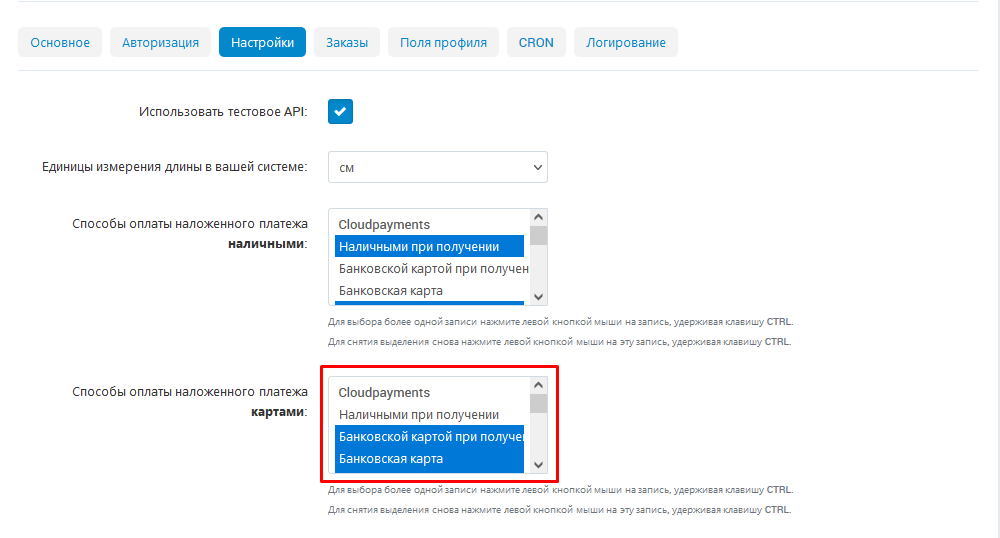
8. Specify the payment method to the courier in cash by default. To do this, in the item "Cash on delivery payment methodsin cash", select one of the suggested methods. For example: "Bank card", "Invoice", "Discuss by phone", etc. (depending on the payment methods you already have).To select more than one entry, left-click on the entry while holding the CTRL key. To remove the selection, left-click on this entry again while holding down the CTRL key.
Please note that different transport companies may have different payment requirements. In the settings, only the data that will be specified by default is displayed!
9. Specify the payment method to the courier by cards by default. To do this, in the item "Cash on delivery payment methods by cards", select one of the suggested methods.
10. As a rule, the transport company includes insurance and cash on delivery in its services. To sum up the total cost of all fees of the delivery service in the receipt, check the appropriate box.

11. Indicate in numbers the waiting time for a response from the provider. If this period is exceeded, the request will be rejected.

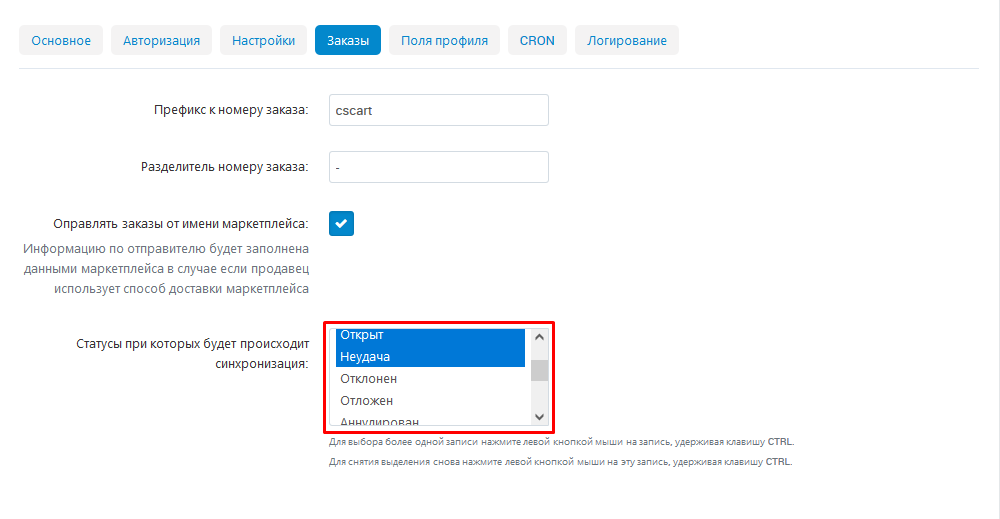
12. Go to the "Orders" tab. Specify the prefix to the order number and the separator of the order number. With this prefix, orders will be created in the Personal Accounts of delivery services.

13.To send goods on behalf of the marketplace, check the appropriate box.

14. Check the statuses for which you need to make a change request for ApiShip. At the same time, the final status does not need synchronization.
For example, while the order is being processed, its status will be "Open" and the carrier does not need information about this. But the status "On hold" means that the process is frozen pending confirmation (payment or availability of goods) and will not be transferred to the carrier until its completion. The status "Completed" indicates the completion of the transportation, the buyer has received the order and he will not need to make a new request to change the status.
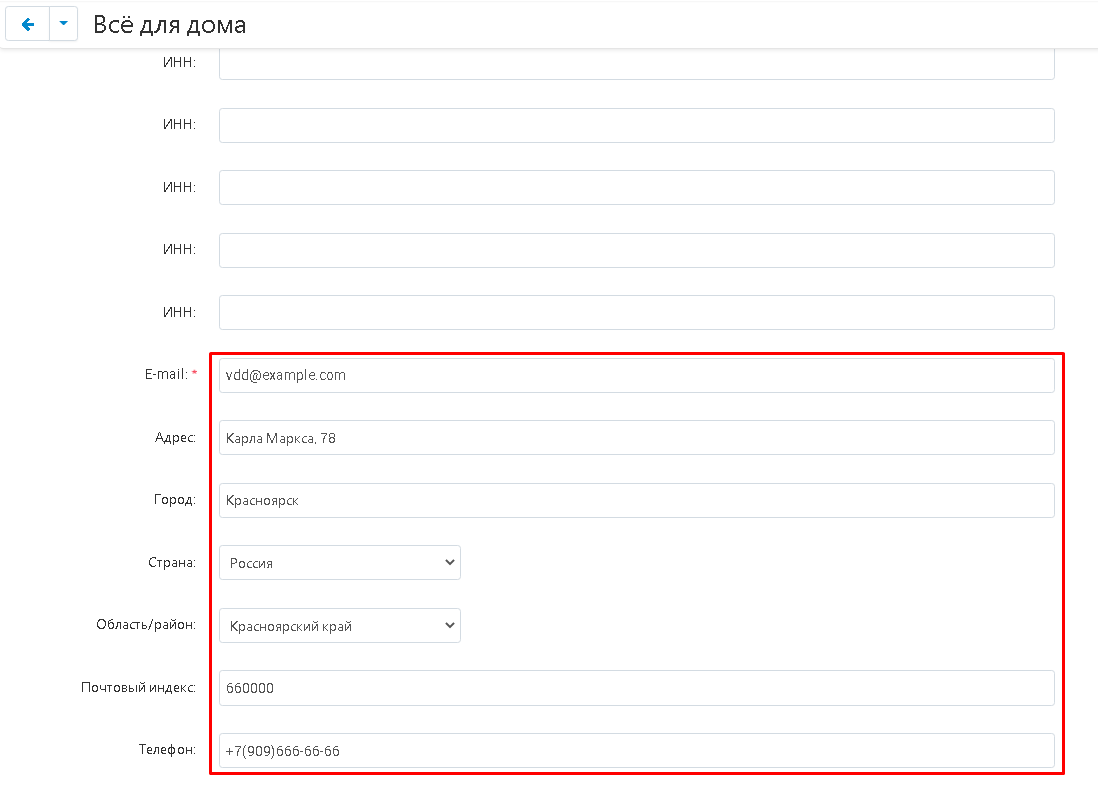
15. Go to the "Profile Fields" tab. In the "Buyer" section, select from which profile fields the information about the buyer will be indicated. If necessary, you can create your own profile fields (see the subsection "Profile Fields").
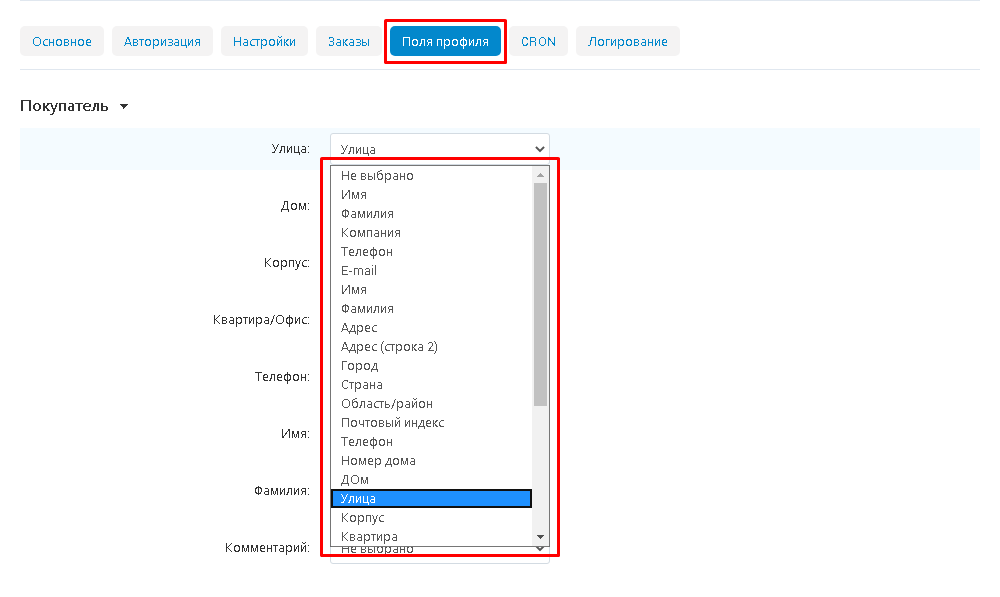
16. In the "Seller" section, specify the profile fields for the seller.
17. Go to the "CRON" tab. Enter the commands into the CRON scheduler. Note that the CRON job is configured on the server. The stability of the store will depend on the correct configuration.
Address for CRON settings (for example: php/var/www/mw/data/www/mwdevelopers.ru/admin.php - p --dispatch=maurisweb_apiship.send_orders.create) may differ from the control panel or other server settings. To configure the task, contact the server administrator.

18. Go to the "Logging" tab and select the type of logging: "Not selected", "File system", "Database".

19. Save the module settings by clicking on the blue "Save" button in the upper right part of the screen.

PROFILE FIELDS
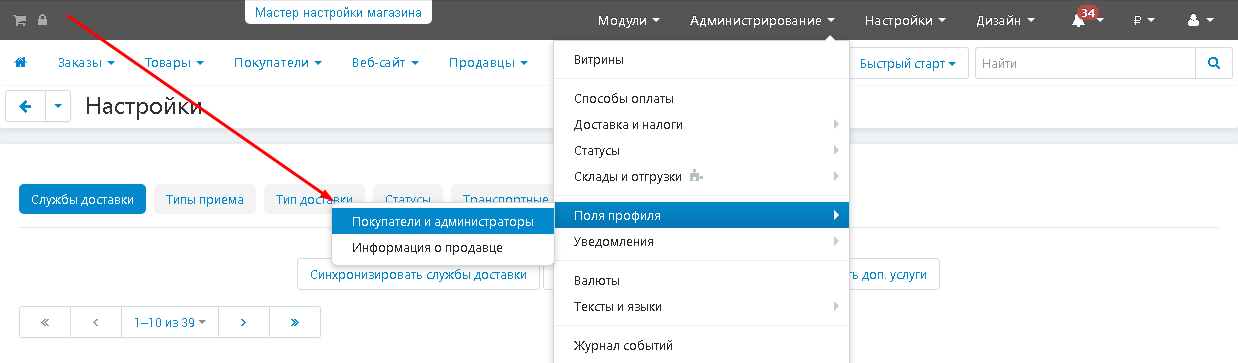
1. To create new profile fields, go to the "Administration" tab, select the "Profile Fields" section and then "Buyers and Administrators".
2. Click on the plus button in the upper right corner of the panel.

3. Fill in the required fields (marked with a red asterisk) and specify access to the profile in the "Profile (Show/Required).
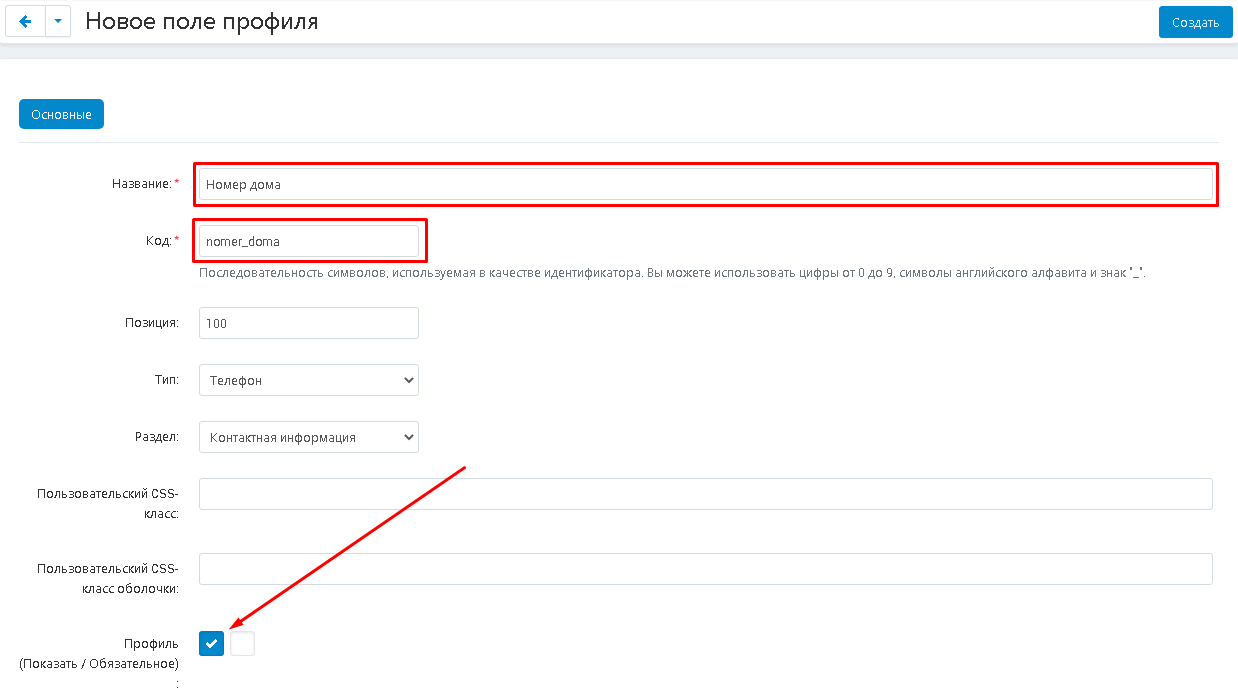
4. When all the fields are filled in, click on the "Create" button in the upper right corner of the panel.

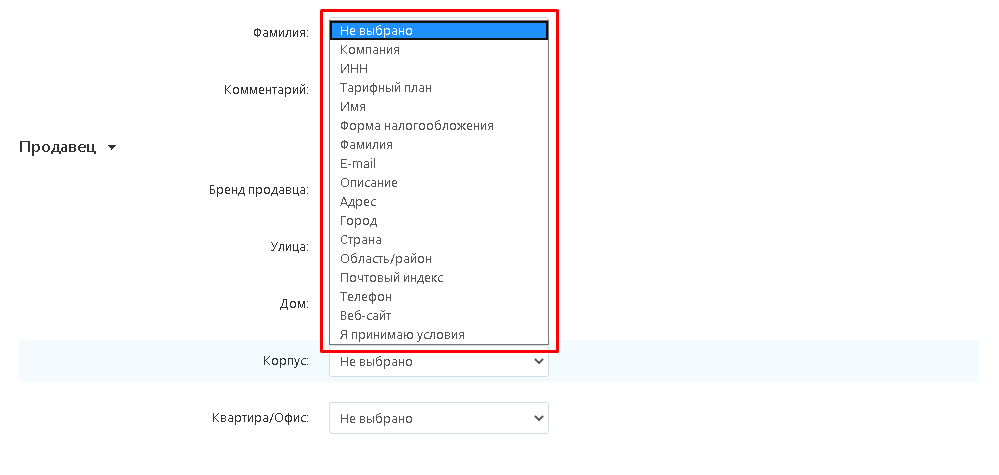
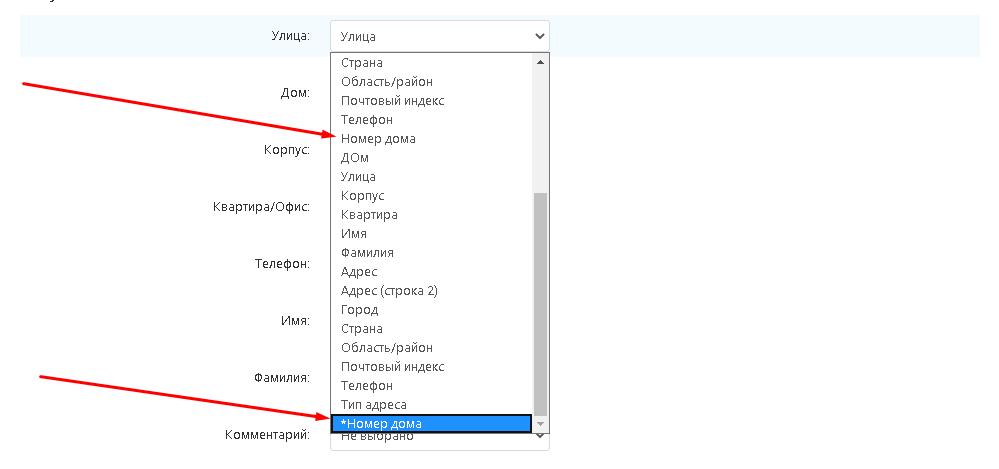
5. If the profile fields are displayed in different sections with the same names (for example, in the "Address" and "Contact information" sections), it is recommended to add a distinction mark to one of them (*, !, @, etc.)
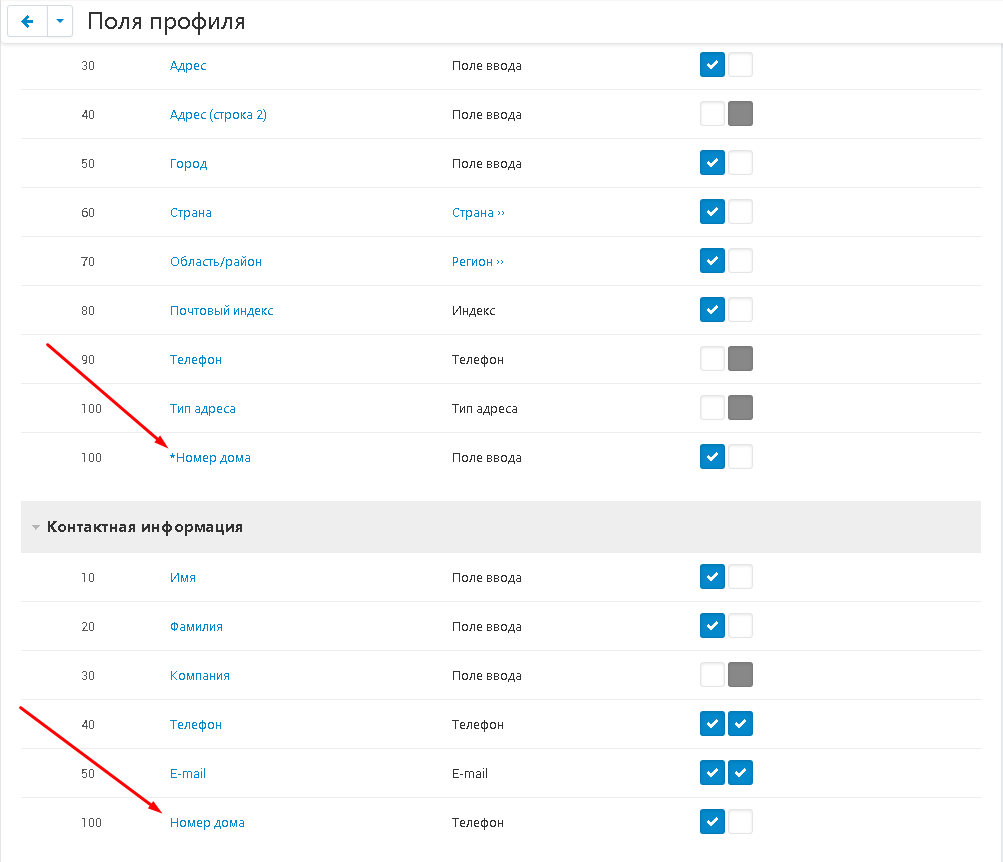
6. In this case, you will not make a mistake during the selection.
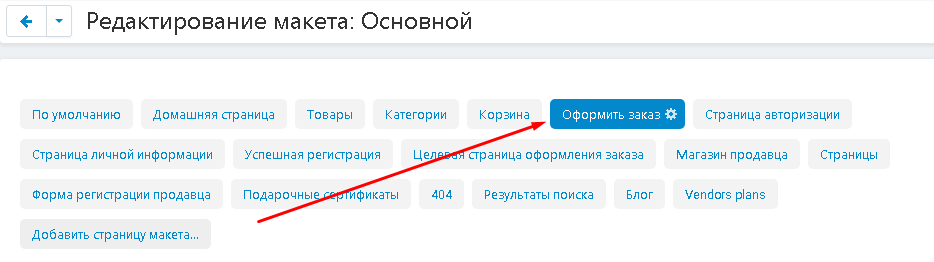
7. To make the profile fields appear on the checkout page, go to the "Design" tab, select the "Layouts" and "Layouts" section.

8. Go to the "Checkout" tab.
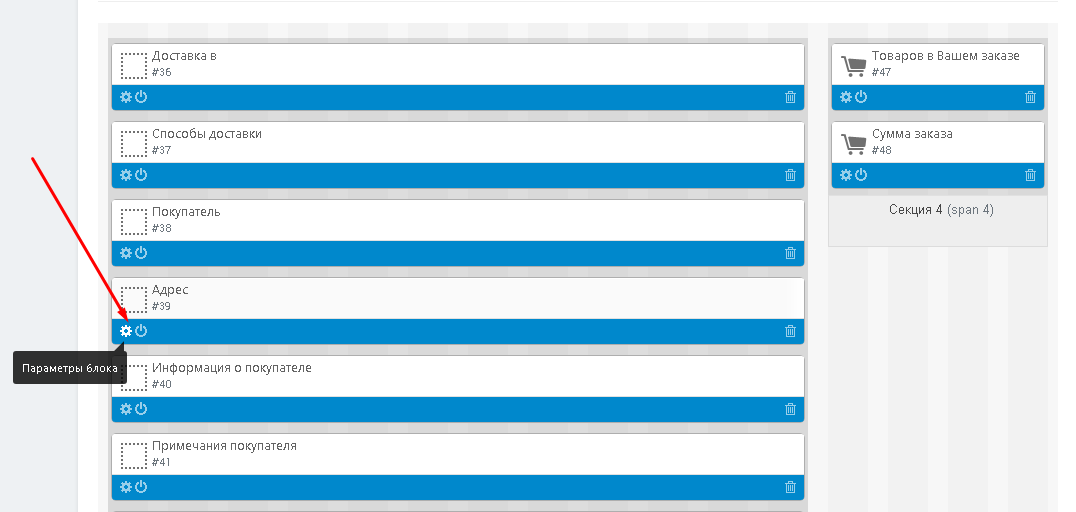
9. Go to the parameters of a ready-made block or create your own.
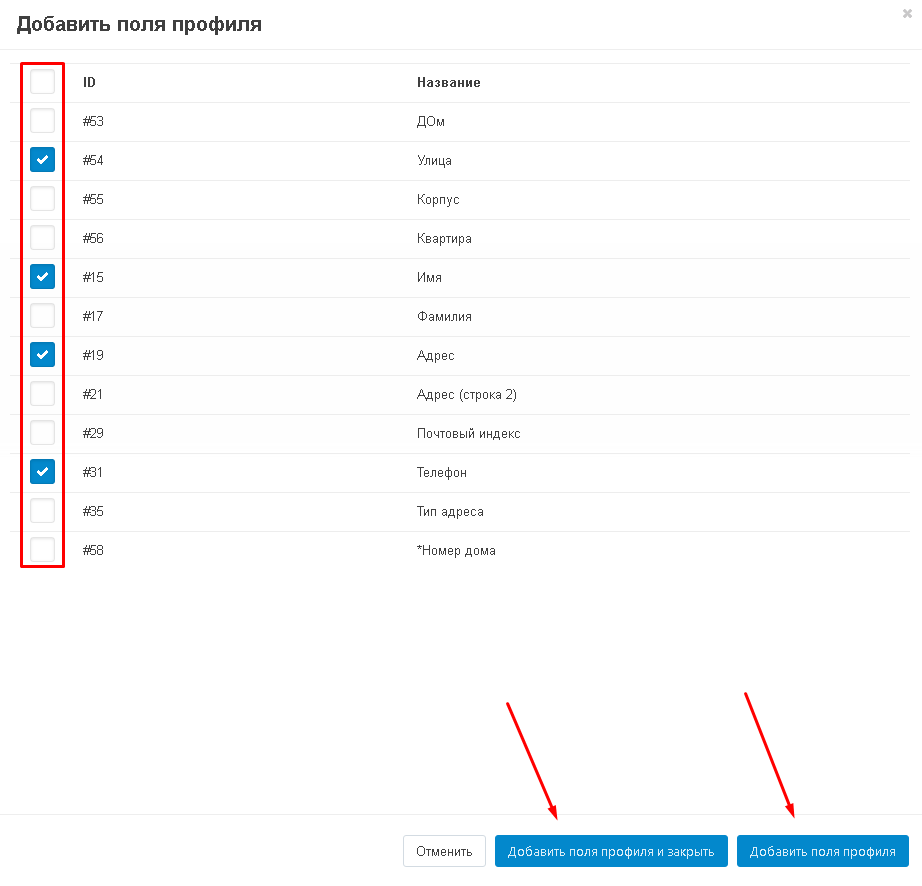
10. Go to the "Content" tab and click on the "Add profile fields" button.
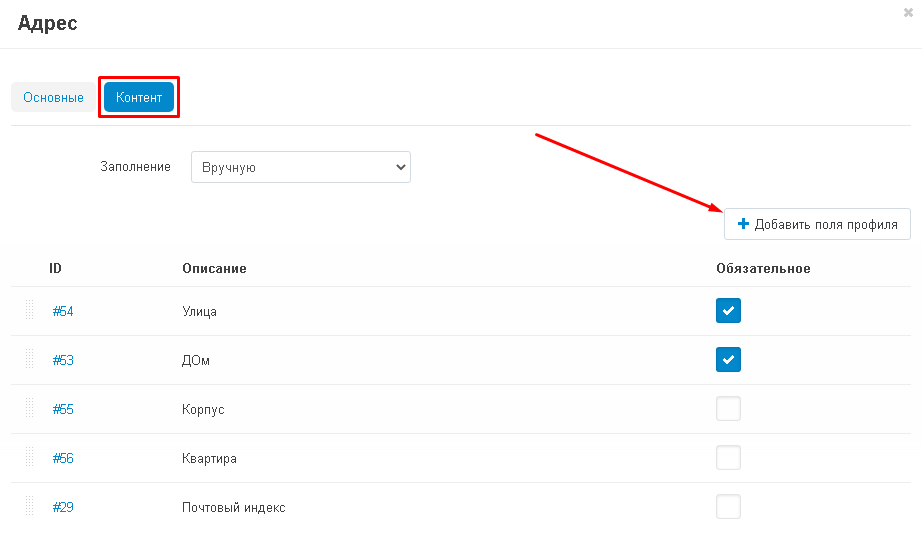
11. In the window that opens, tick the required profile fields. Click on the "Add profile fields" button to continue the selection or "Add profile fields and close" to complete the selection.
12. Save the changes by clicking on the button in the lower right corner.

PRIVILEGES
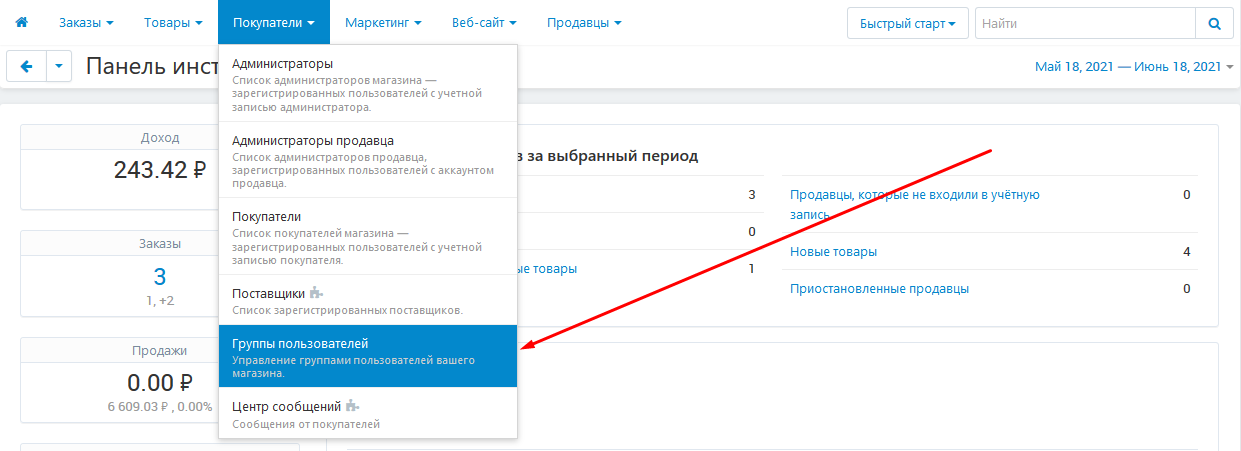
1. To configure privileges for a group of users, go to the "Buyers" tab and select the "User Groups" section.
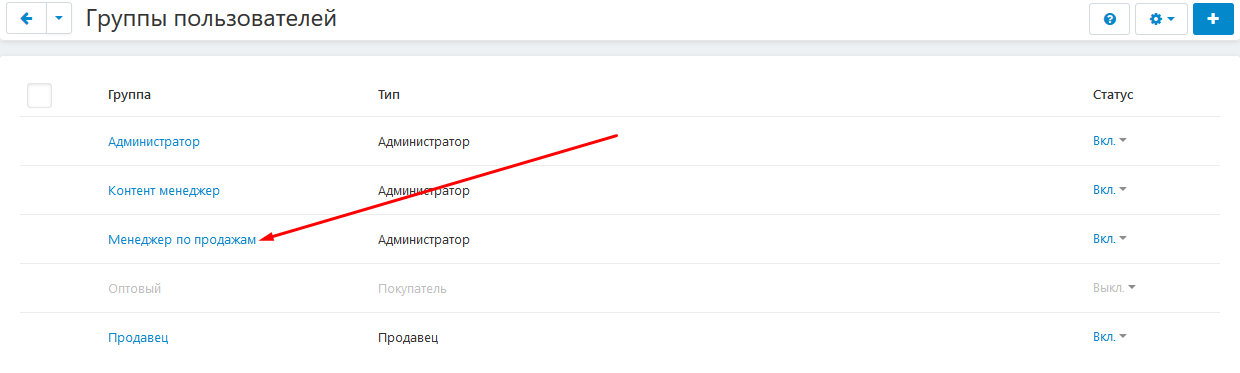
2. Select the desired user group and click on its name highlighted in blue.
Do not forget that in order to correctly configure the privileges of groups with the "Seller" type, the "Privileges for Sellers" module must be installed and enabled.
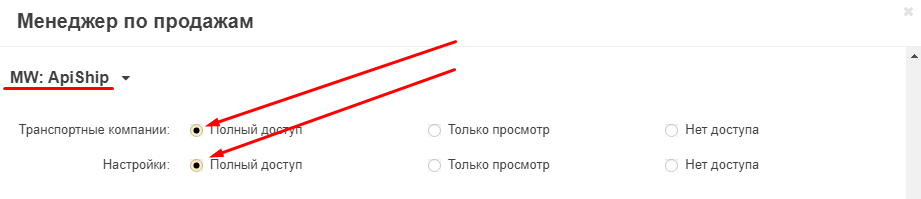
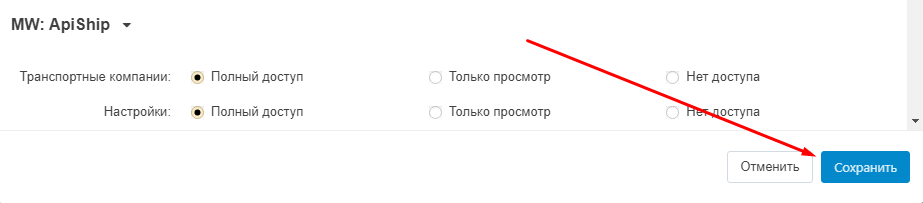
3. Go to the section "MW: ApiShip" and specify the access level for the items "Transport companies" and "Settings": "Full access", "View only", "No access".
The item "Transport companies" gives access to view and create TC, as well as to carry out their approval (only for administrators).
The "Settings" item allows you to change the order statuses.
4. Save the changes by clicking on the blue "Save" button in the lower right corner of the window.
APISHIP SYNCHRONIZATION SETTINGS
To synchronize the data of the ApiShip Personal Account with the platform, go to the "Modules" tab, the "ApiShip" section and select "Settings".

For the initial synchronization setup, be sure to follow the following order:
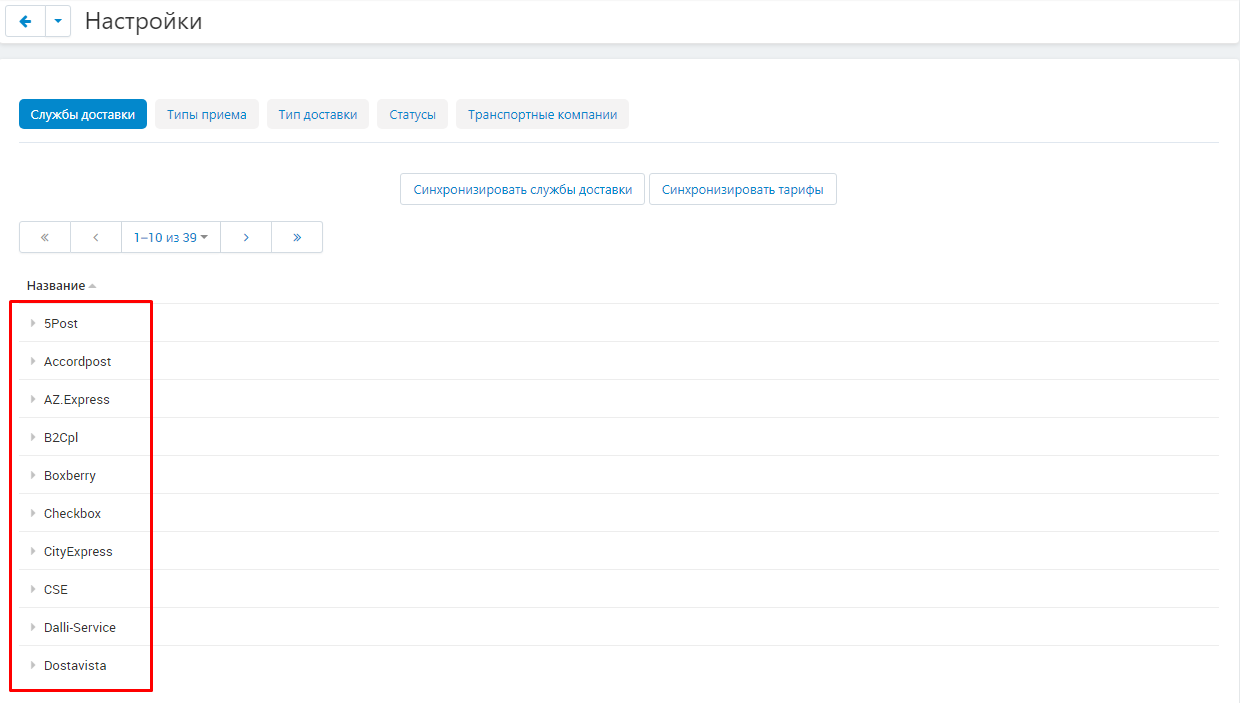
1. DELIVERY SERVICES
1. First of all, synchronize the data about the delivery services with the ApiShip Personal Account.

2. To do this, first click on the white button "Synchronize delivery services",

3. then "Synchronize tariffs".

4. The list of delivery services will be filled in automatically. If this did not happen, then check the module settings (see the section "MODULE SETTINGS"). It is possible that the authorization data was entered incorrectly (item 5) or the test mode is used incorrectly (item6).
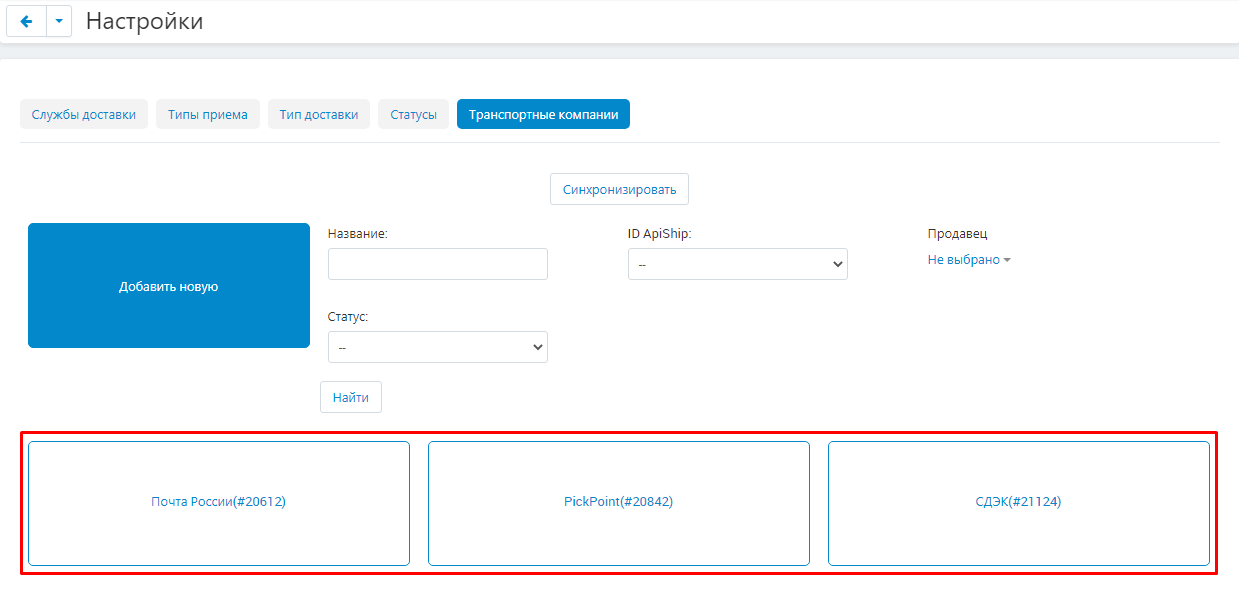
2. TRANSPORT COMPANIES
1. Information about carriers is contained in the "Transport companies" tab.

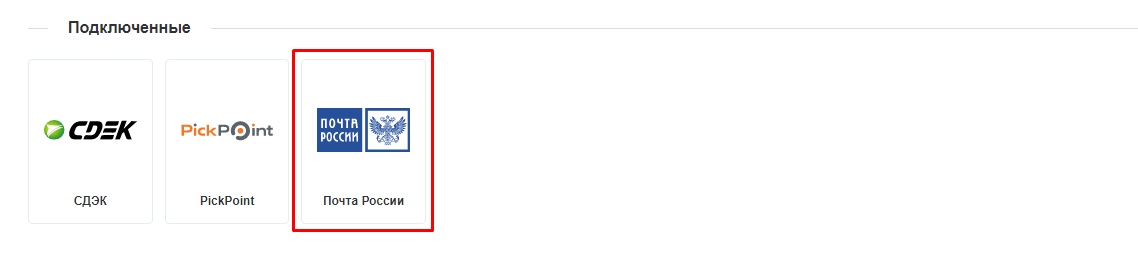
2. It is synchronized with the "Delivery Services" tab in the ApiShip Personal Account. In the "Connected" section there are those transport companies that can already be used. The rest are located in the "Available to connect" section.
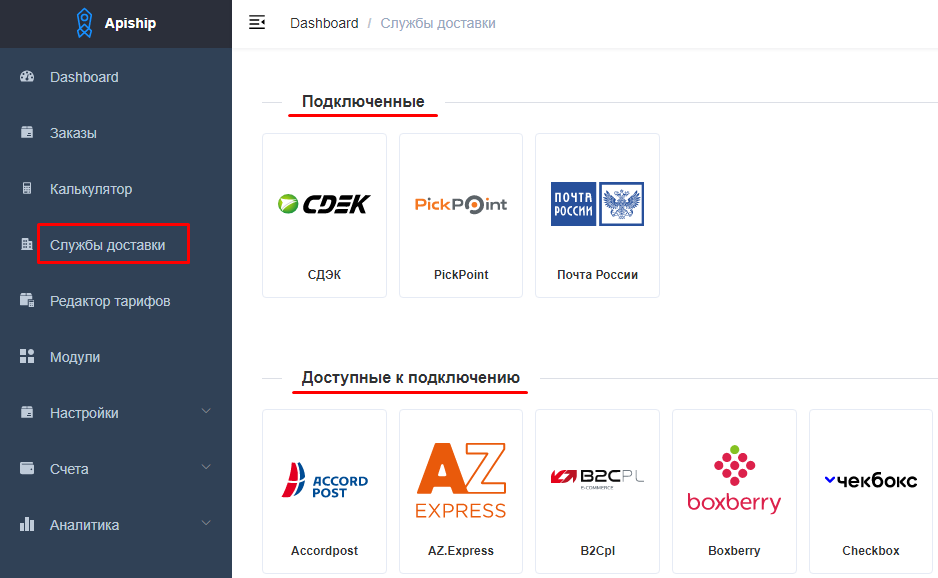
3. First click on the "Sync" button.

4. The connected transport companies will be displayed in the tab.
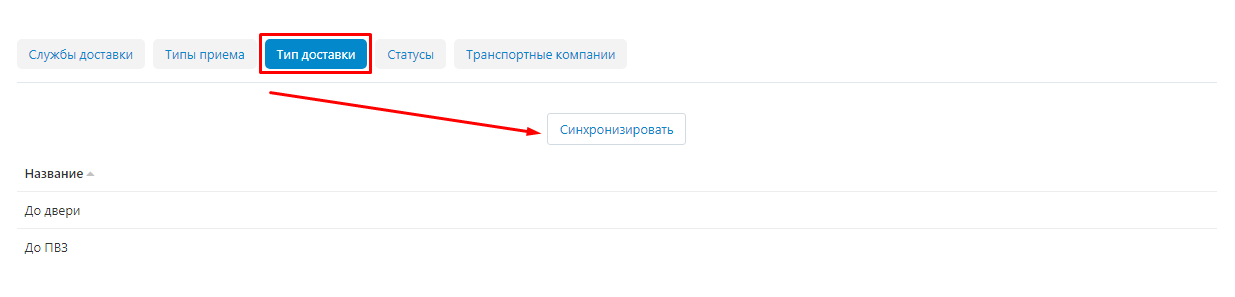
3. TYPE OF RECEPTION. TYPE OF DELIVERY.
1. Each time, after adding a new TC not through synchronization (for example, added by the seller), you need to synchronize the types of reception and types of delivery.
To do this, go to the "Reception Types" tab and click on the "Synchronize" button.

2. Then enter the "Delivery Type" tab and click on the "Sync" button.
4. STATUSES
1. For the correct synchronization of the store and transport companies, you need to correlate the statuses. To do this, go to the "Statuses" tab and click on the "Synchronize" button (especially after a new TC has been added).

2. The statuses of transport companies will be listed in the left column.
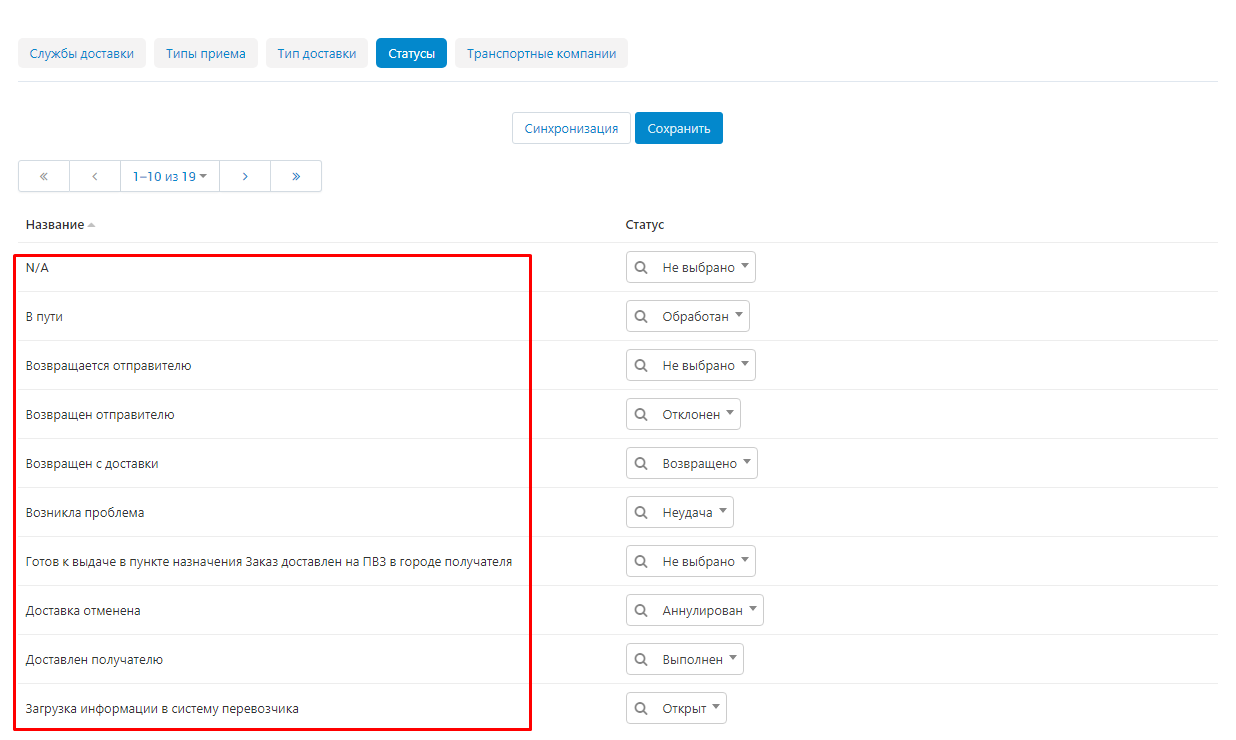
3. In the right - store statuses.
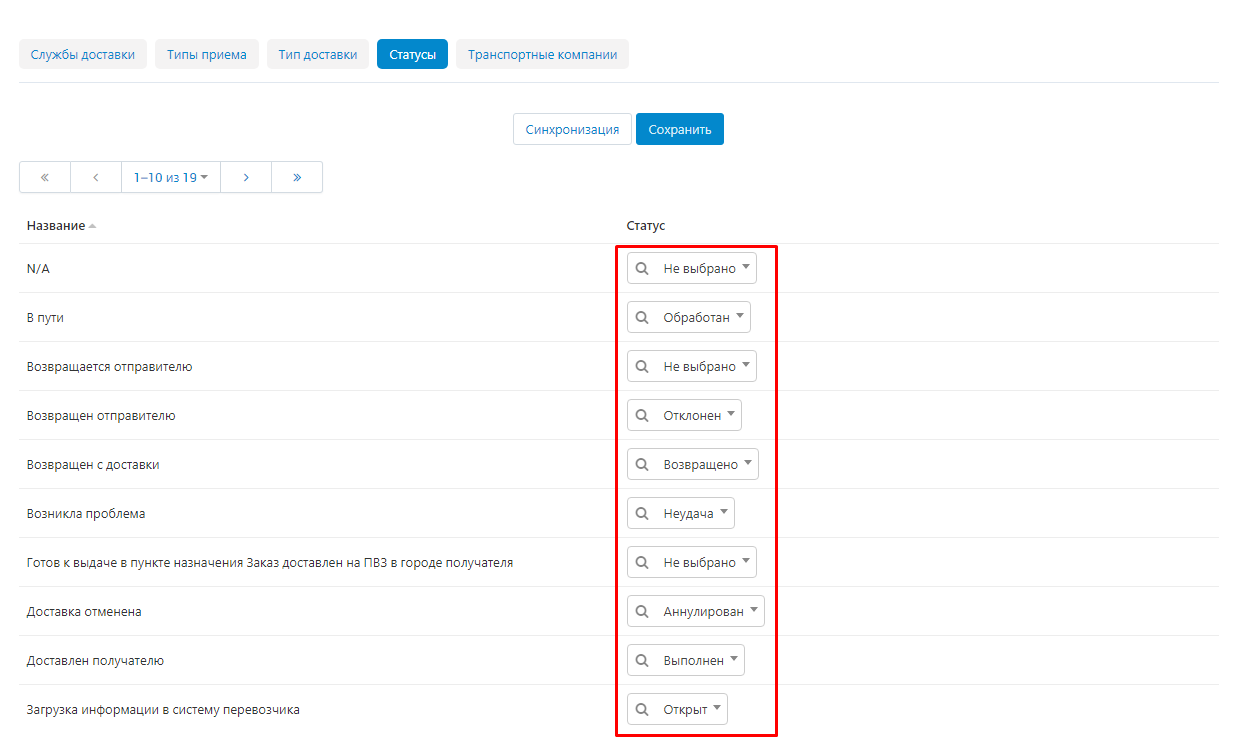
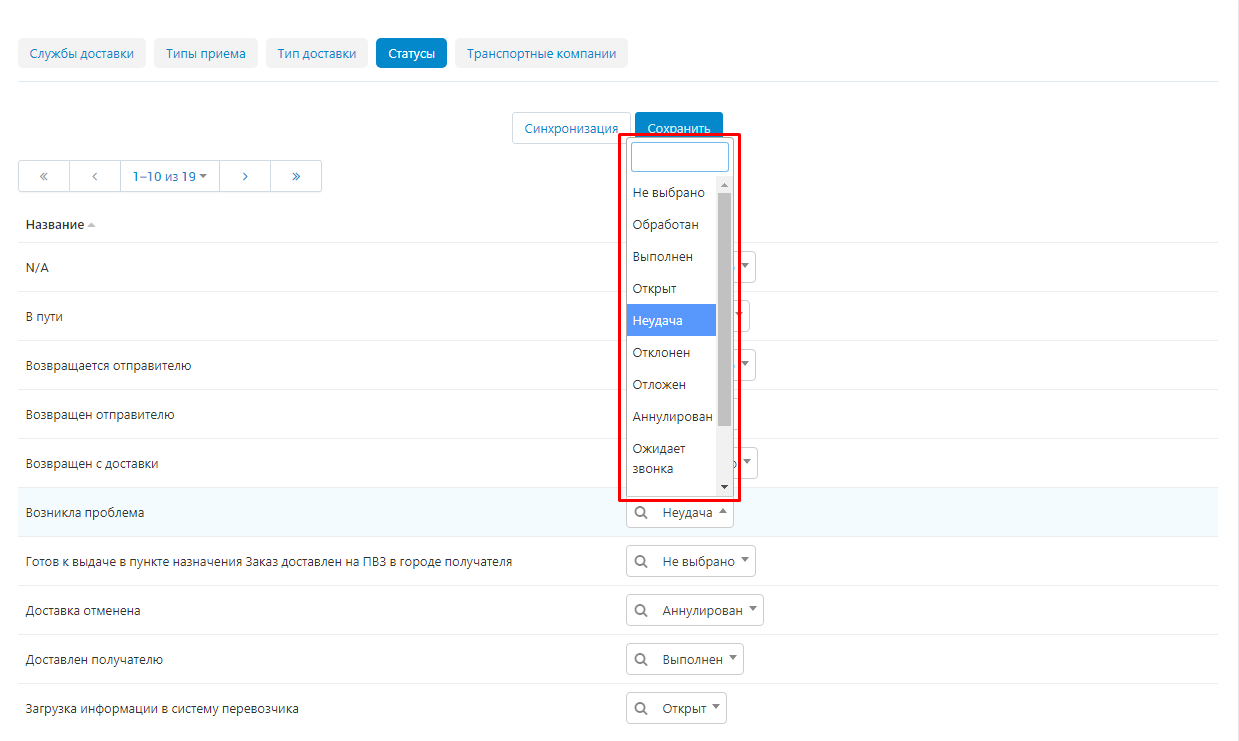
4. Expand the additional menu and select the status of the store, which will be correlated with a specific status for transport companies.
For example, the status of the transport companies "There is a problem" can be correlated with the status of the store "Failure". Now, when updating the order status by CRON, in case of a problem, the order status will change to "Failure".
You may not have to match all statuses, but it is recommended to do this for the maximum number so that there are no problems in the process.
5. After the status matching is completed, click on the blue "Save" button.

ADDING A NEW TRANSPORT COMPANY BY THE SELLER
The seller can independently add a new transport company (TC), if he has the privileges for this. Also, the seller must have the correct address entered.
1. To add a new TC, in the seller's panel, go to the "Modules" tab, the "ApiShip" section and select "Settings".

2. Click the green "Add New" button.
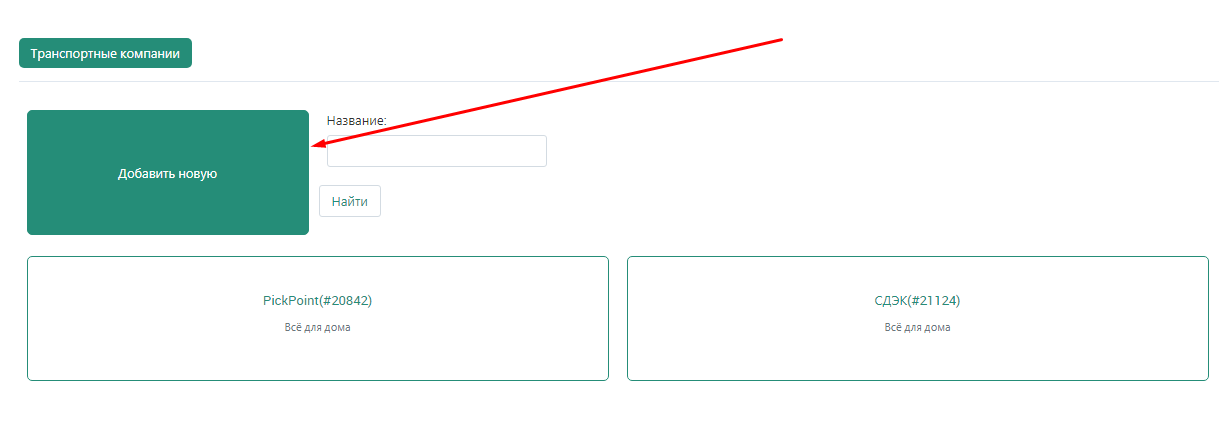
3. Enter the name of the transport company you are adding.

4. Expand the additional menu in the "Delivery Service" item and select the desired company.
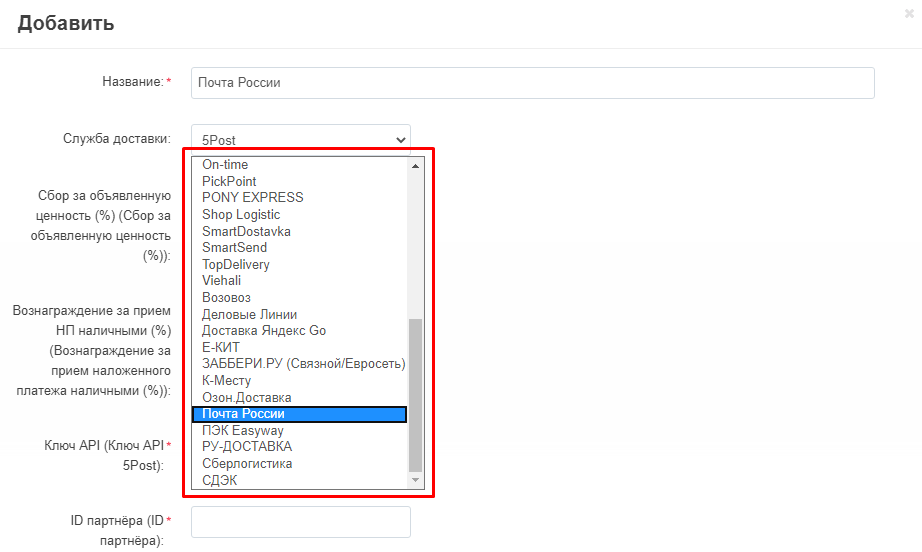
5. To fill in the data for creating a new TC, you need to log in to the ApiShip Personal Account and select the desired delivery service in the "Connected" section.
6. Inside there will be all the information to fill in the data about the new TC.
7. When all the data is filled in, click on the green "Save" button in the lower right corner of the window.

8. After that, the added TC will appear in the tab and will be marked in red until it is verified by the administrator.
VERIFICATION OF A NEW TRANSPORT COMPANY BY THE ADMINISTRATOR
1. After the seller has added a new TC, it must be checked by the administrator in order to use its services for the store.
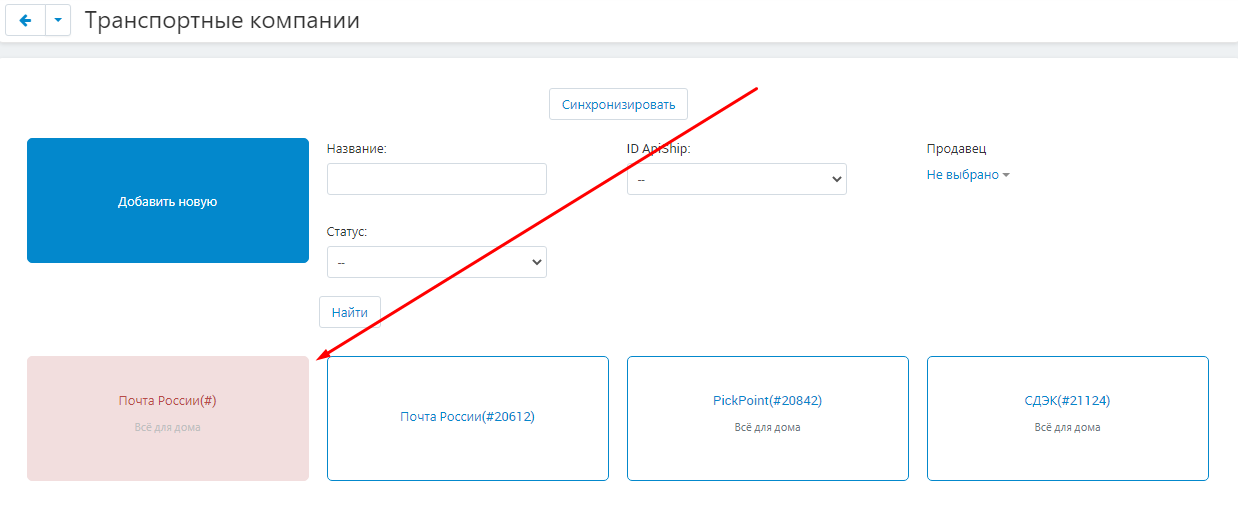
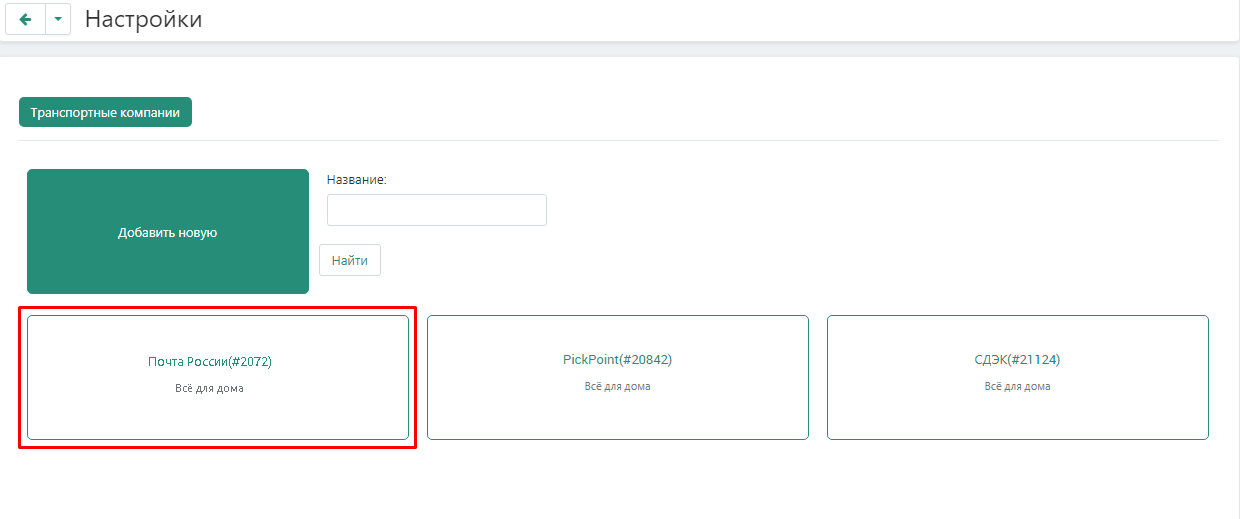
To do this, in the admin panel, go to the "Administration" tab, the "Shipping and taxes" section and select "Transport companies".

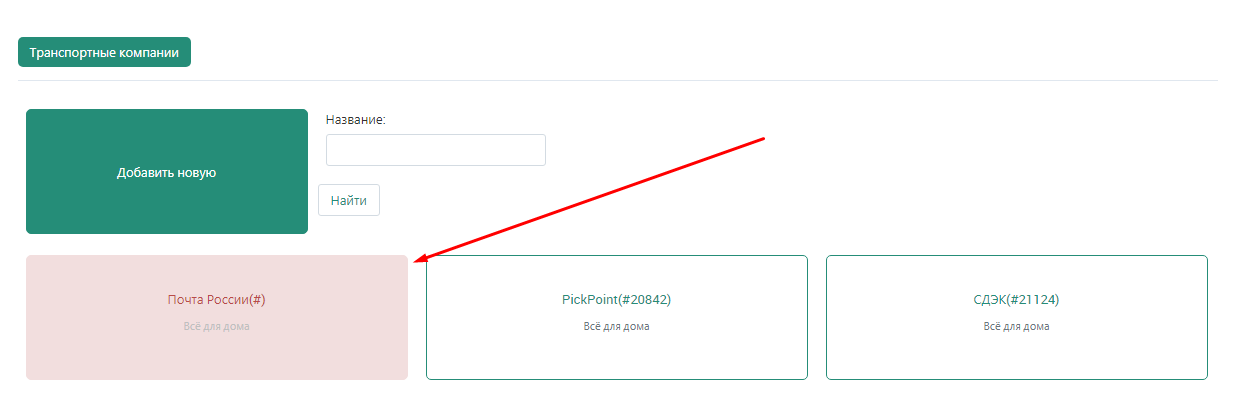
2. Select the TC highlighted in red.
3. Set the status: "On" (enabled) or "Off" (disabled). And enter the ID in ApiShip.
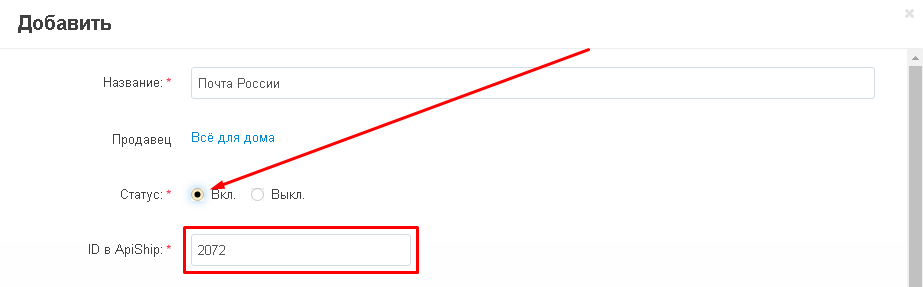
4. The ID is located in the name of the TC in the ApiShip Personal Account (see paragraph 6 of the section "ADD A NEW TRANSPORT COMPANY BY THE SELLER")

5. After checking all the data of the new TC, click on the blue "Save" button in the lower right corner of the panel.

6. The red selection will disappear from the checked TC and now it can be used.
CREATING A DELIVERY METHOD
1. To bring to the showcase the opportunity to choose the services of a specific transport company, you need to create a delivery method.
To do this, go to the "Administration" tab, the "Shipping and Taxes" section and select "Shipping Methods".

2. To create a new delivery method, click on the button in the plus form on the right side of the panel.

3. Enter the name.

4. Expand the additional menu in the "Tariff calculation" item and select "ApiShip".
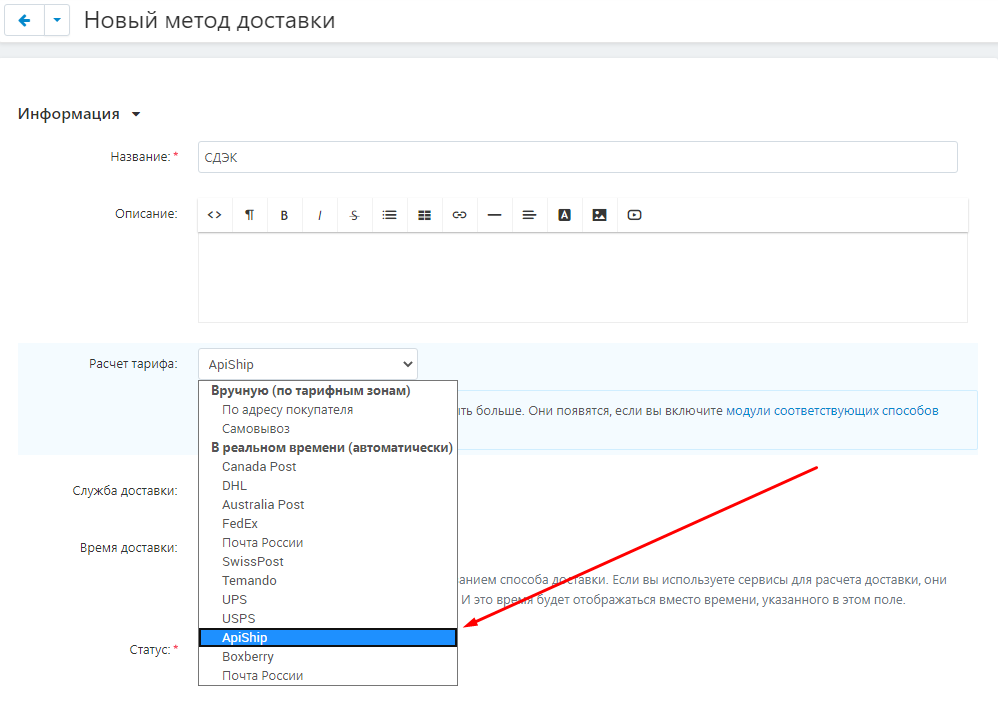
5. Click on the blue "Create" button in the upper right corner of the panel.

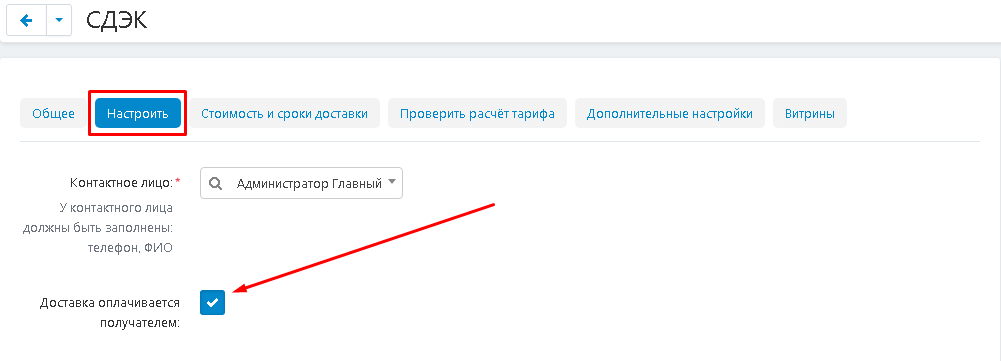
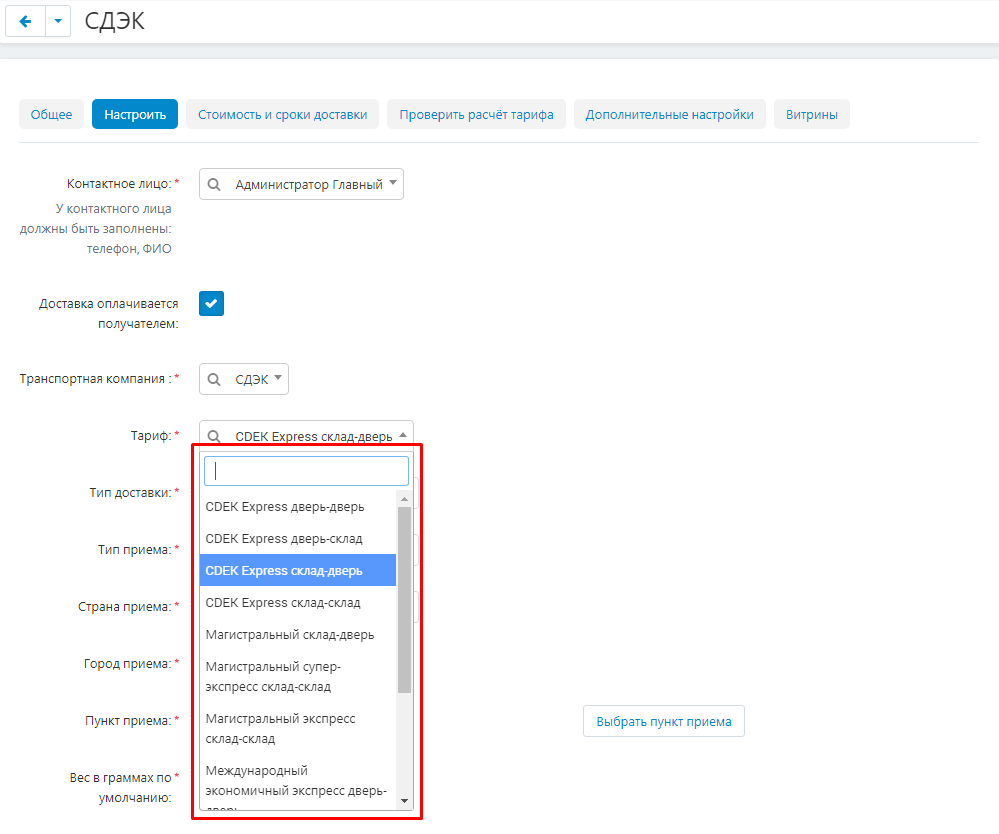
6. Go to the "Configure" tab. Check the box if the delivery is paid by the recipient. If the delivery service does not support payment by the recipient, then there will be problems with transferring the order to the TC,
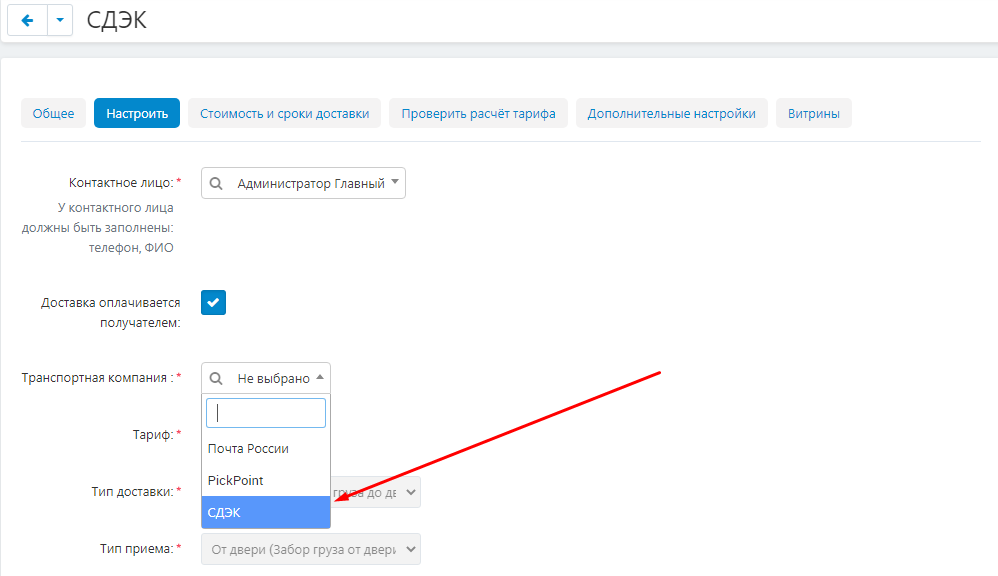
7. In the "Transport company" item, select the delivery service.
Please note that the items marked with a red asterisk are mandatory!
8. In the "Tariff" item, select the desired tariff. Please note that if you want to add different tariffs from the carrier, then you need to create a delivery method for each of them. One delivery method = one tariff.
9. If the tariff assumes the presence of PVZ, then it is necessary to enter the city of reception.

10. Click on the "Select a reception point" button.

11. The PVZ catalog will appear. Click on the arrow and select the PVZ by double-clicking on it.
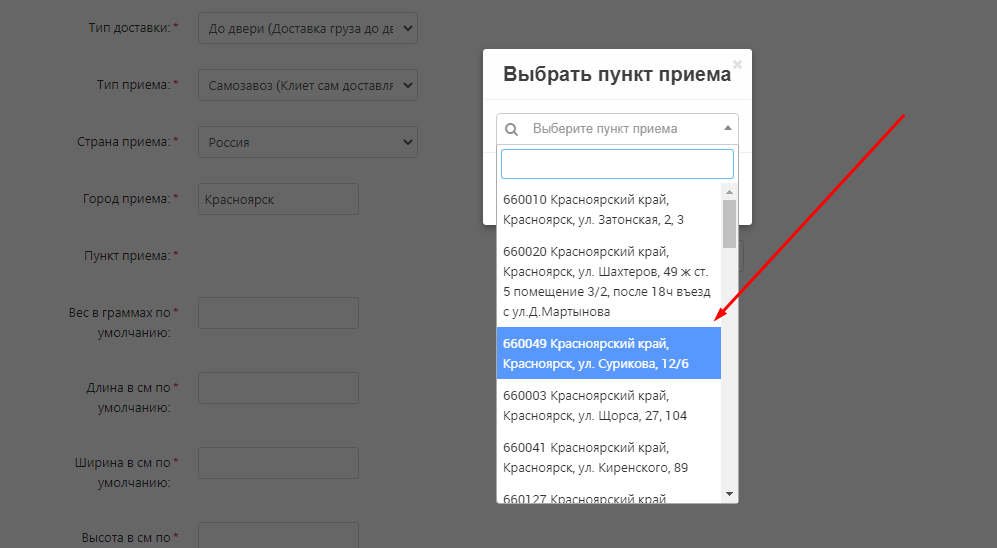
12. The selected PVZ will appear on the page.

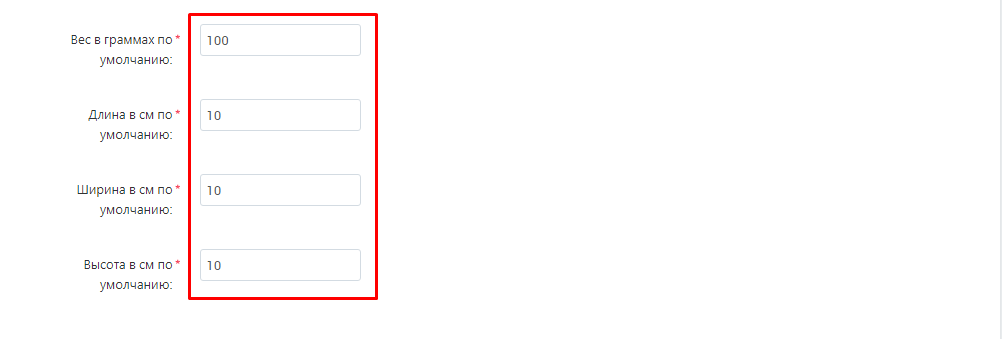
13. Fill in the parameters of the weight, length, width and height of the cargo.
14. Go to the "Advanced Settings" tab. In addition to the standard functionality, here you can also turn on and off the buyer's address as mandatory.
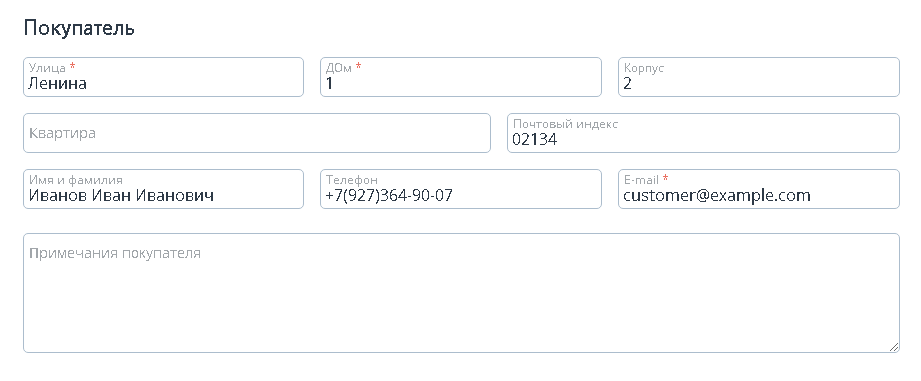
If you tick the box "The buyer must specify his address",
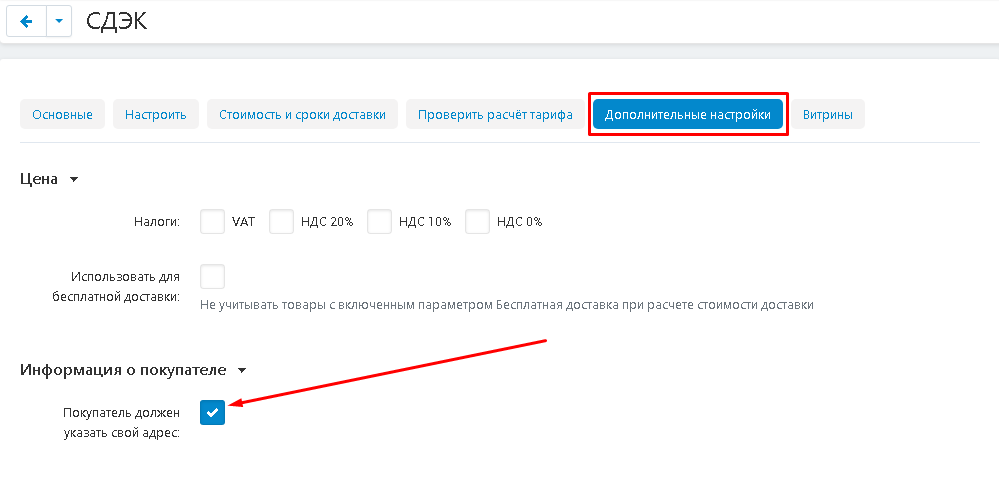
then the buyer's address will be displayed when placing an order and will be mandatory.
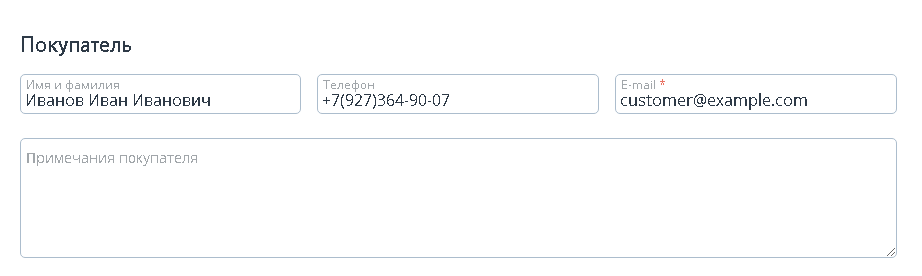
15. If there is no check mark,

then during the checkout, the address fields for the buyer will not appear.
16. Save the changes by clicking on the blue "Save" button in the upper right corner of the panel.

17. If the delivery method needs to be added to all sellers, click on the button in the form of a blue gear, select "Allow delivery for all sellers". The delivery method will be added for all sellers of the store.

TARIFF PLANS
In some cases, as a result of a failure or error, the delivery method may lose tariff zones. Or, they are not added for the platform. Without specifying the tariff zone, the delivery method will not be displayed on the checkout page. Therefore, it is recommended to check the data in advance.
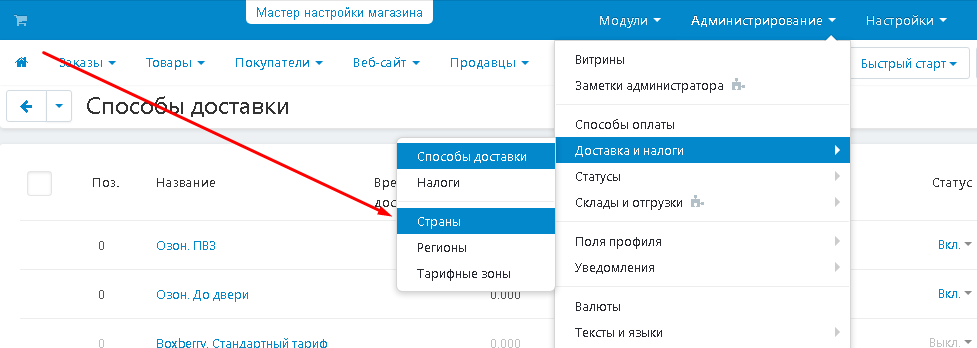
1. First of all, check if all countries are included. To do this, go to the "Administration" tab, select the "Shipping and Taxes" and "Countries" section.This is especially important when you work in different countries.
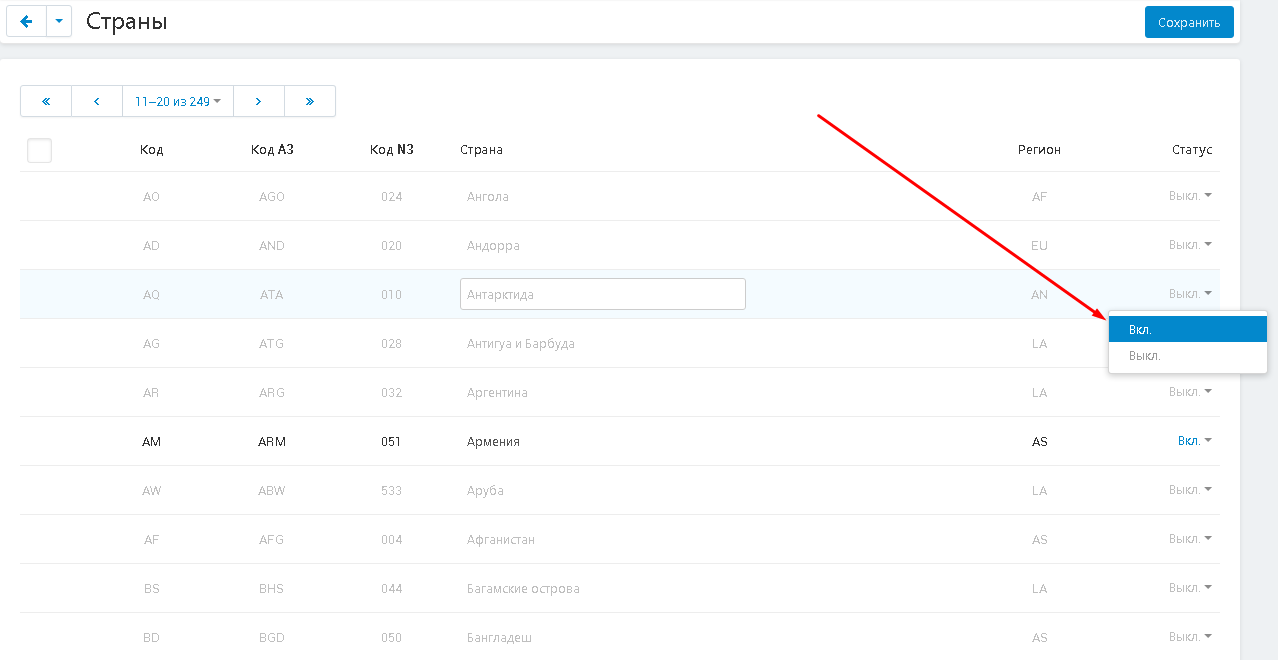
2. In the list that appears, select the desired country. Make sure that the status is set to "On" (enabled)
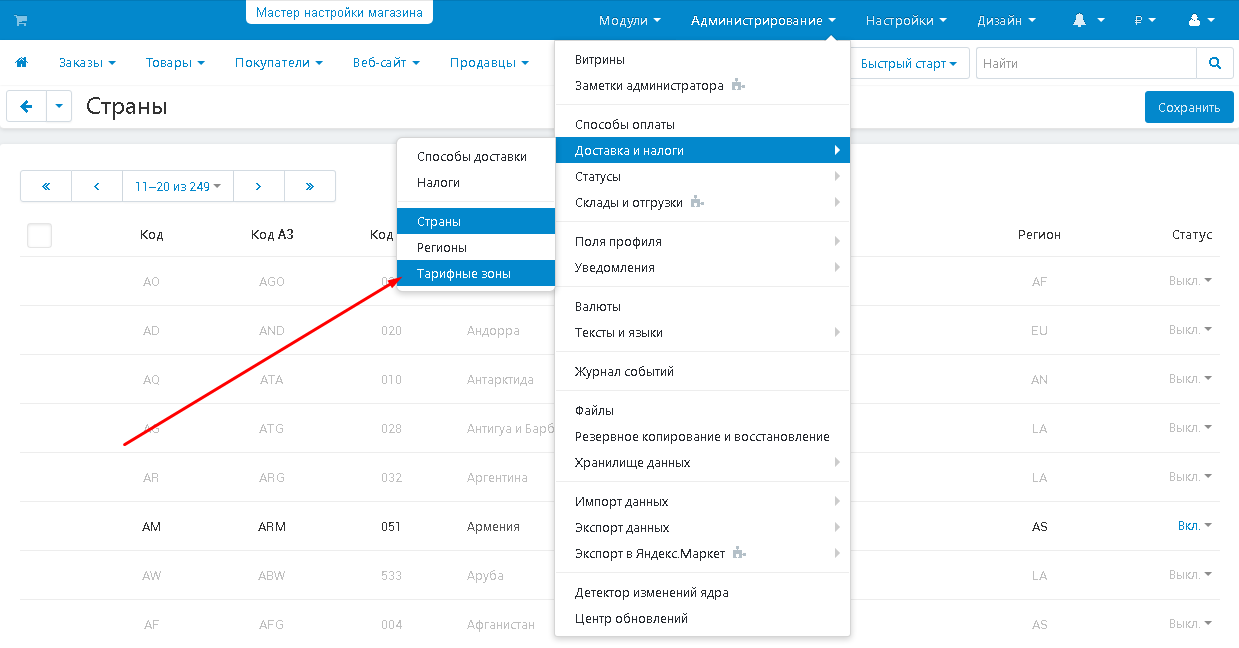
3. Now check the tariff zones. To do this, go to the "Administration" tab, select the "Shipping and Taxes" and "Tariff zones" section.
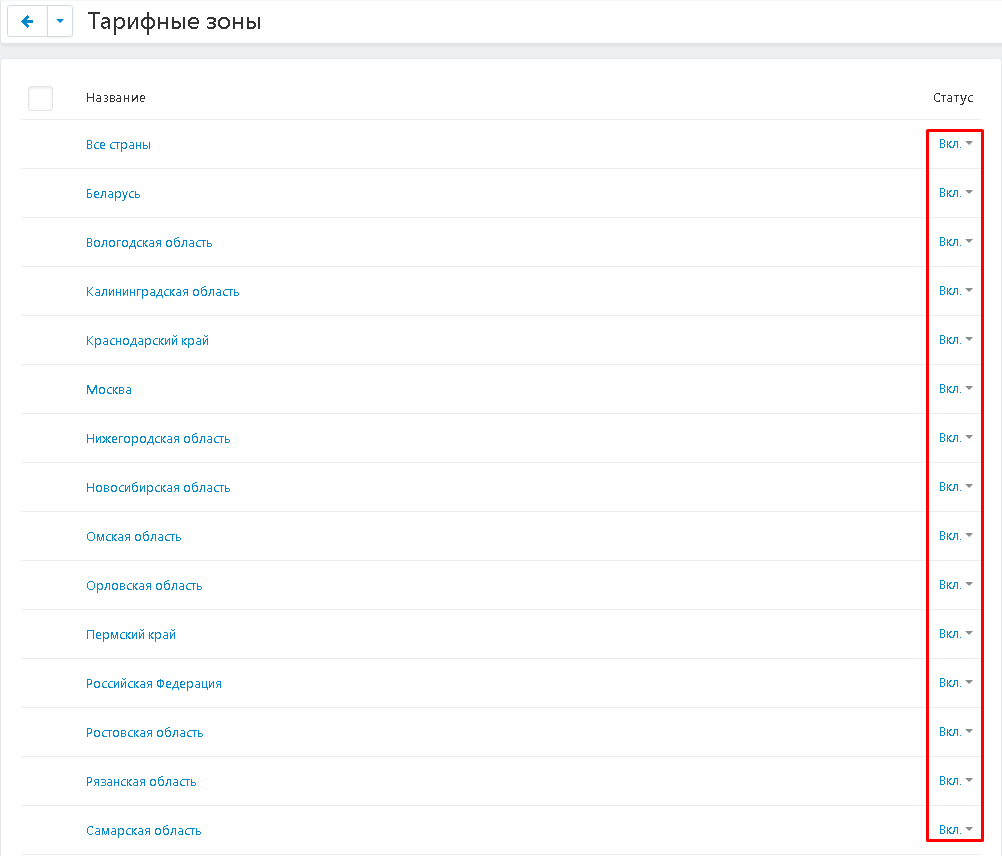
4. Make sure that all the necessary tariff zones are enabled.
5. If necessary, add a new tariff zone by clicking on the plus button in the upper right corner of the panel.

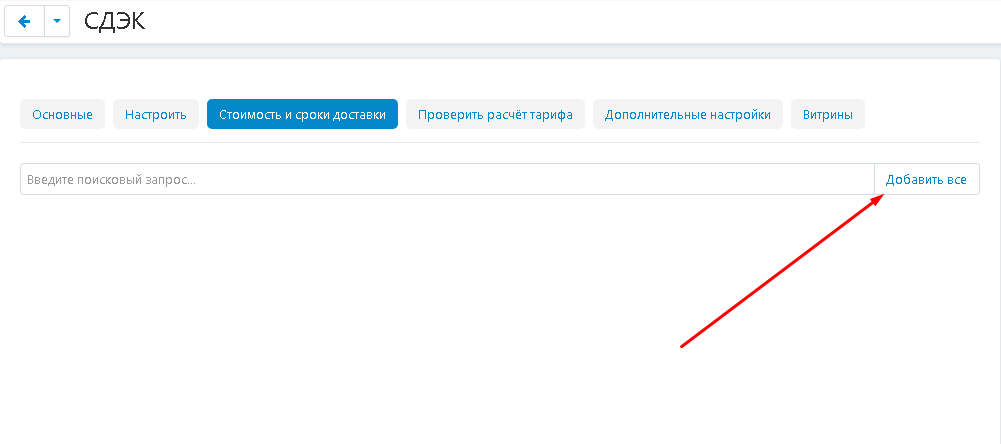
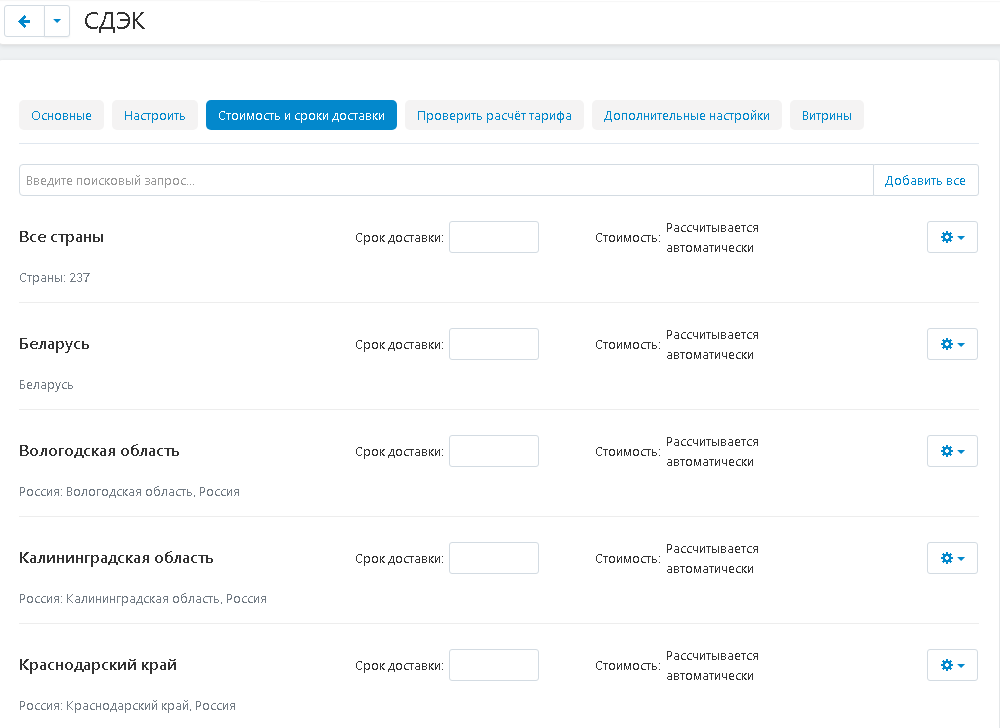
6. Information about tariff zones is contained in the "Cost and delivery time" tab in any of the delivery methods.

7. If the contents of the tab are completely missing, then a failure has occurred. To enable all available tariff zones at once, click on the "Add all" button.
8. Or use the search.
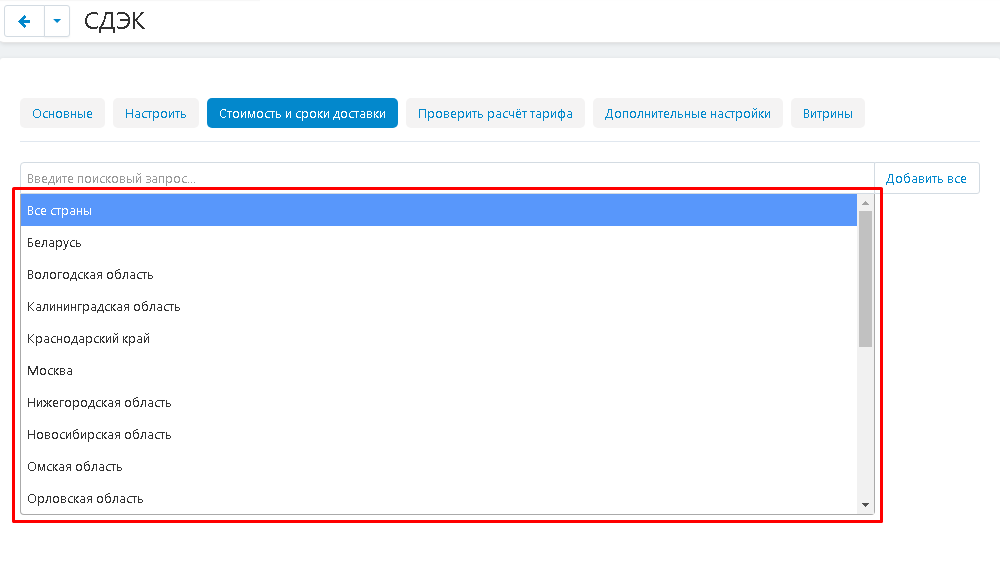
9. The contents of the tab will be filled in.
ORDERING
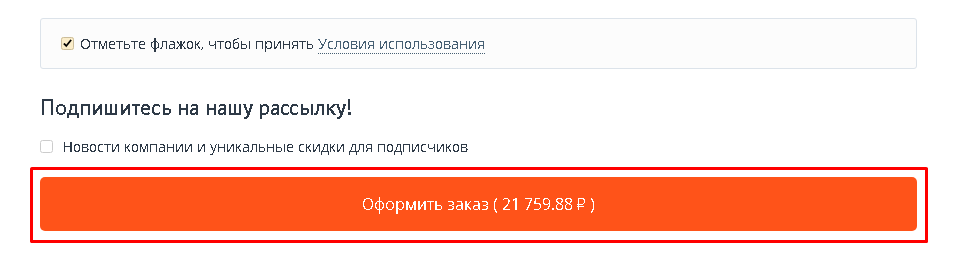
1. Go to the showcase by clicking on the button in the form of a grocery basket.

2. Make a purchase.
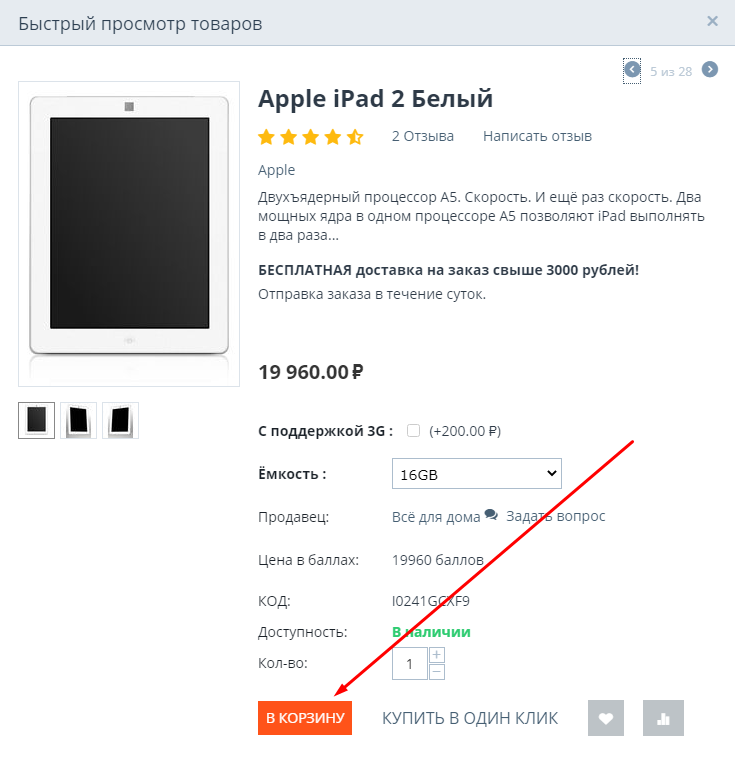
3. The created delivery methods will be displayed on the checkout page.
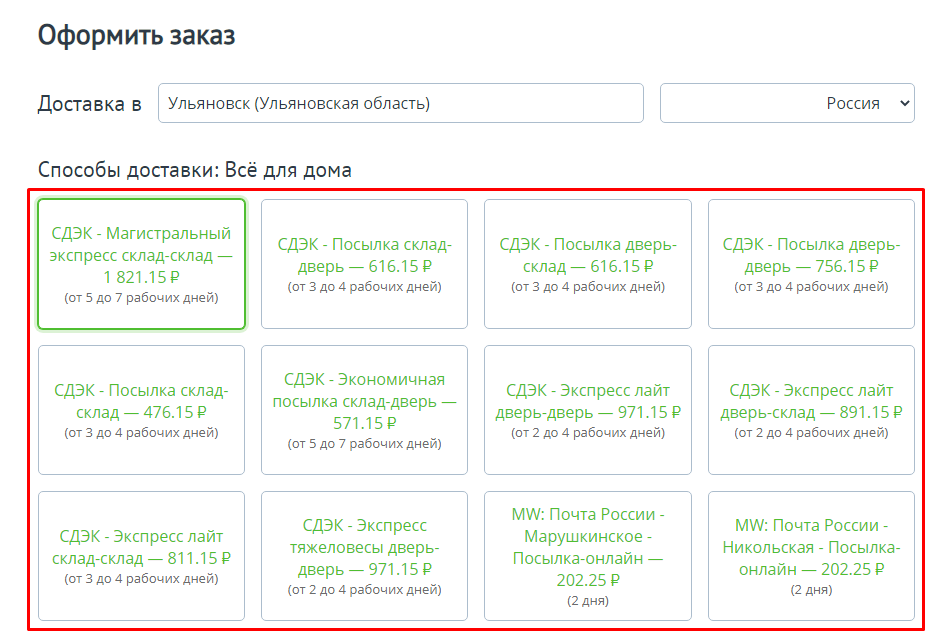
4. When choosing a tariff that implies the presence of a PVZ, a map and a list of pick-up points will open.
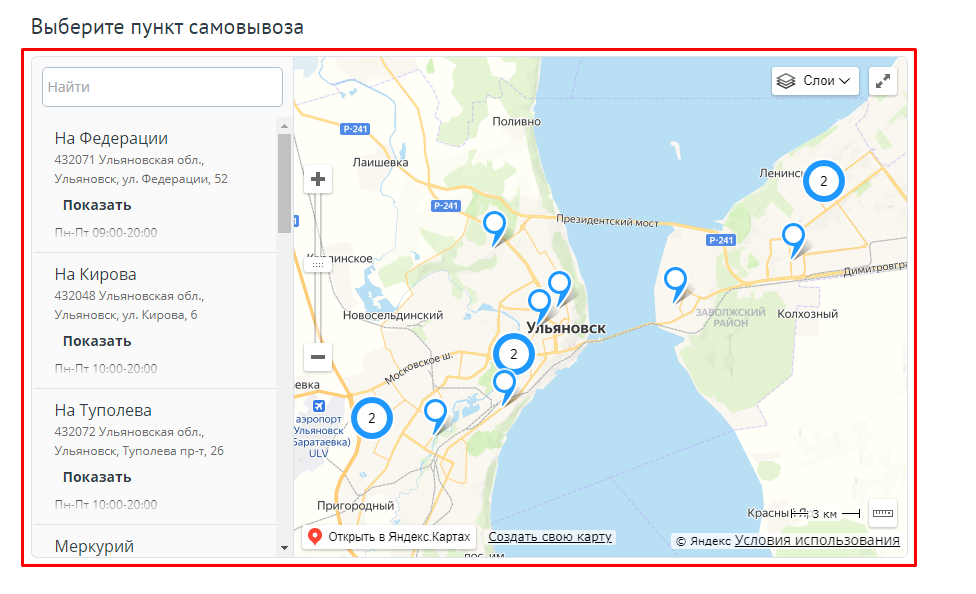
5. To select the PVZ, you can use the side menu.
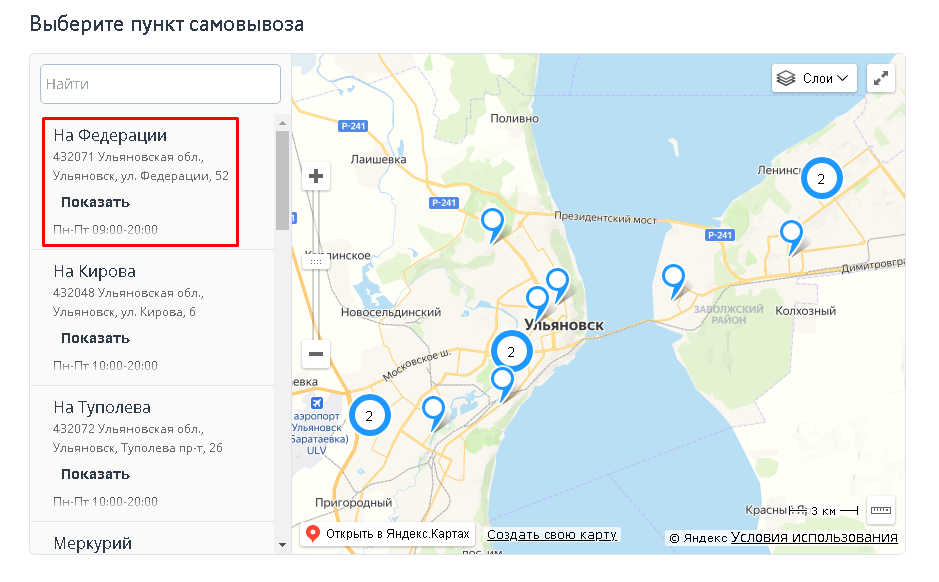
6. Or select the PVZ on the map. If dots with numbers appear on the map, it means that there are several PVZ in this district. Click on the circle with the number.
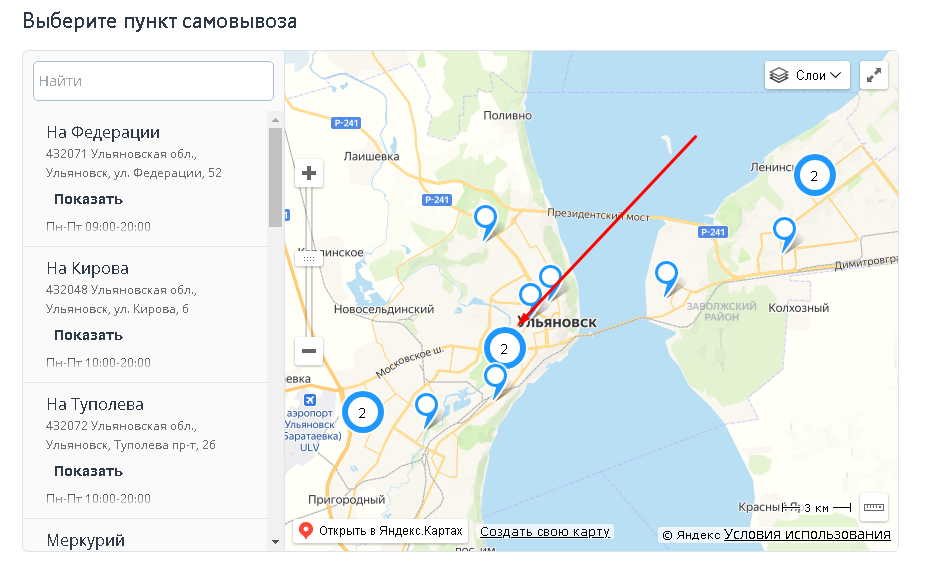
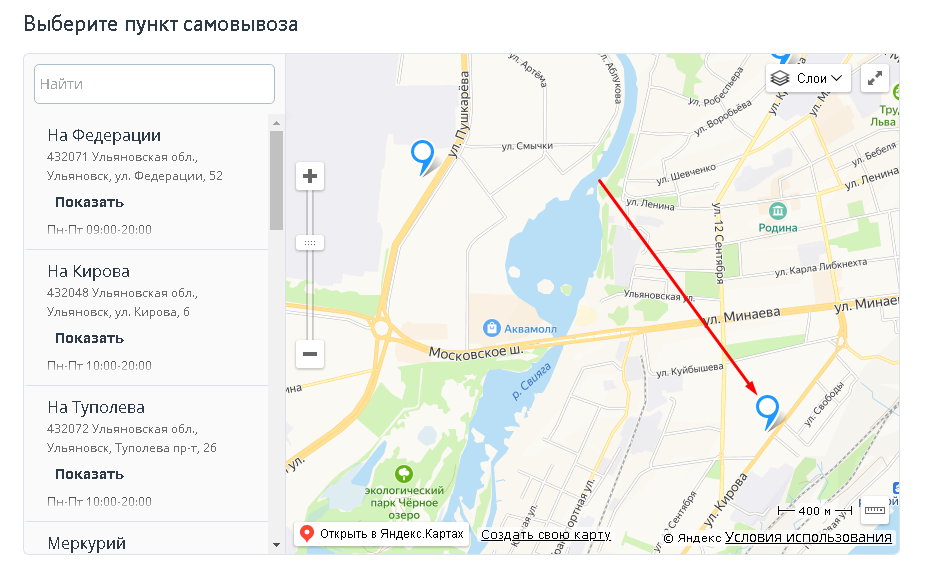
7. The map will zoom in, showing the PVZ in the desired region. Click on one of them to select.
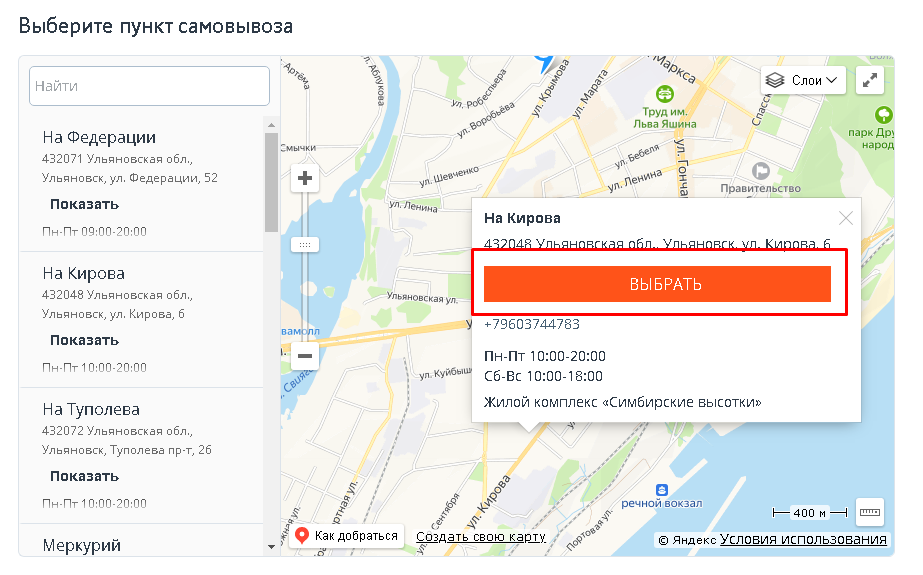
8. A window will open with data about the PVZ: full address, phone number, working hours and landmarks. Click on the red "Select" button to finish selecting the PVZ.
9. Complete the purchase.
CHANGING THE ORDER AFTER REGISTRATION
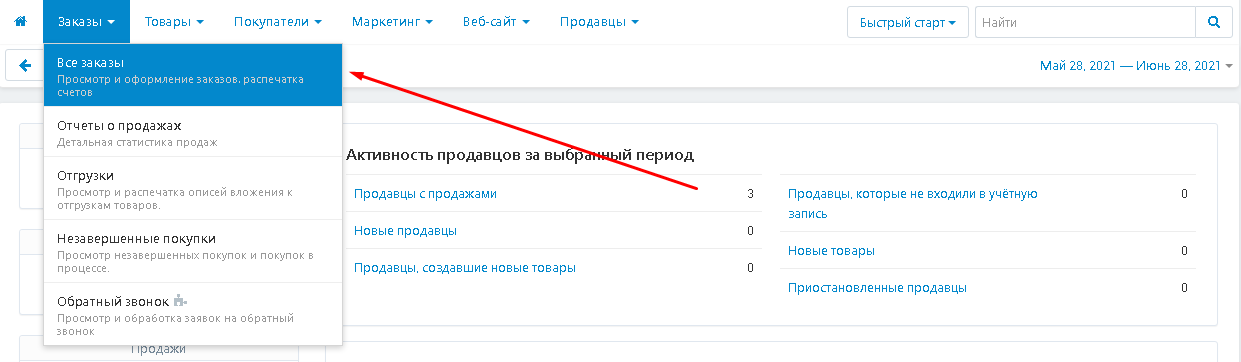
1. After the order is placed, its further editing takes place in the admin panel. To do this, go to the "Orders" tab and select "All orders".
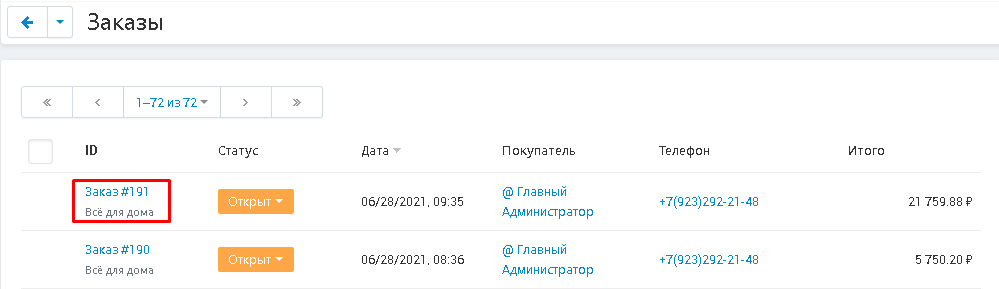
2. Select an order and click on its name highlighted in blue.
3. The delivery method in the order will be specified exactly the one that the buyer chose.
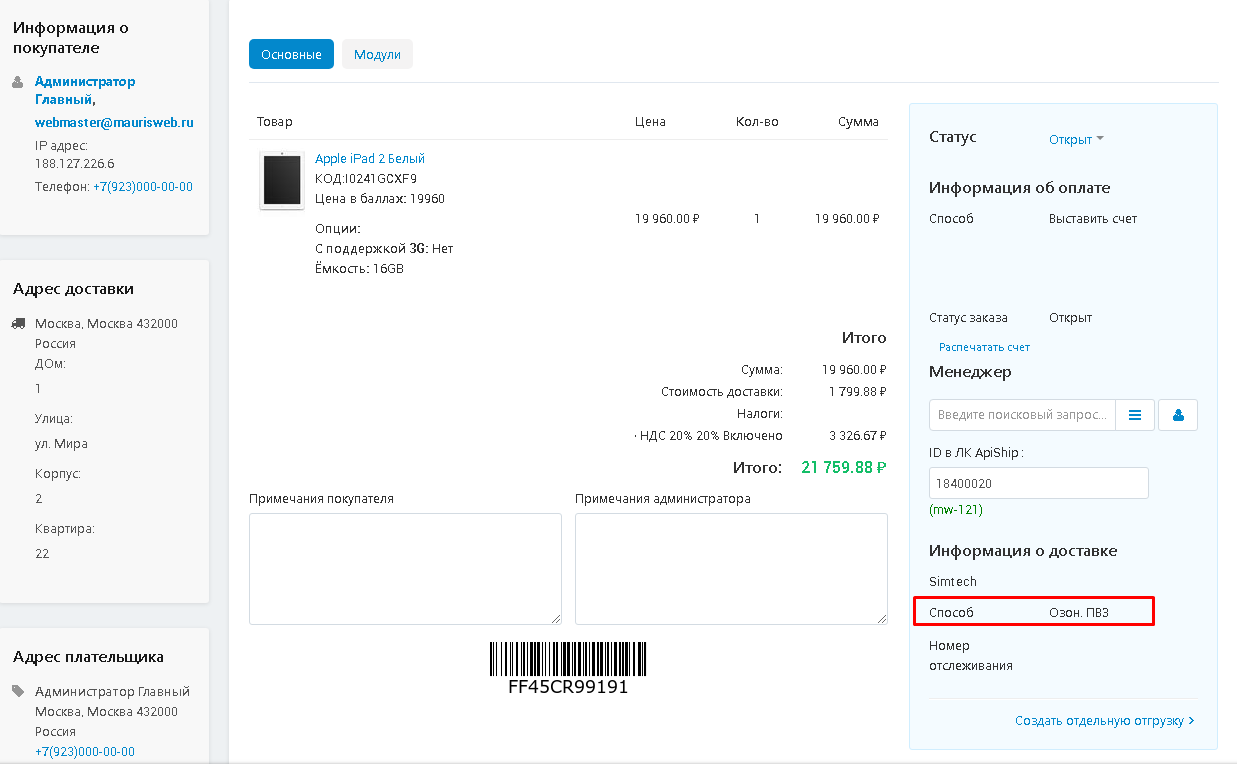
4. If the order number is changed in the ApiShip Personal Account, it can be entered manually in the "ID in the ApiShip LC" field.

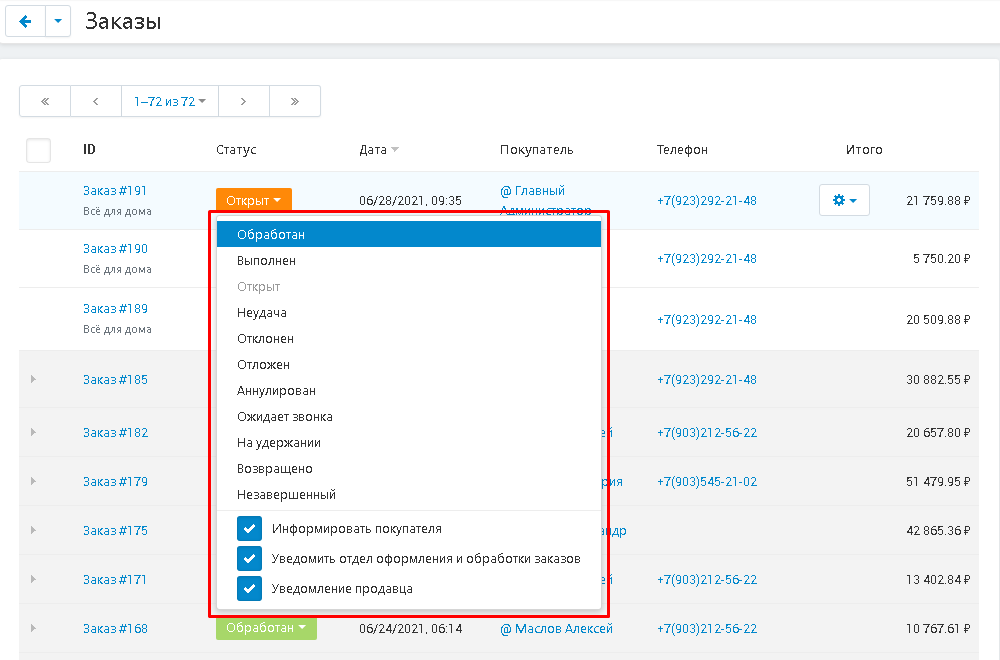
5. To change the order status, click on it, open the additional menu and select the one you want to install
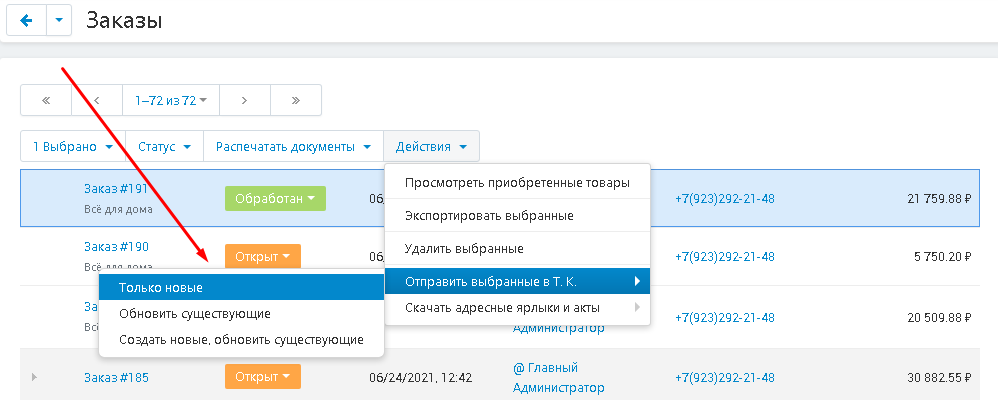
6. To send the selected order to the shopping center, select it, click on the "Actions" button, and then go through "Send selected to the Shopping Center" and one of the options: "New only", "Update existing" or "Create new, update existing".
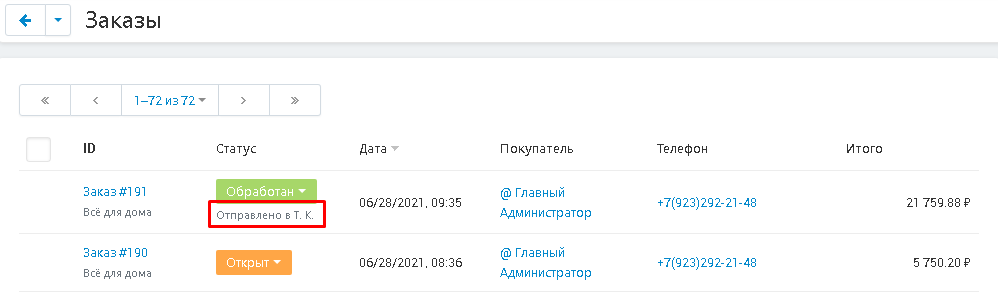
7. The inscription "Sent to Because" will appear under the order status.
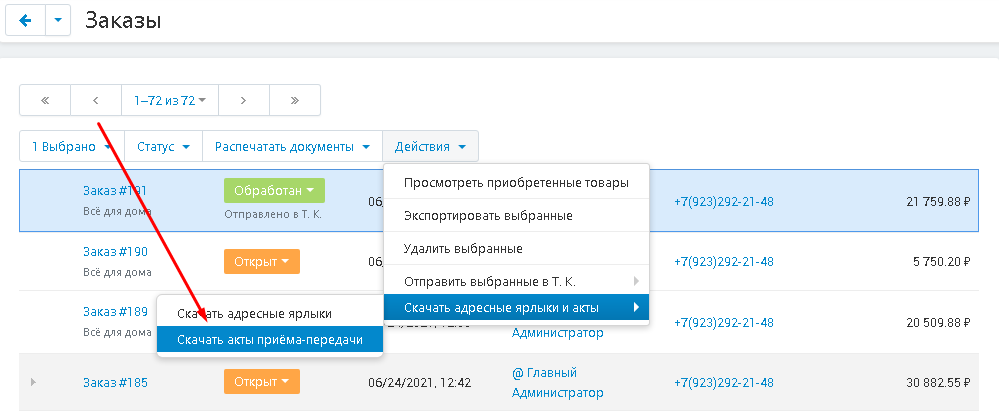
8. To download shortcuts, select the function "Download address labels and acts" and "Download address labels". After the formation, the PDF document will be loaded into memory.
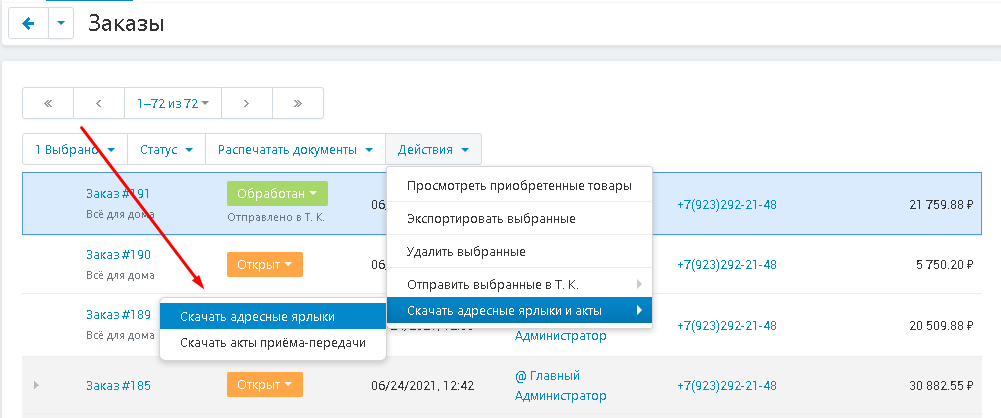
9.To get the closing documents, select the function "Perform an action in ApiShip for selected orders" and "Download acceptance certificates". The archive with the documents will be loaded into memory.