Product card template: Variation of products or services for Multi-Vendor
Product card template: Variation of products or services for Multi-Vendor
The module allows you to combine a huge number of variations in one product card, differing in size, color, weight, technical characteristics. With the help of buttons and drop-down lists, the buyer will be able to choose exactly the product that suits him best. At the same time, he does not have to switch between many product cards. When you select a specific characteristic, the price will be automatically recalculated. The selection of one characteristic can block the selection of another characteristic if they depend on each other.
SCOPE OF APPLICATION
Suitable for selling products of the same model, different in color, size, shape, etc.
APPLICATION EXAMPLE
Several products are, in fact, variations of each other. Using the module, they can be combined in such a way that you can see all the variations from one product card without switching to others.
SPECIFICATIONS
- Works on CRON;
- Sets the default product card settings;
- Allows you to connect product variations through an existing product.
MODULE SETTINGS
1. To configure a module, go to the "Modules" tab, in the pop-up menu, select "Modules Management" and the "MAURISWEB" section.

2. In the list that opens, select the module you are interested in and click on its name, highlighted in blue or black.

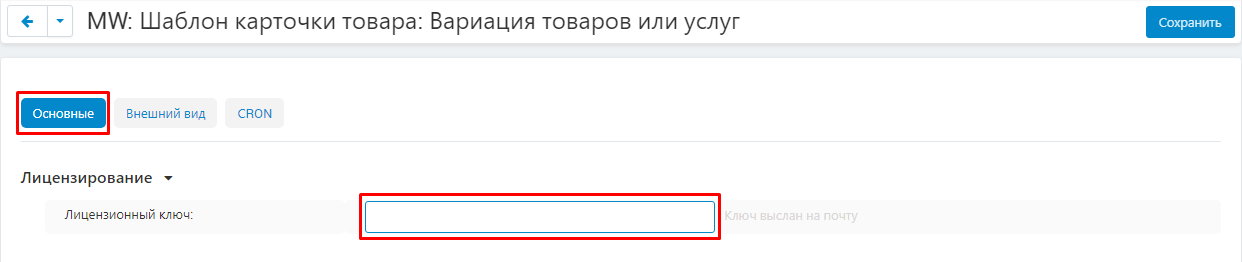
3. On the page that opens, select the "General" tab, go to the "Licensing" section and in the "License key" field, enter the license key that is available in your account at www.maurisweb.ru in the list of purchased modules and also sent to you by e-mail.
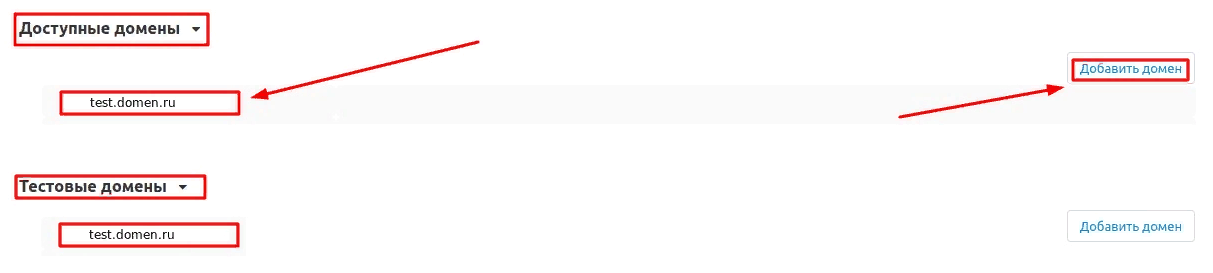
4. In the "Available domains" and "Test domains" sections, check the correctness of the specified domains. You can add additional domains by clicking on the white "Add Domain" button on the right side of the page. The total number of domains should not exceed three.
5. Go down below, select the "Basic settings" section and tick the box "Save data when removing the module" so as not to lose them when reinstalling the module.

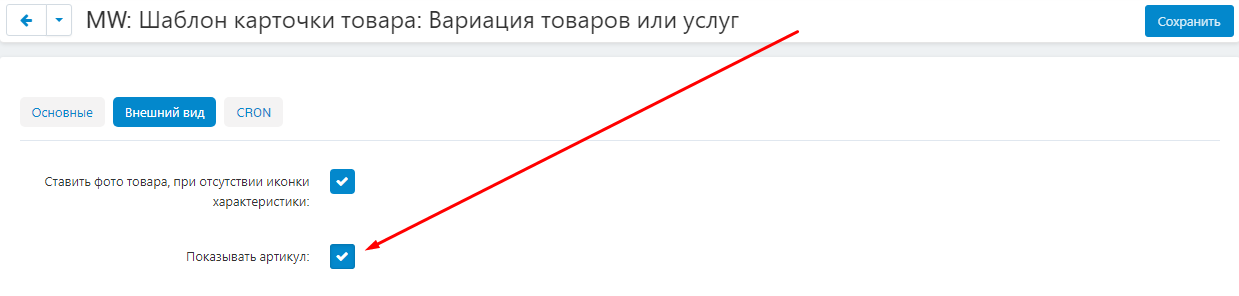
6. Go to the "Appearance" tab and check the box "Set product photo if there is no characteristic icon" to enable this function.

7. If it is necessary to show the SKU of a product, then put a tick in the appropriate item.
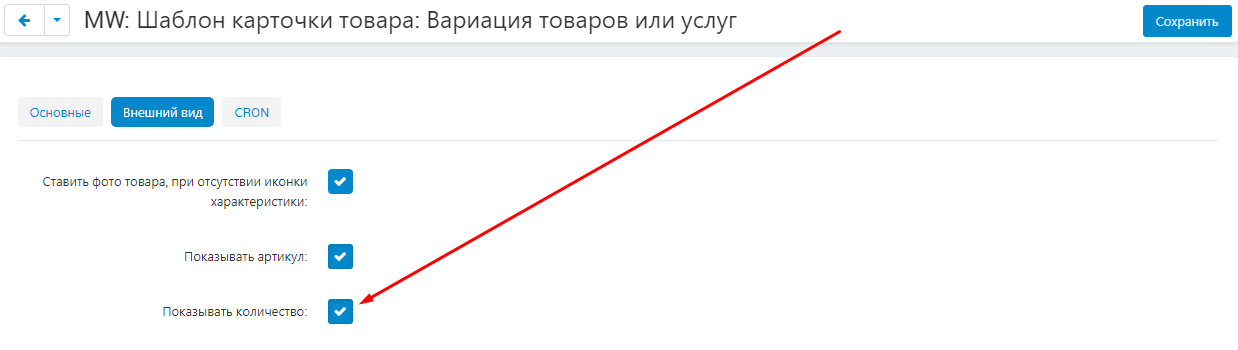
8. To display the quantity of goods in stock, check the box next to "Show quantity".
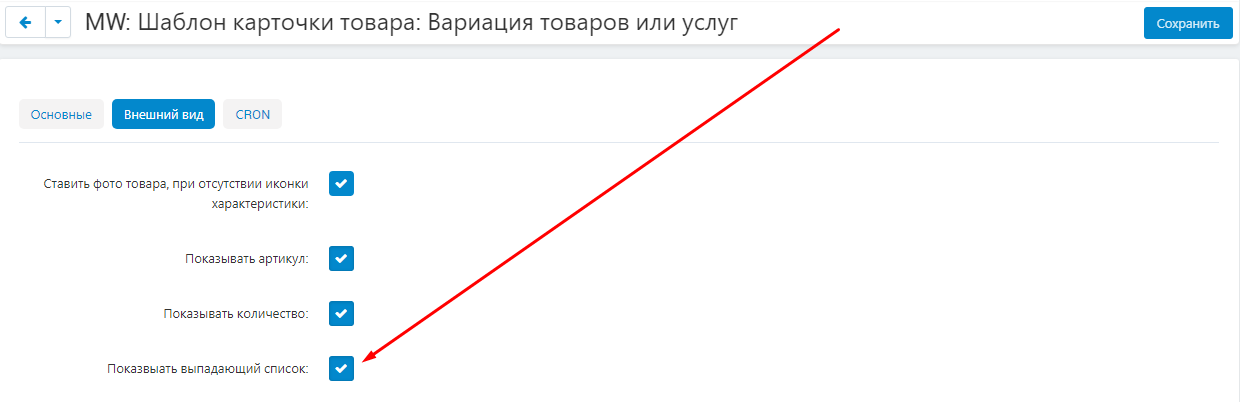
9. If you want to show drop-down lists, check the corresponding list.
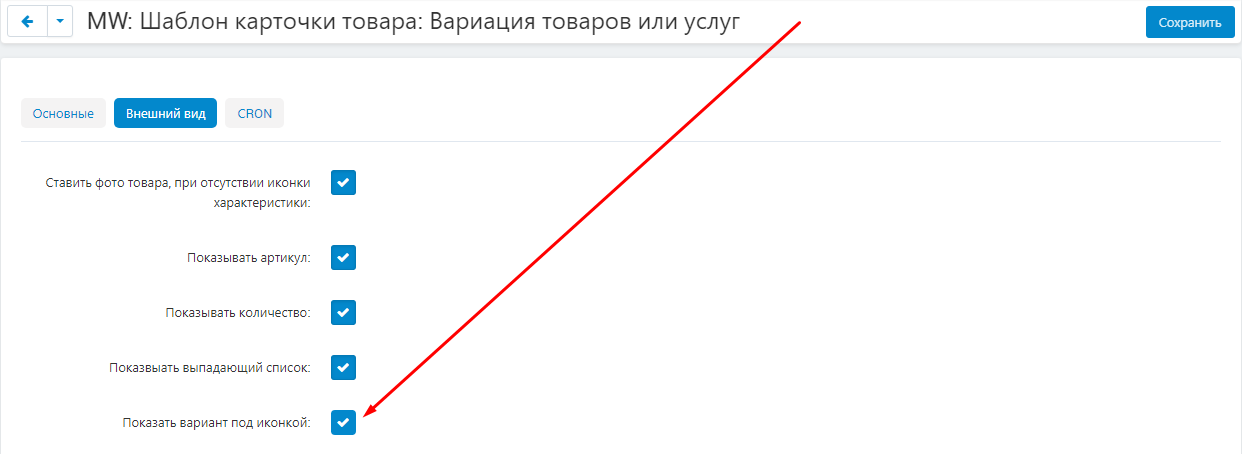
10. Check the box "Show option under icon" to enable this function.
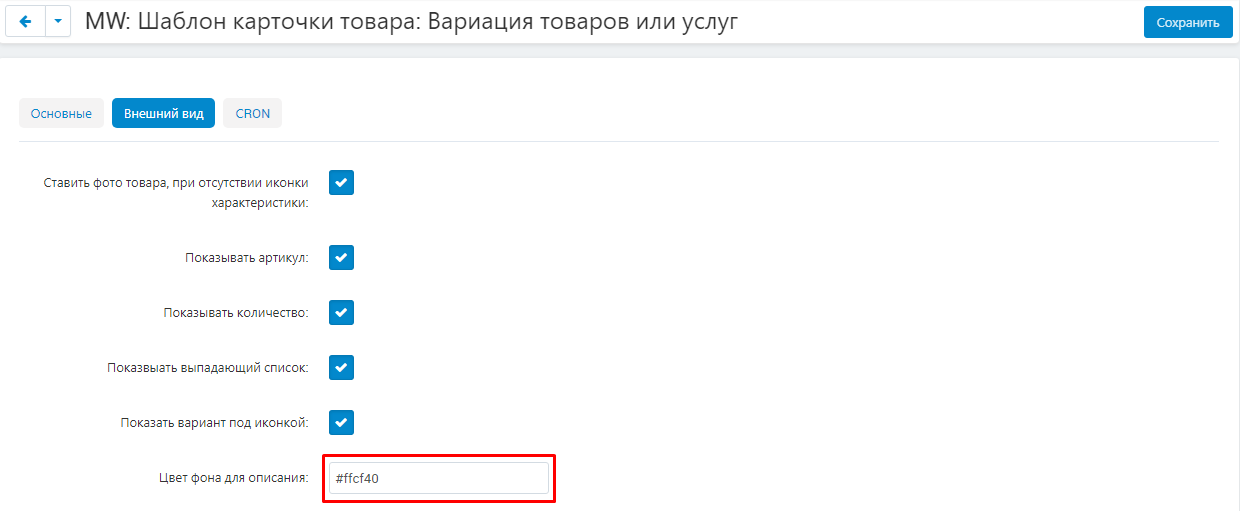
11. For "Background Color for Description", enter the HTML code for the desired color.
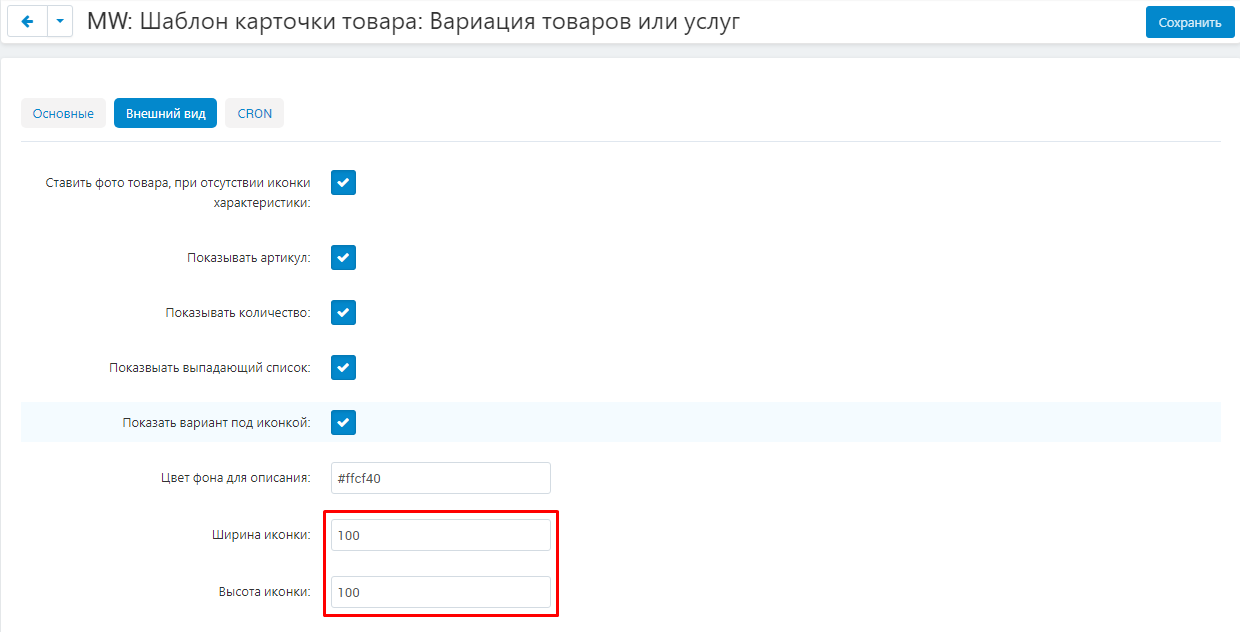
12. In the "Icon Width" and "Icon Height" fields, enter these values in pixels.
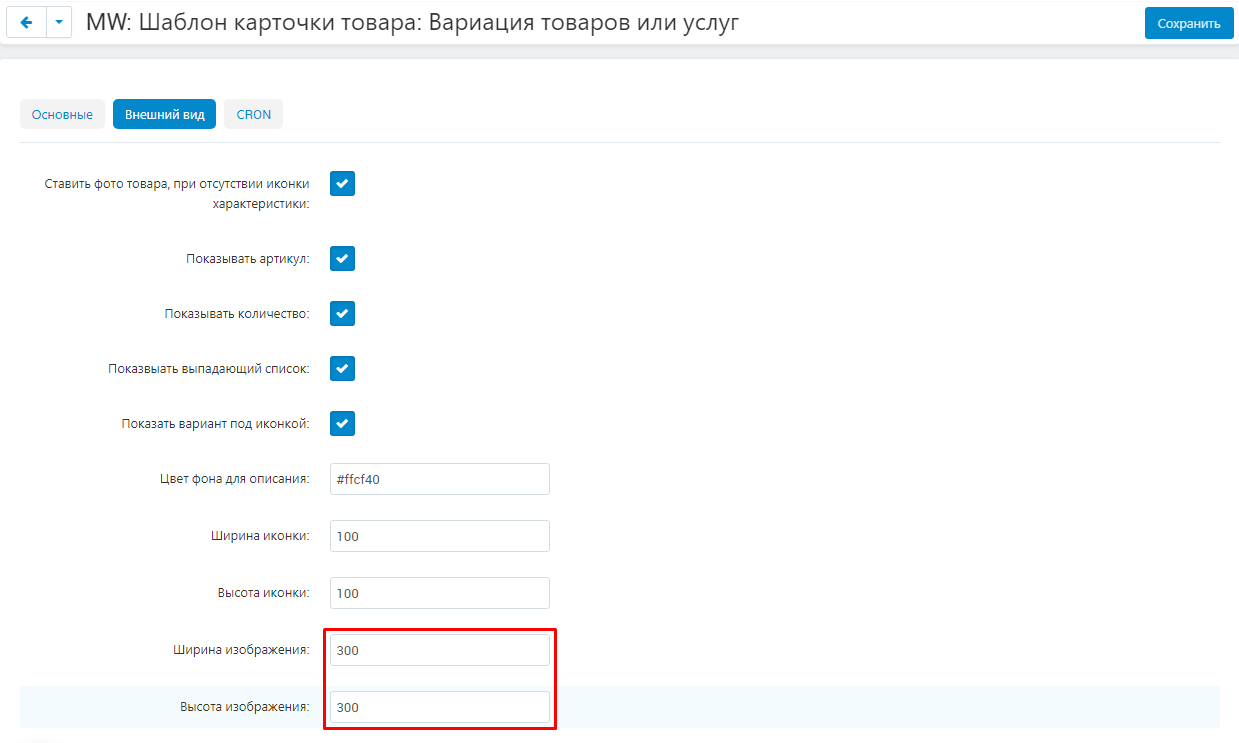
13. In the "Image Width" and "Image Height" boxes, enter these values in pixels.
14. Go to the "CRON" tab. Enter a CRON command in the scheduler to automatically load options for product variations.

15. Save the module settings by clicking on the blue "Save" button at the top right of the panel.

FUNCTIONALITY OF THE MODULE
CHARACTERISTICS CREATION
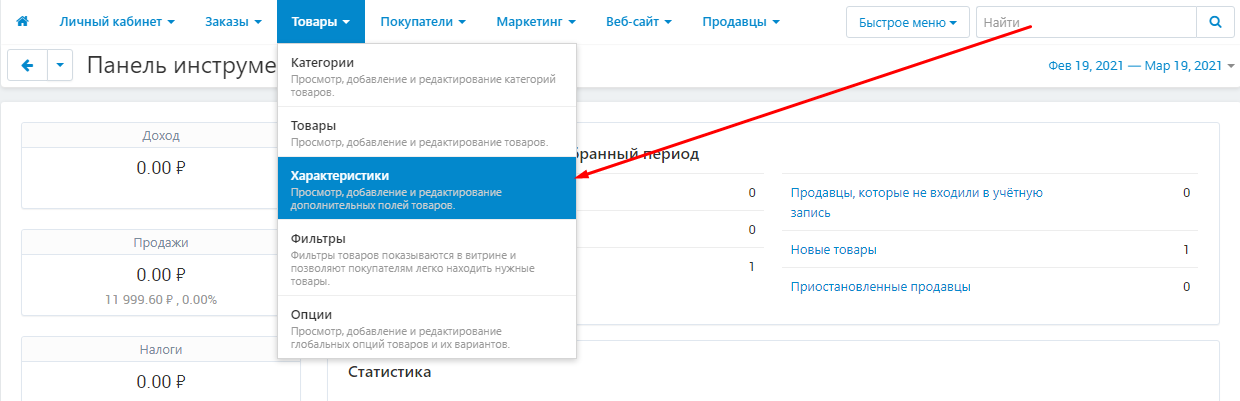
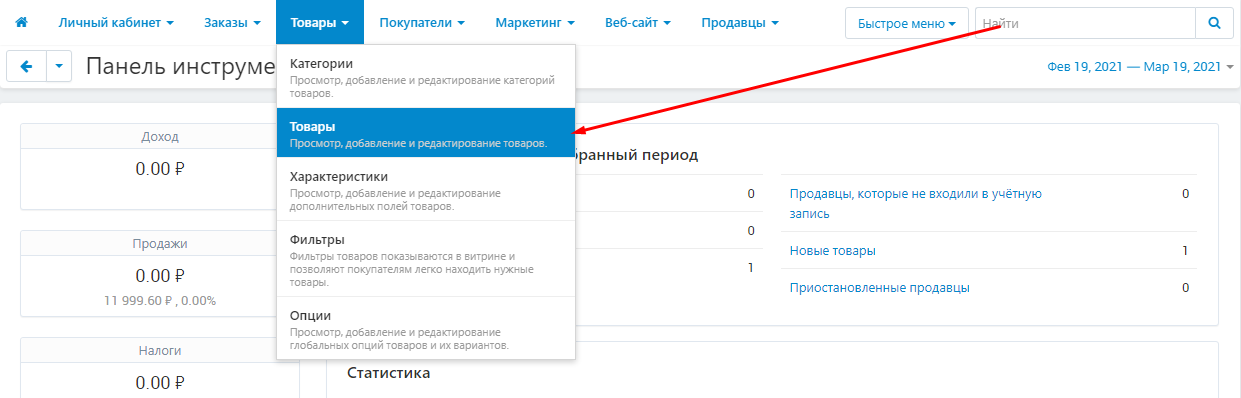
1. To create a new characteristic, go to the "Products" tab and select the "Characteristics" section.
2. On the page that opens, click on the blue button with a plus sign.

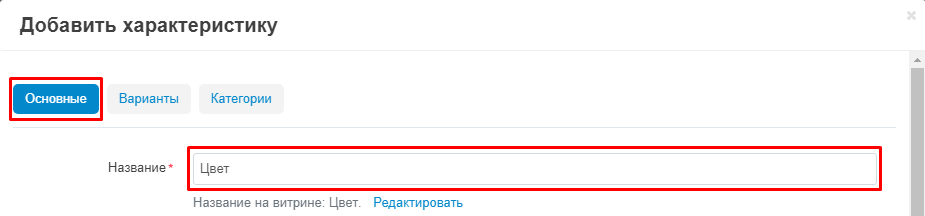
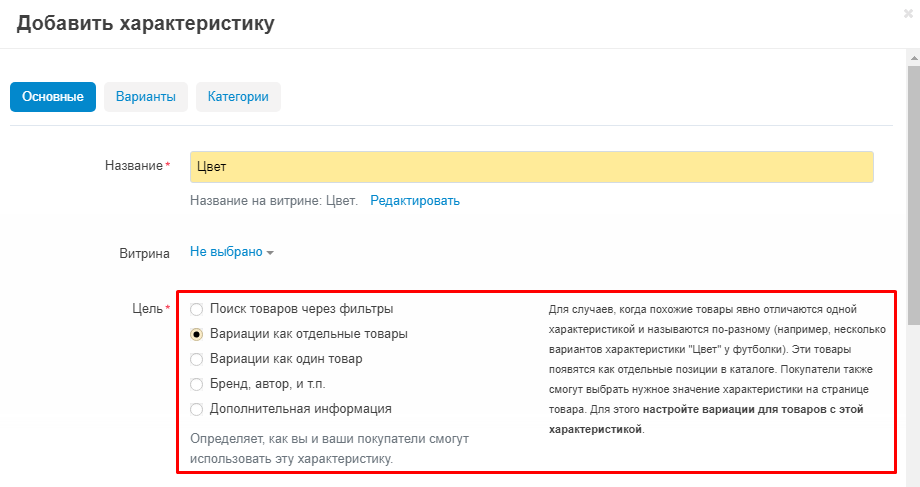
3. A window for creating a characteristic will open. First of all, enter the name of the new characteristic.
4.In the "Purpose" section, select one of the available options: "Search for products through filters", "Variations as separate products", "Variations as one product", "Brand, author, etc.", "Additional information" ... When you click on any of the items, a hint will appear on the right side of the screen, which will help you choose the desired target.
Notice goals such as Variations as Separate Products and Variations as Single Products. If the product has several variations distinguishable by this characteristic, then the goal should be to specify one of these items.
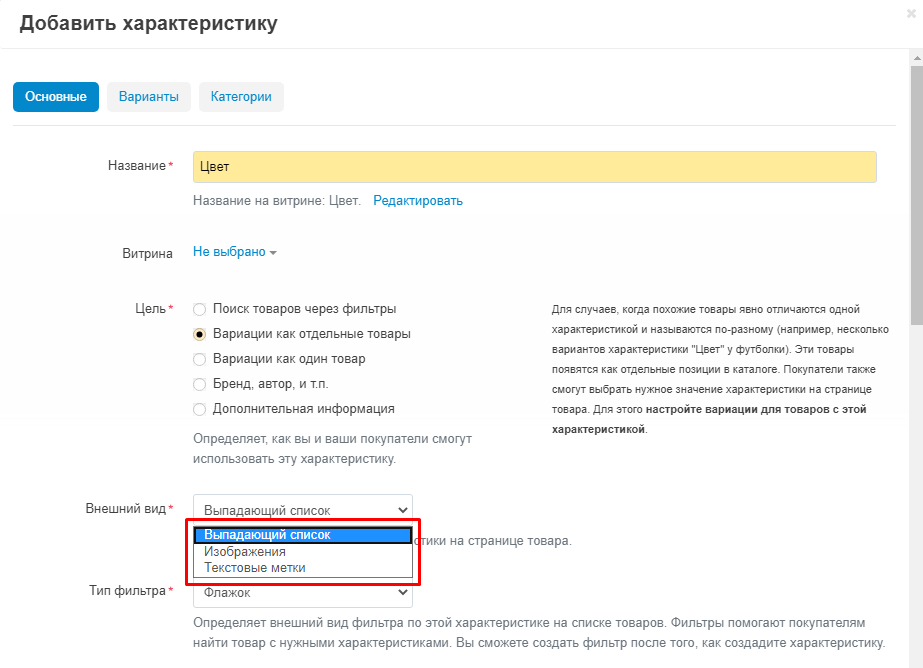
5. In the "Appearance" item, select one of the three possible options:
"Drop-down list" - variations will be displayed as a drop-down list;
"Images" - variations will be displayed as separate images;
"Text labels" - variations will be displayed as buttons with the name of the characteristics.
6. Load the image in one of the possible ways:
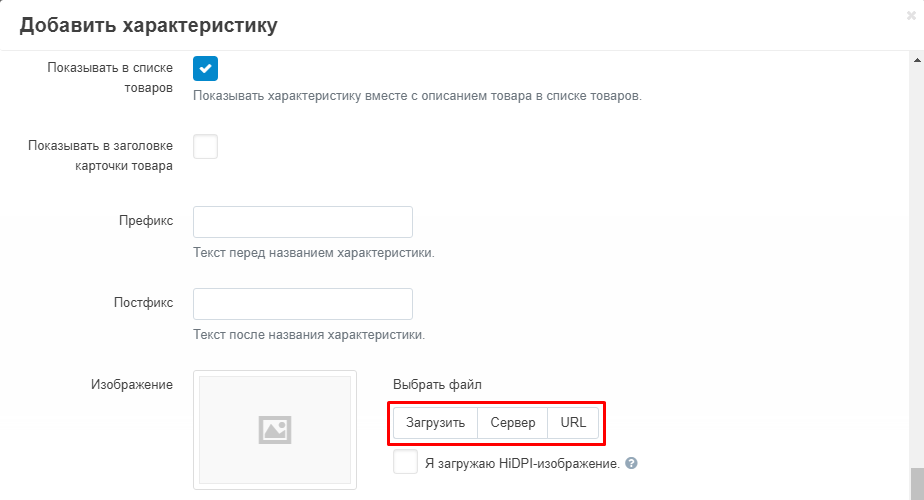
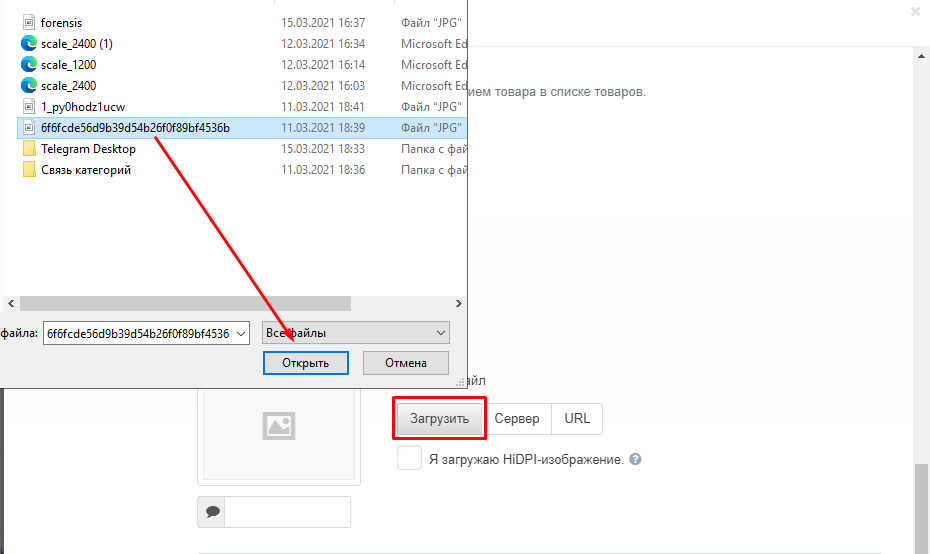
6.1. Click "Download" to select an image from your computer's memory. In the window that opens, select the desired picture and click on the "Open" button.
6.2. To select an image from the server memory, click the "Server" button.

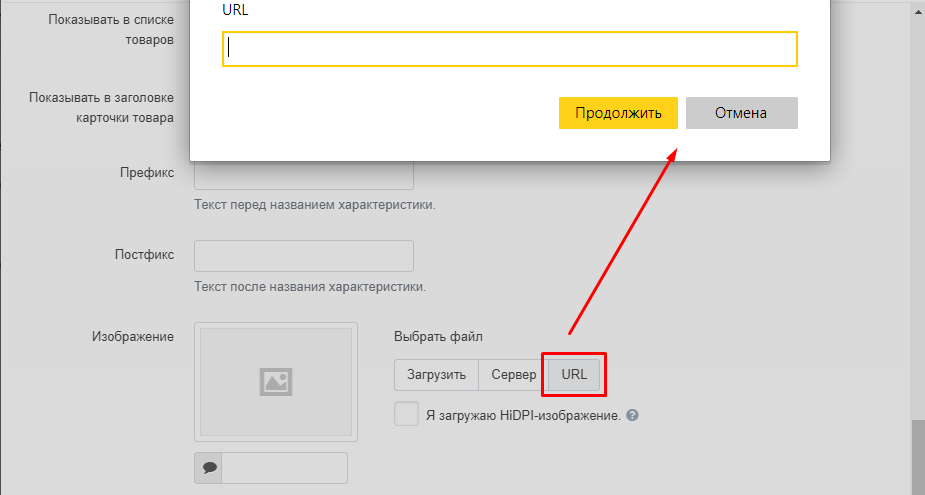
6.3. To enter the URL of the image, click on the "URL" button.
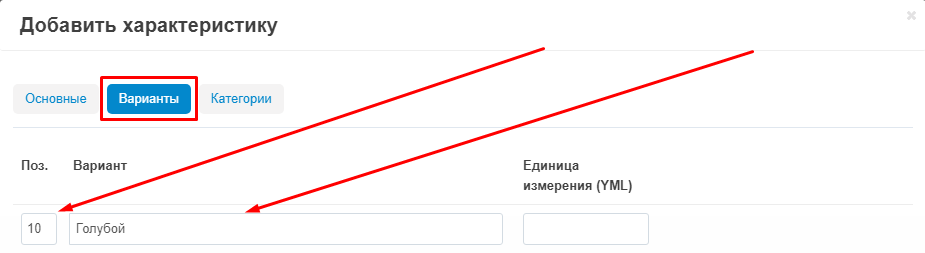
7. Go to the "Variants" tab. Supply the position value ("Pos.") And the variant value ("Variant").
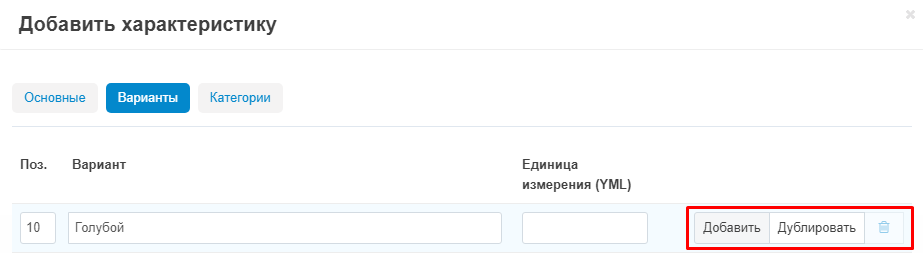
8. To add, copy or delete a variation, use the buttons on the right side of the line.
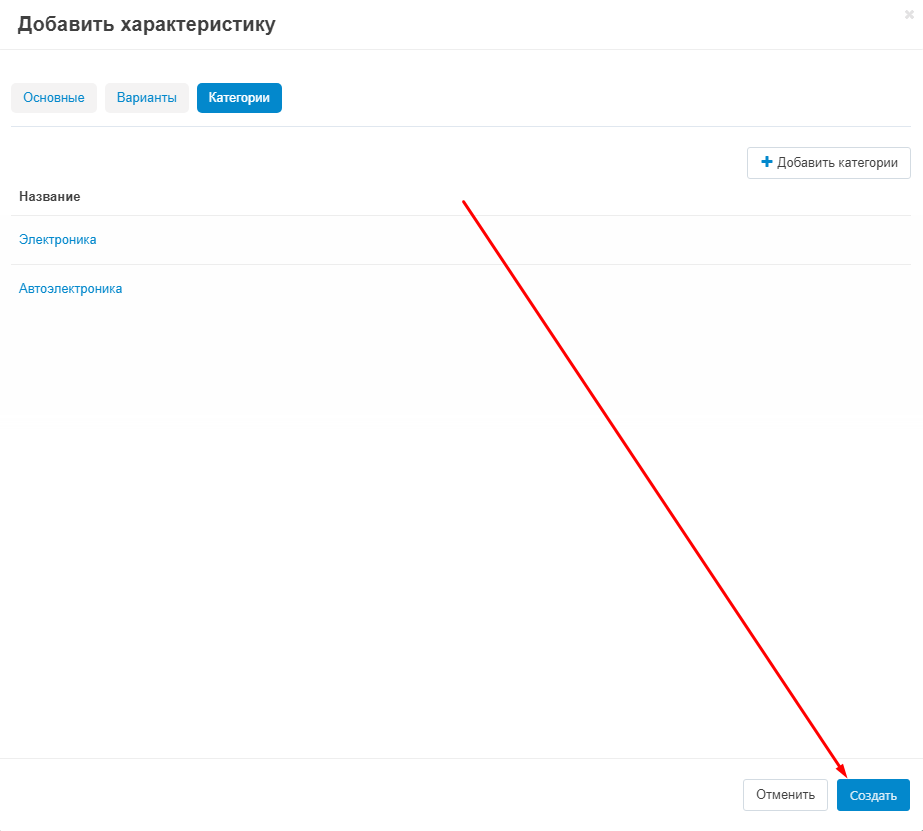
9. Go to the "Categories" tab. By default, the characteristic is available for all categories of the site.
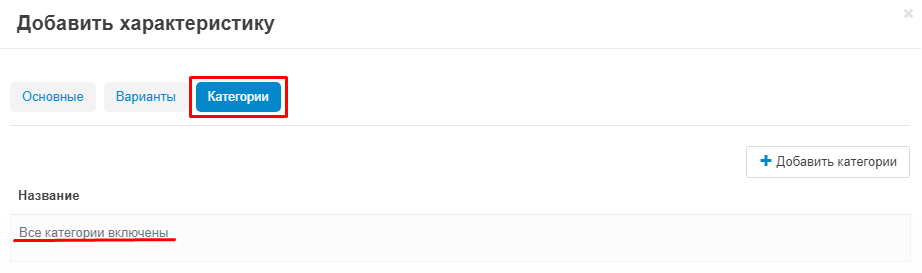
10. To select specific categories, click on the white "Add Categories" button.".
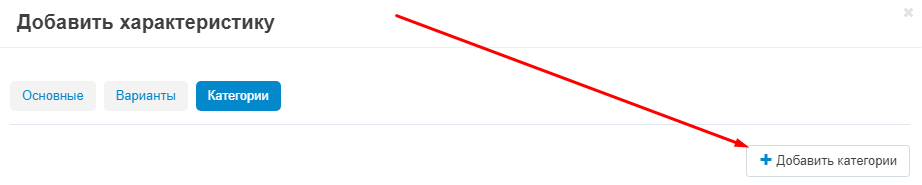
11. In the window that appears, check the boxes for the desired categories and click on the blue "Add Categories" button in the lower right corner.
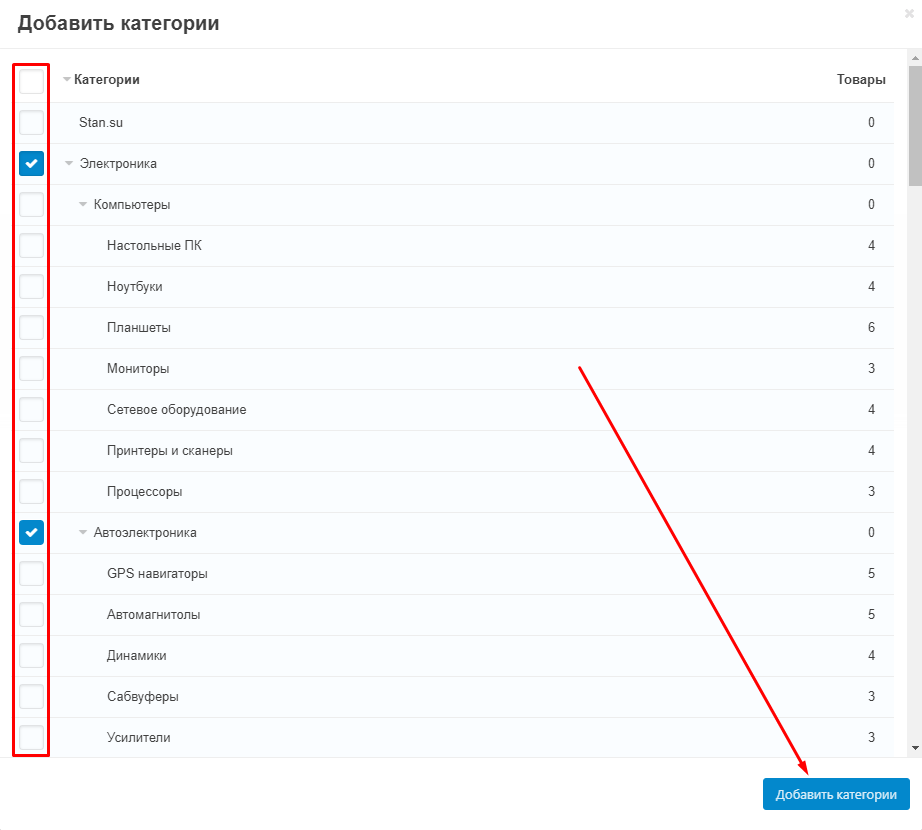
12. To create a category, click on the blue "Create" button in the lower right corner.
CREATING A PRODUCT WITH VARIATIONS
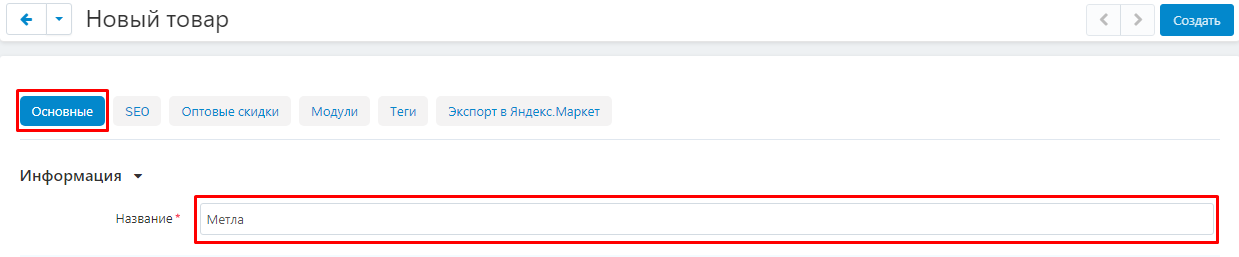
1. To add a new product, go to the "Products" tab and select the "Products" section.
2. On the page that opens, click on the blue button with a plus sign.

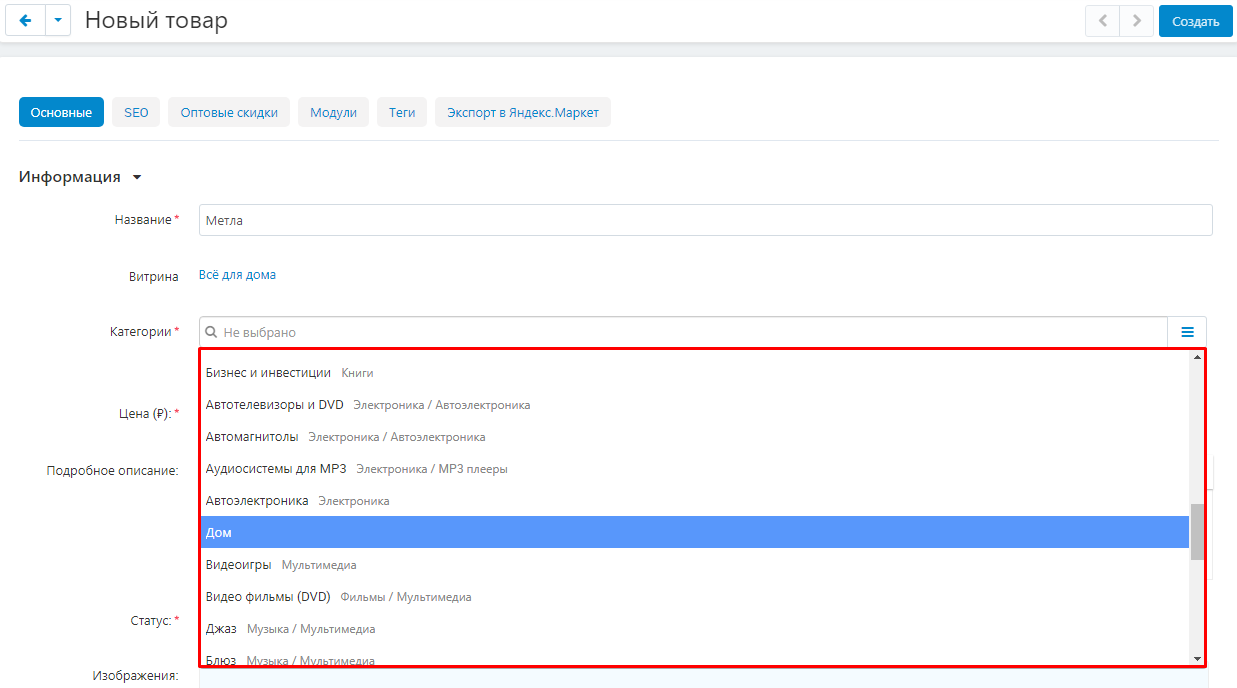
3. Select the "General" tab and enter the name of the product in the appropriate field.
4. In the "Category" item, select or create the desired category.
5. Save your changes by clicking on the blue "New" button in the upper right corner of the panel.

6. Go to the "Features" tab.

7. Fill in the values of the characteristics required for the product.
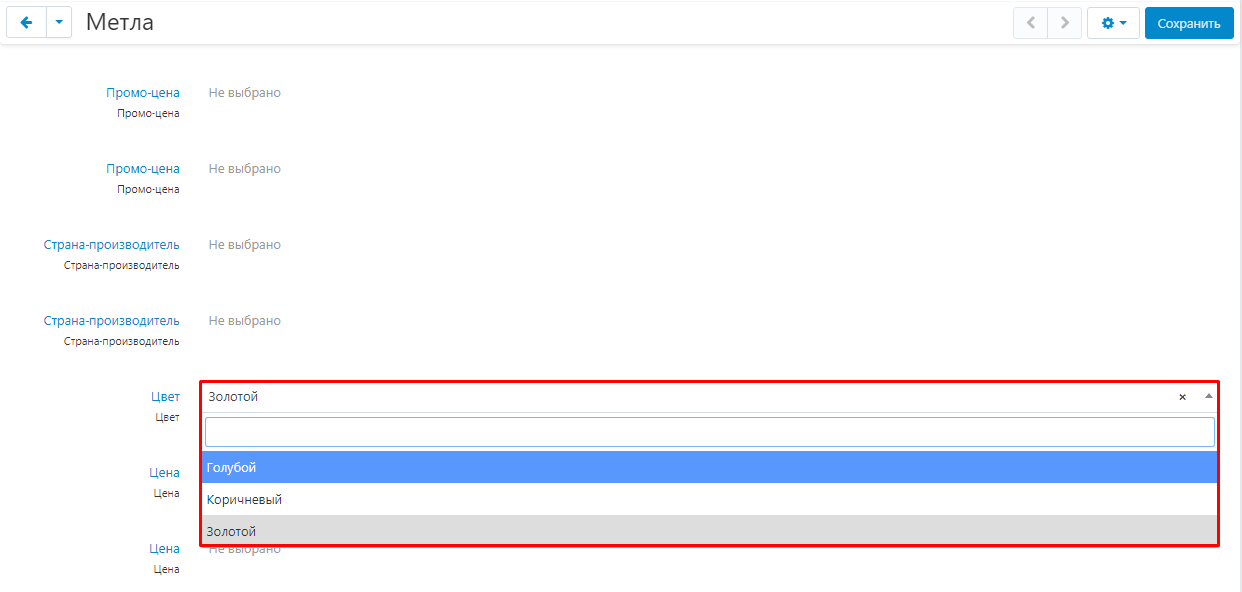
8. Click the "Save" button.

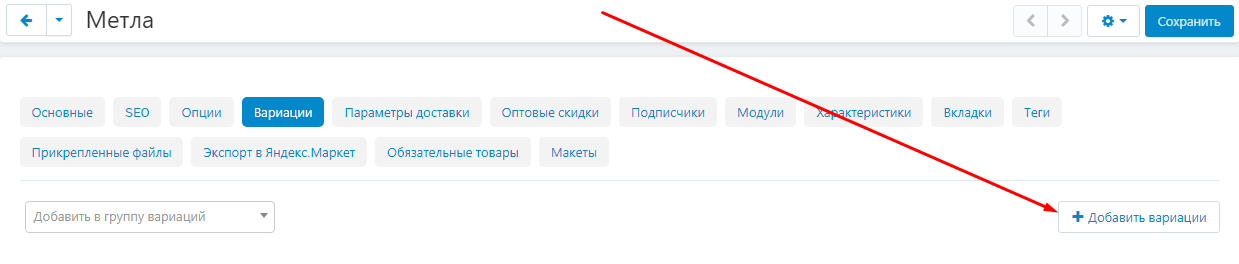
9. Go to the "Variations" tab.

10. To create a new variation, click on the white "Add variations" button.
11. To create variations with existing products, select the Use Existing Products tab. Check the boxes you want and click on the blue "Add Variations" button in the lower right corner.
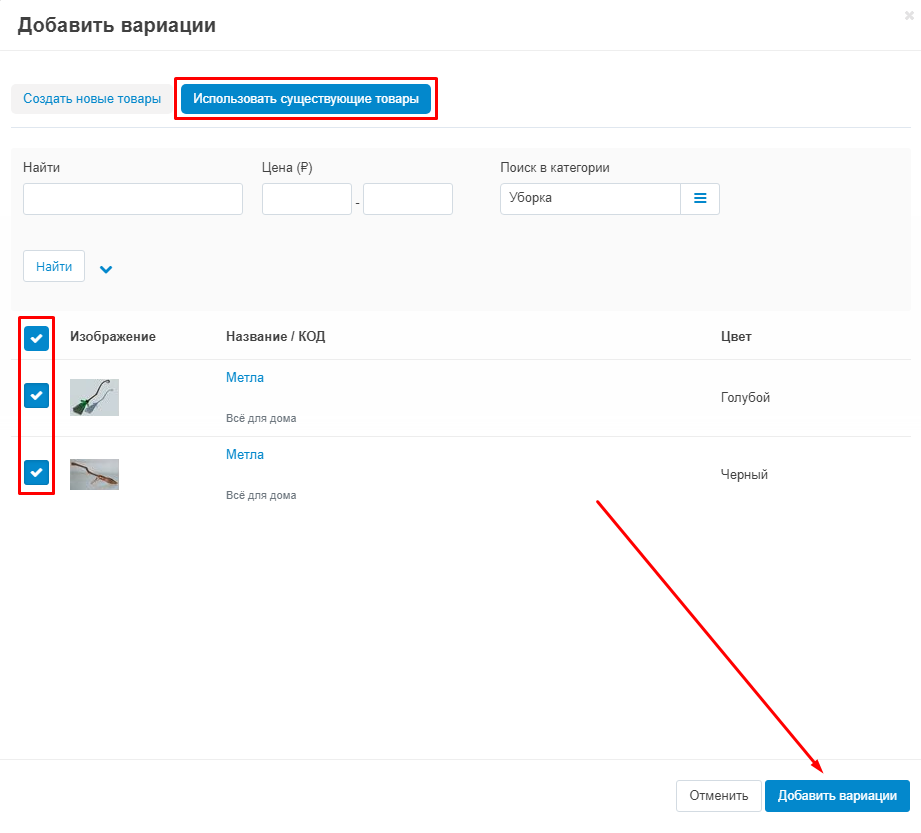
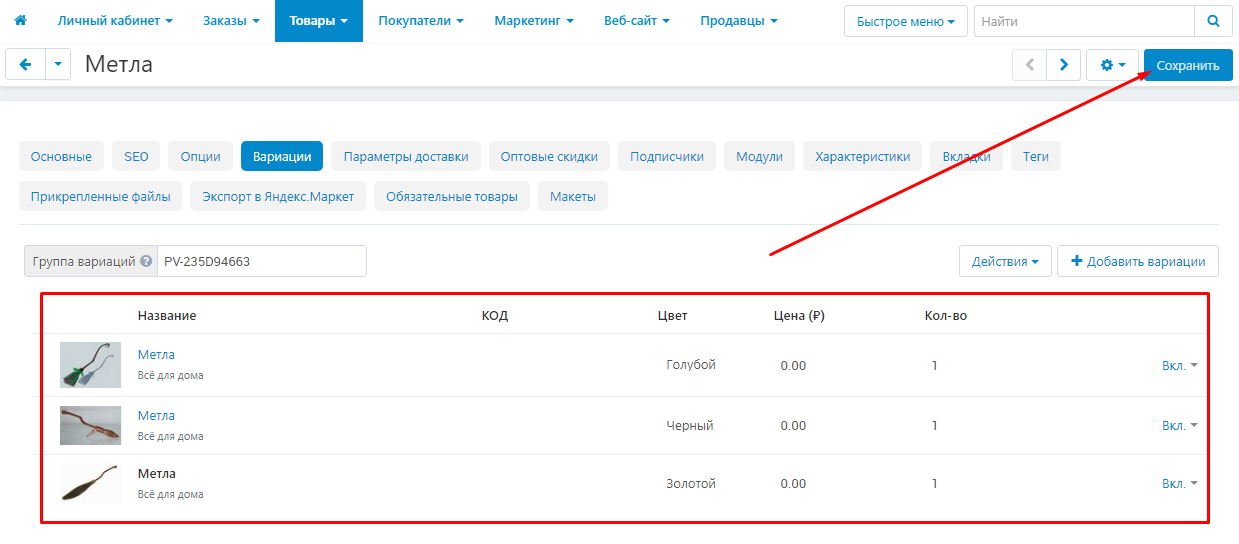
11.1. The selected products will appear in the list of variations. Click the "Save" button.
12. To create product variations by characteristics, select the "Create new products" section. Go to the field with the designation of this characteristic and add all the necessary options there. Then click on the "Create" button in the lower right corner (the button will automatically display the number of created options).
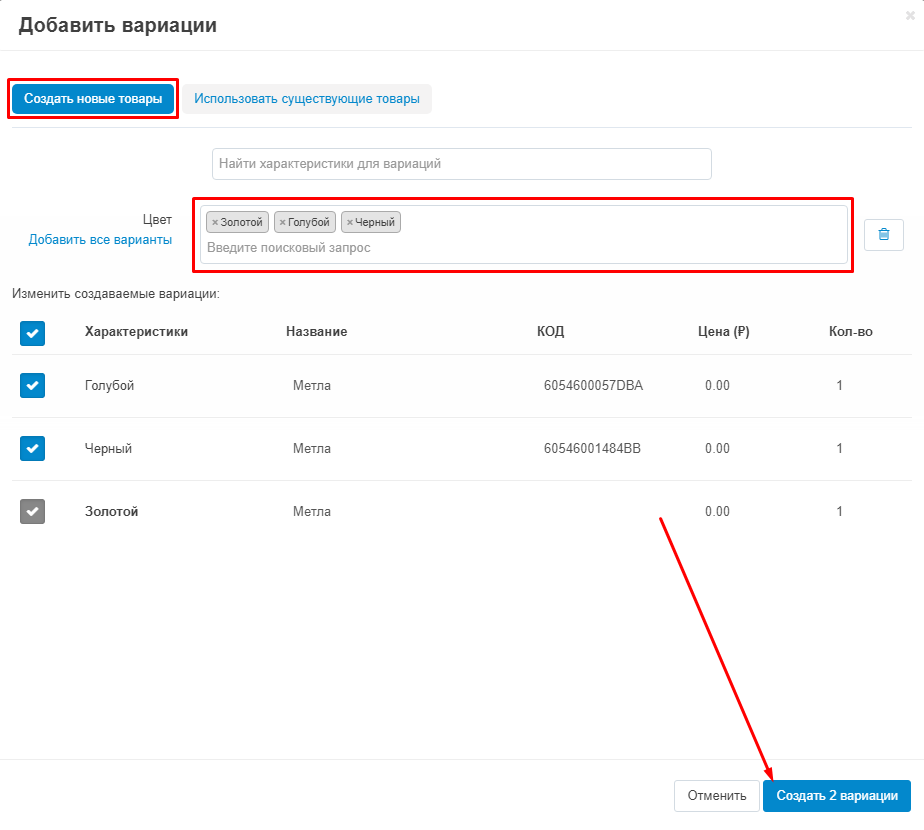
12.1. The module will automatically create products with all possible combinations of the specified characteristics. Click the "Save" button.
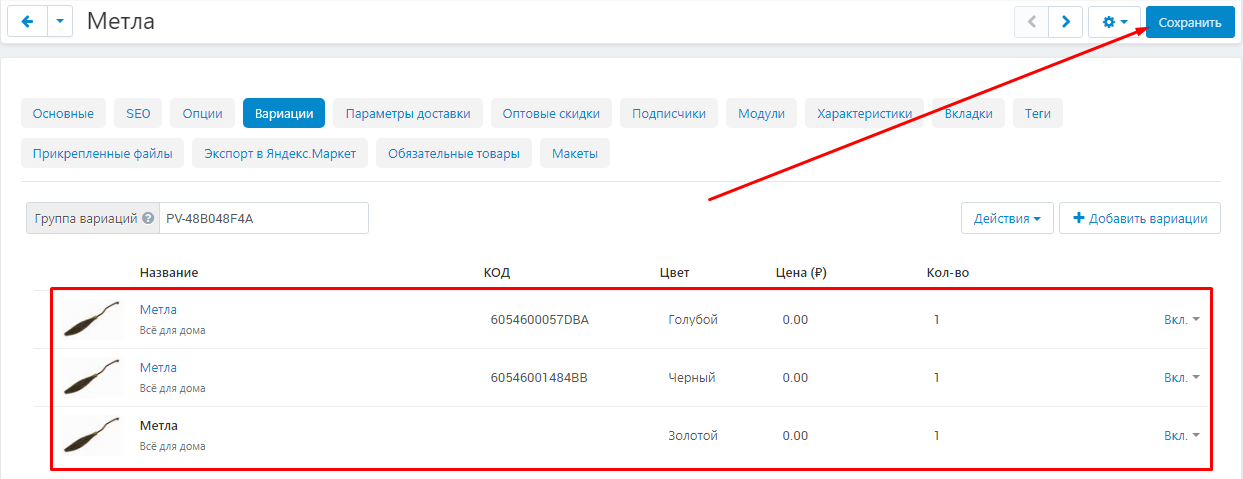
13. Here you can edit the cost of the item in the "Price" column.
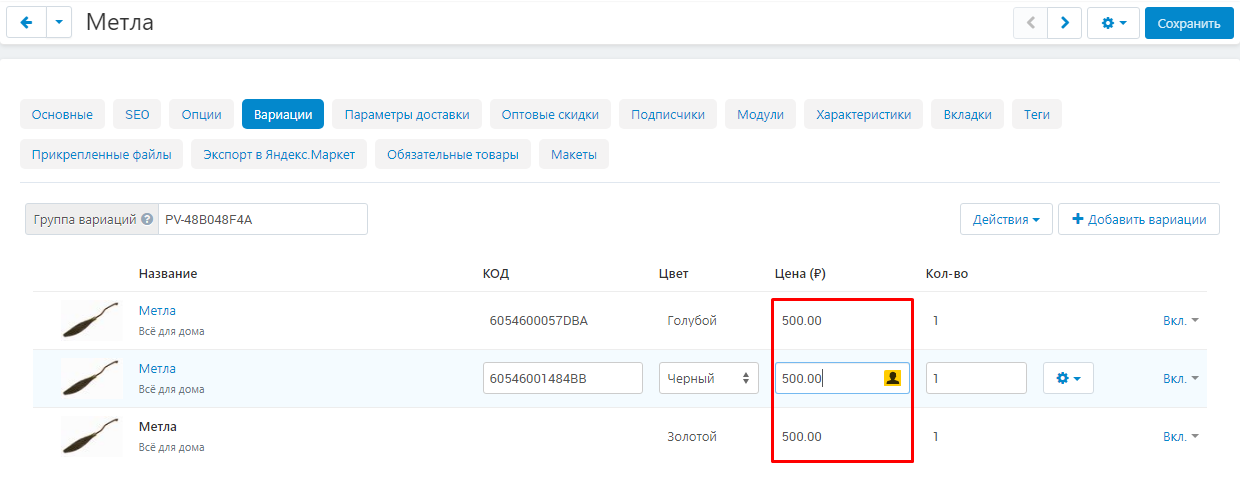
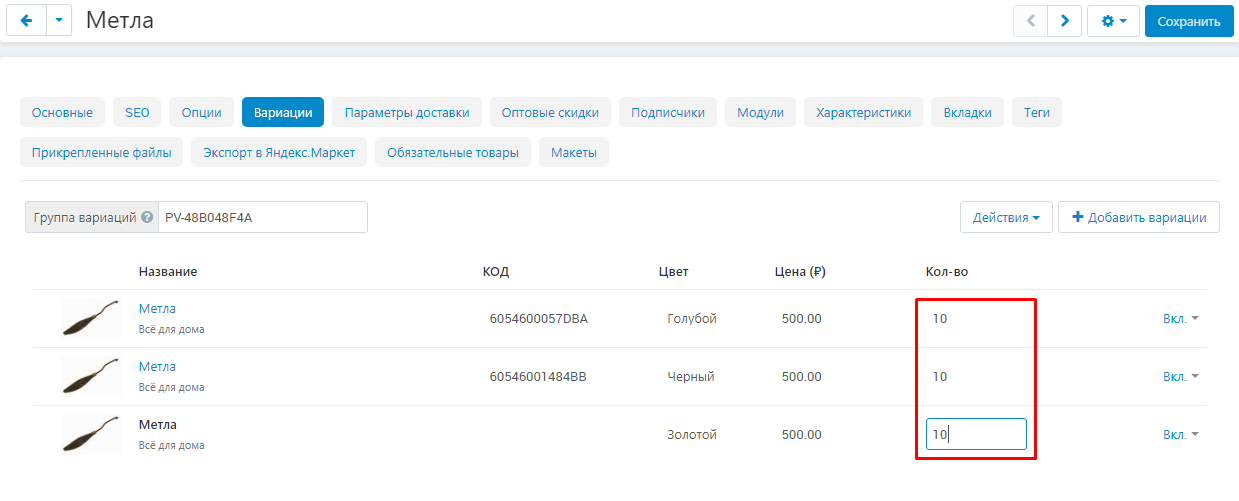
14. You can edit the quantity of goods in stock in the "Quantity" column.
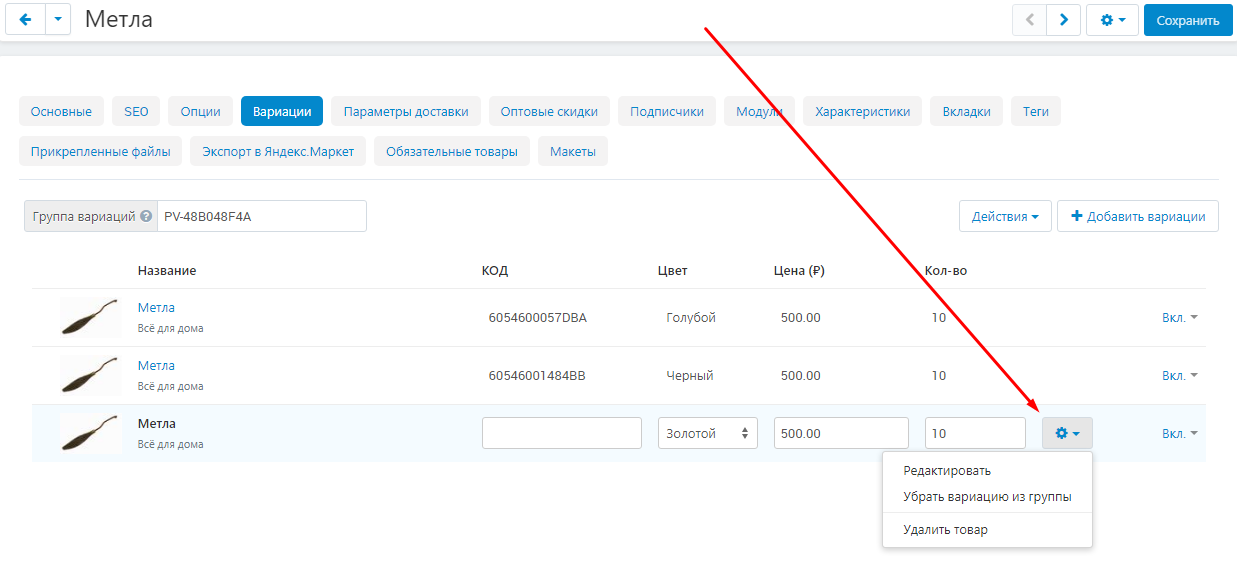
15. To edit a product, click on the gear-shaped button on the right side of the line and select one of the possible functions: "Edit", "Remove variation from group", "Remove product".
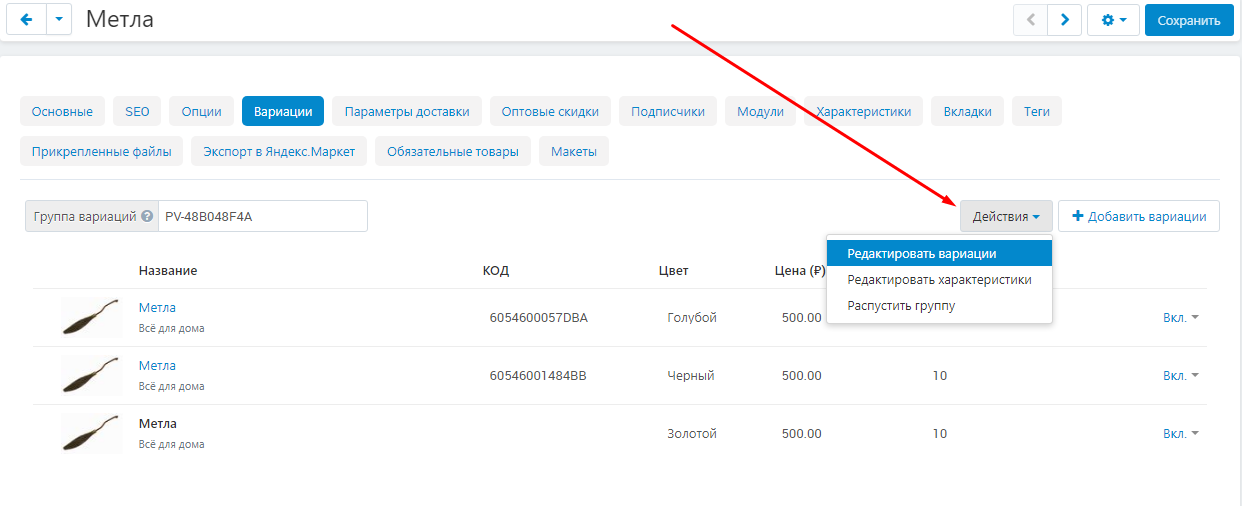
16. To edit all variations, click on the white button "Actions" and select one of the possible actions: "Edit variations", "Edit characteristics", "Dissolve the group".
CREATING OPTIONS
1. To create a new option, go to the "Products" tab and select the "Options" section.

2. On the page that opens, click on the blue button with the plus sign.

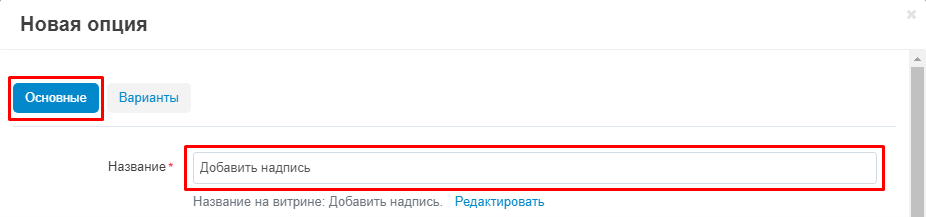
3. The creation window will appear. Go to the "General" tab and enter a name for the new option.
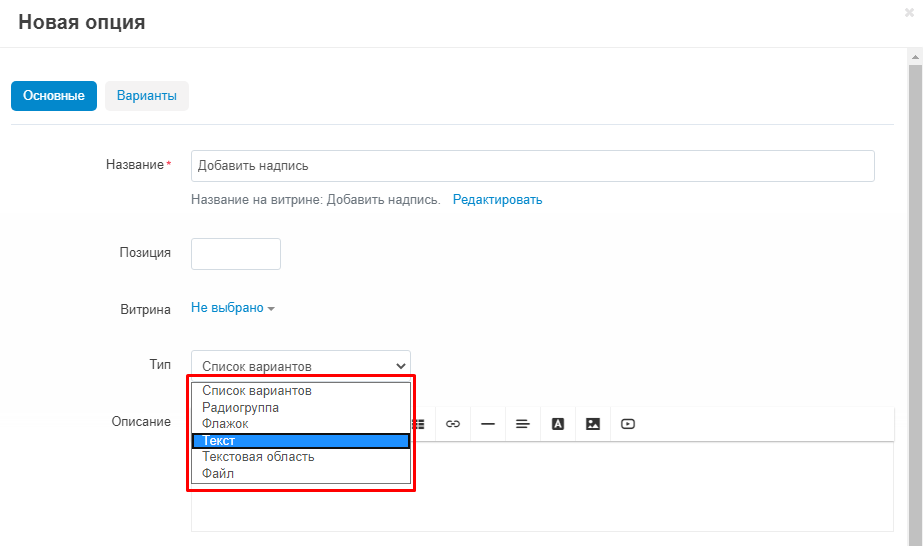
4. In the "Type" section, expand the list and select one of the possible options:
"List of options" - the option will be presented in the form of a list of options from which the buyer chooses what is needed;
"Radio group" - allows you to create a question with multiple answers;
"Checkbox" - creates a small field in which you can put a checkmark;
"Text" - a small text message;
"Text area" - creates a field for entering text;
"File" - creates a field for uploading a file.
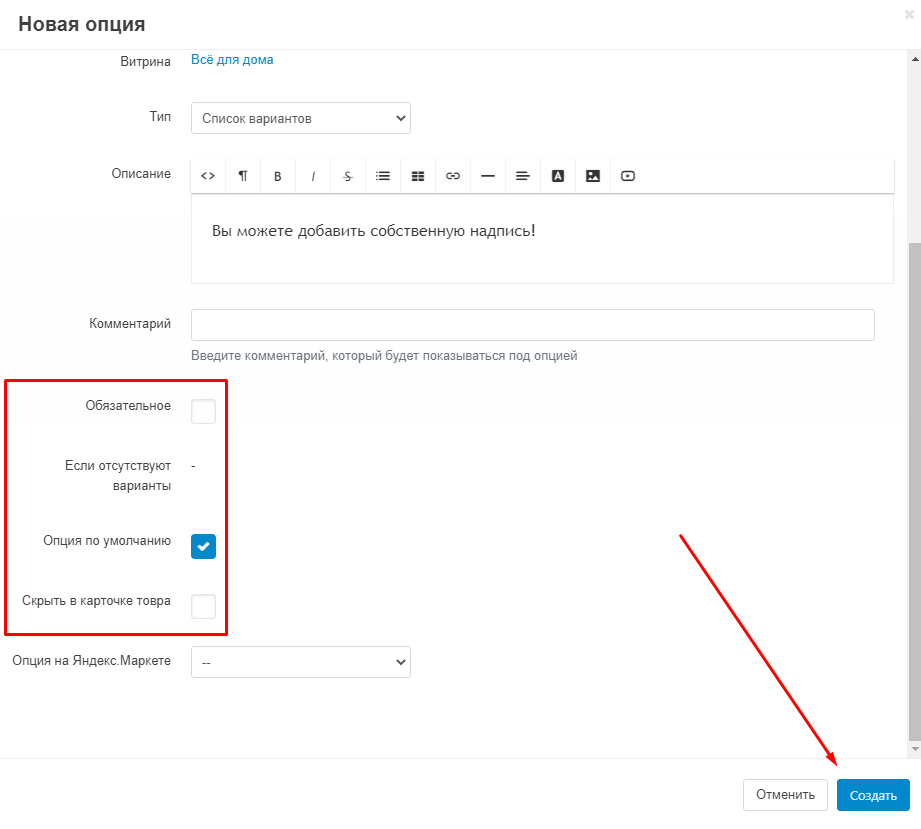
5. If necessary, check the boxes required of the options: "Required", "If there are no options", "Default option", "Hide in the product card".
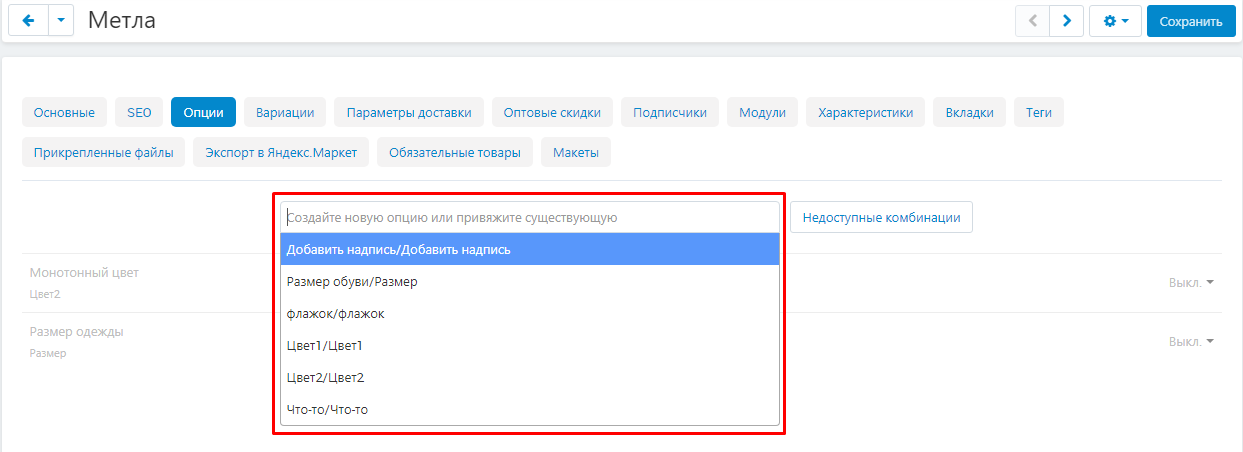
6. Go to the product card to which you want to add an option and go to the "Options" tab.

7. Use the search box to add an option.
8. Save your changes by clicking on the blue "Save" button in the upper right corner of the panel.

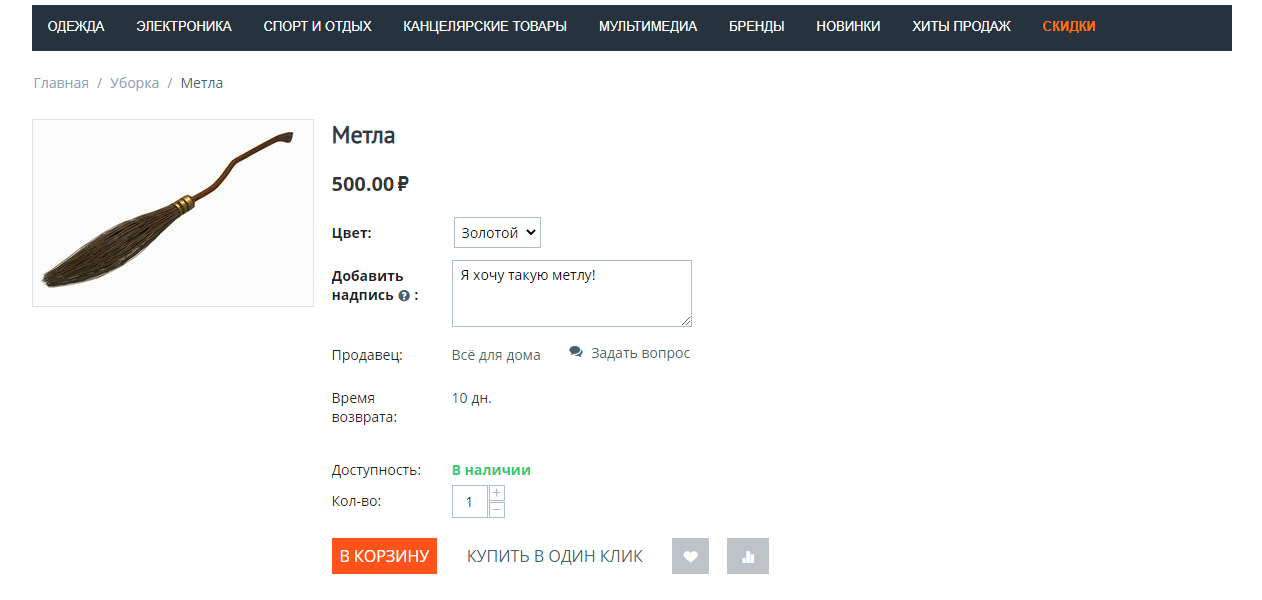
VERIFICATION OF THE RESULT
1. To go to the storefront, click on the blue gear button.

2. The product card will be reflected on the storefront.