SEO analytics PRO
SEO analytics PRO
The module professionally analyzes the site and displays information about errors for the specialist who is promoting the site.
SCOPE OF APPLICATION
Suitable for large marketplaces with a large number of vendors.
APPLICATION EXAMPLE
If the marketplace has a large number of vendors, the administrator can set up an automatic SEO analysis, which will significantly save his time.
SPECIFICATIONS
- Analyzes products, categories, pages, blogs and content;
- Specifies the type of error;
- Analyzes special characters;
- Changes titles.
MODULE SETTINGS
1. To configure a module, go to the "Modules" tab, in the pop-up menu, select "Modules Management" and the "MAURISWEB" section.

2. In the list that opens, select the module you are interested in and click on its name, highlighted in blue or black.

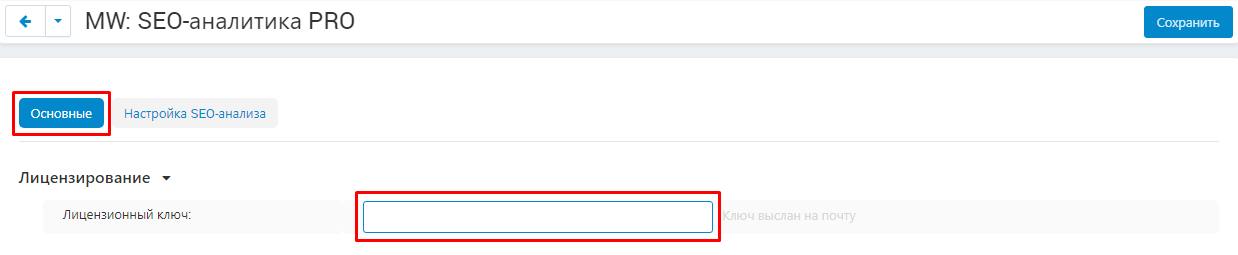
3. On the page that opens, go to the "Licensing" section and in the "License key" field enter the license key that is available in your account at www.maurisweb.ru in the list of purchased modules and also sent to you by e-mail..
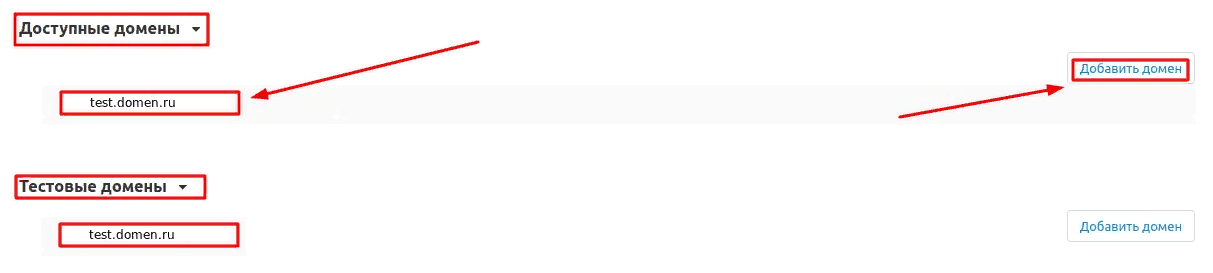
4. In the "Available domains" and "Test domains" sections, check the correctness of the specified domains. You can add additional domains by clicking on the white "Add Domain" button on the right side of the page. The total number of domains should not exceed three.
5. Go down below, select the "Basic settings" section and tick the box "Save data when removing the module" so as not to lose them when reinstalling the module..

6. After the SEO analysis, put a tick in the box "Hide the" Site analysis "button while working with content", then it will no longer be needed.

7. Go to the "SEO analysis settings" tab.
Setting up SEO analysis involves setting values at which, as a result of the analysis, the field values will be optimal (they will not have a red mark next to the field name).

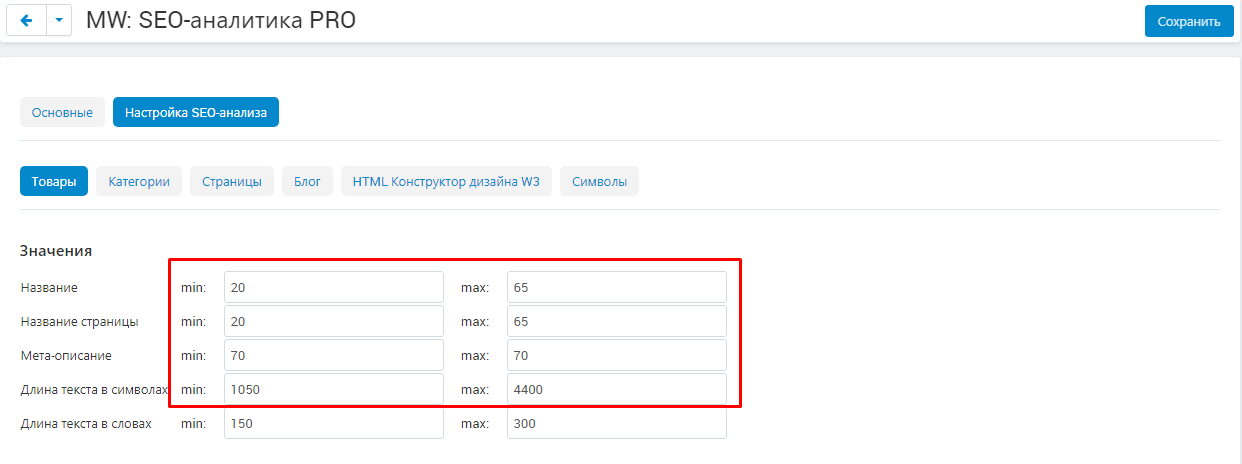
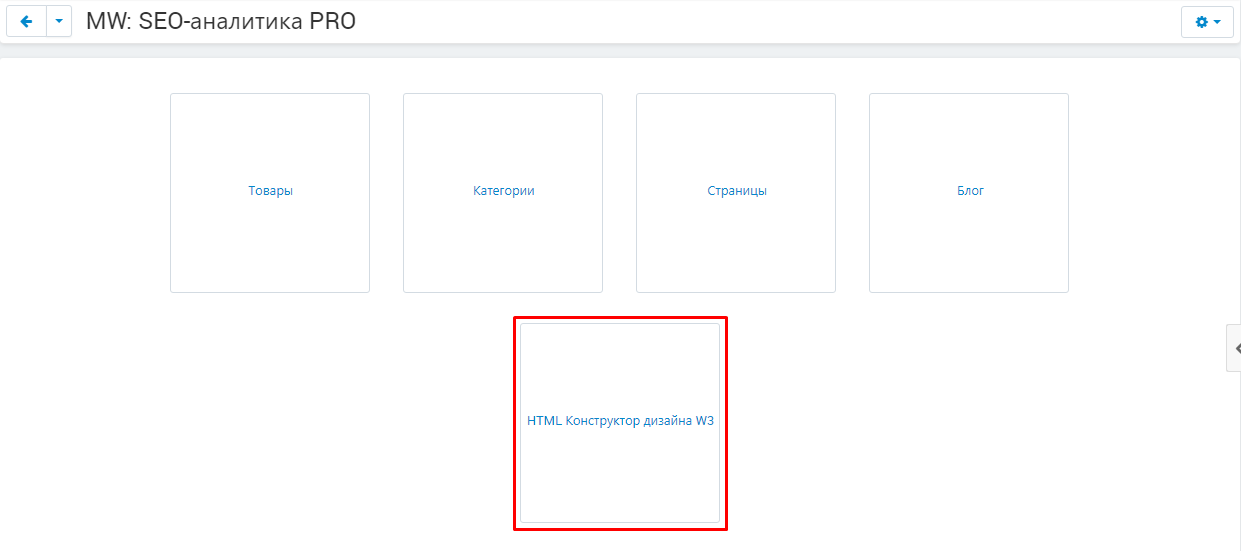
8. For the "Products", "Categories", "Pages", "Blog" and "HTML Design Builder W3" tabs, the procedure for setting up the analysis is the same. Except there are fewer options in the HTML W3 Design Builder tab.

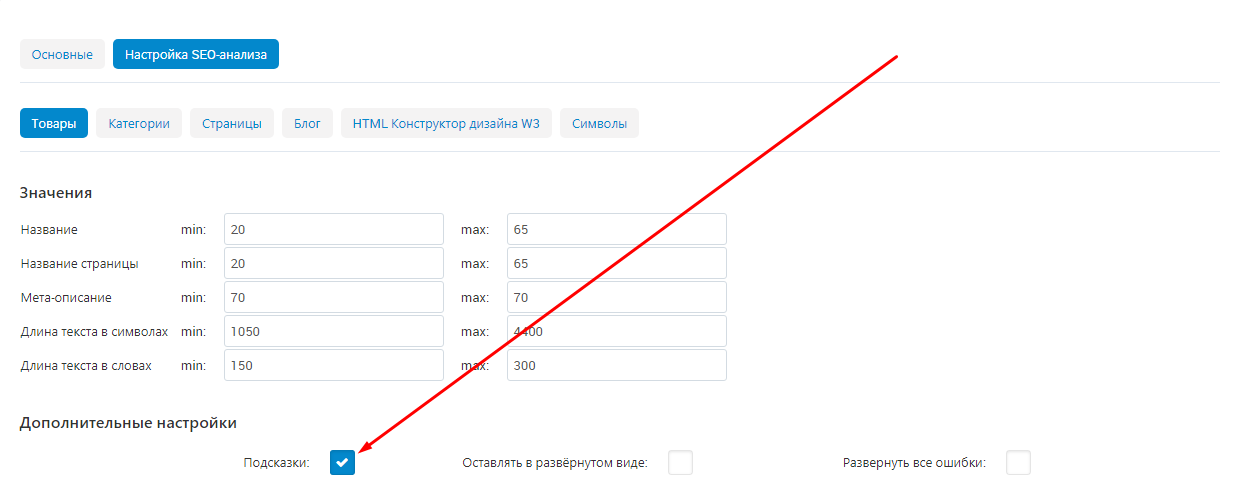
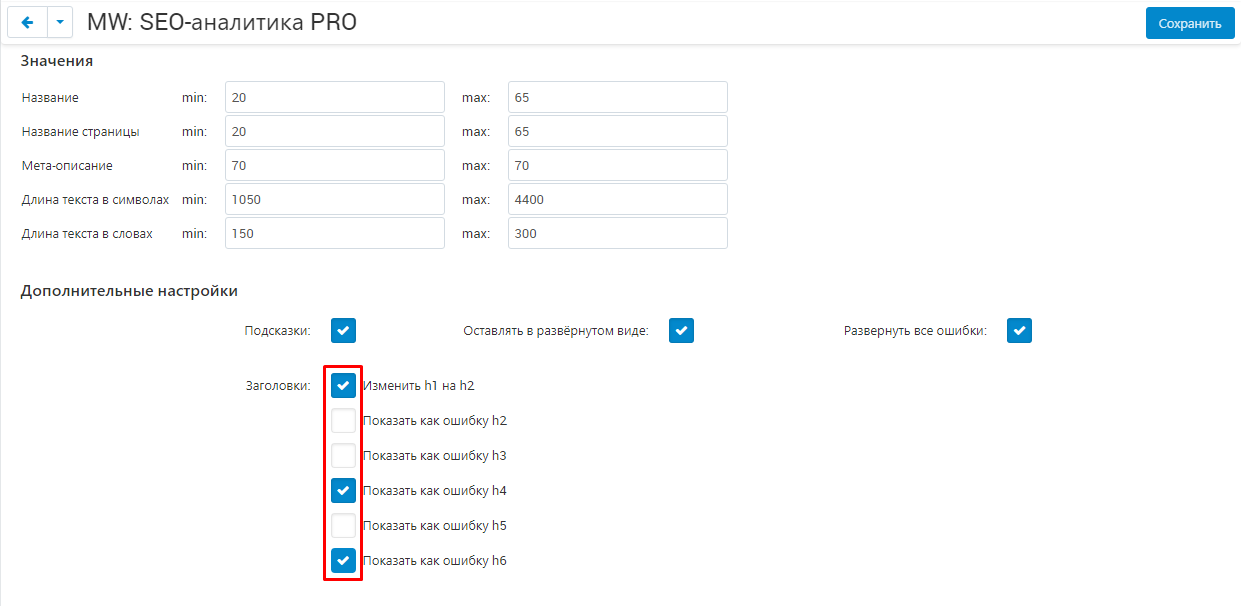
9. In the "Values" section, set the minimum (min) and maximum (max) number of characters, within which no error will be generated for such characteristics as "Title", "Page title", "Meta description" and "Text length in symbols "
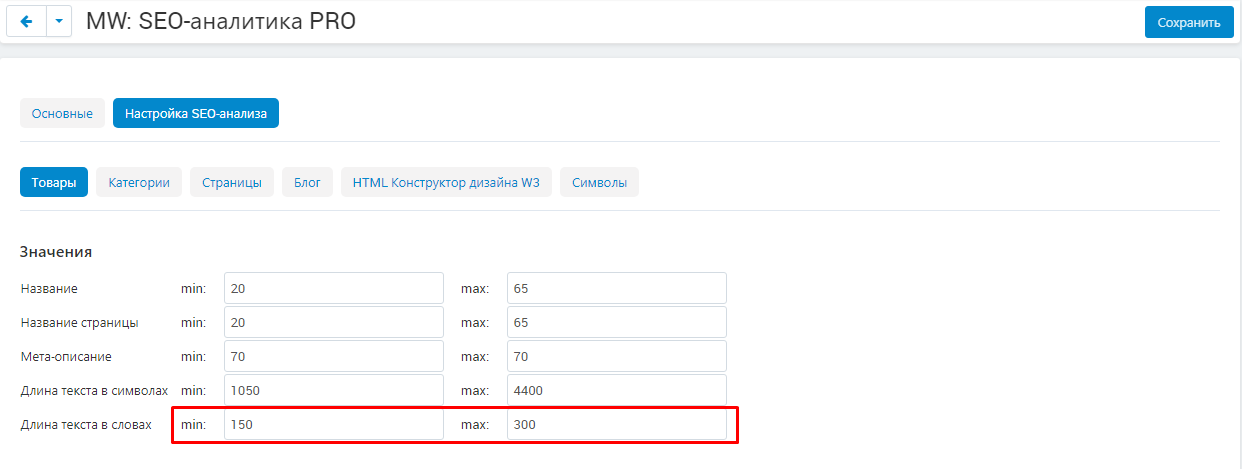
10. Specify the minimum (min) and maximum (max) number of words, within which an error will not be generated for the "Number of words" characteristic.
11. Go to the "Advanced Settings" section and check the "Prompts" checkbox to display tooltips as question marks next to the field names.
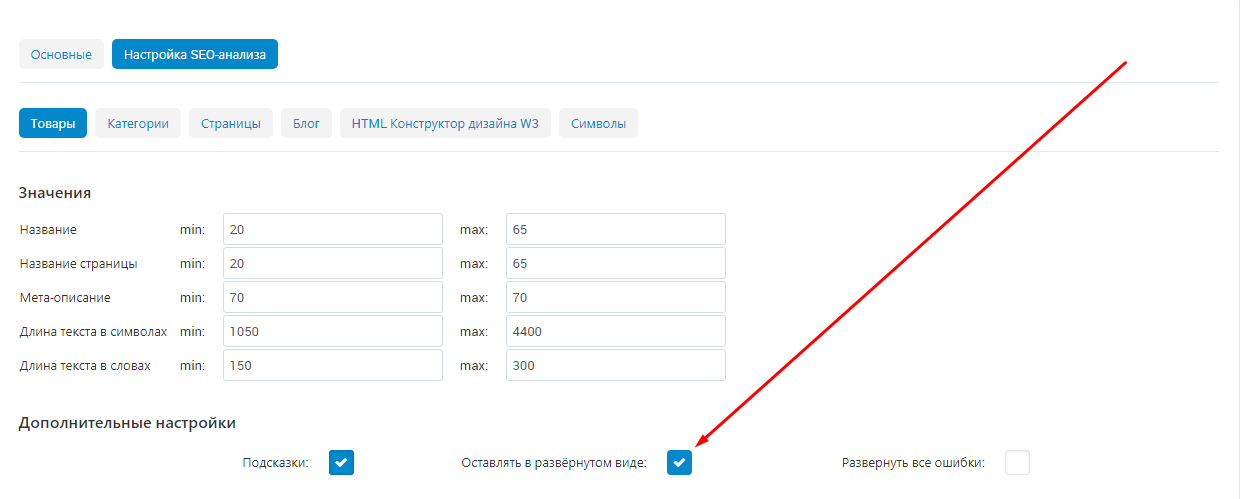
12. Check the box "Leave unfolded" so that the result of the SEO analysis of an already viewed product / category / page does not collapse when you switch to another line.
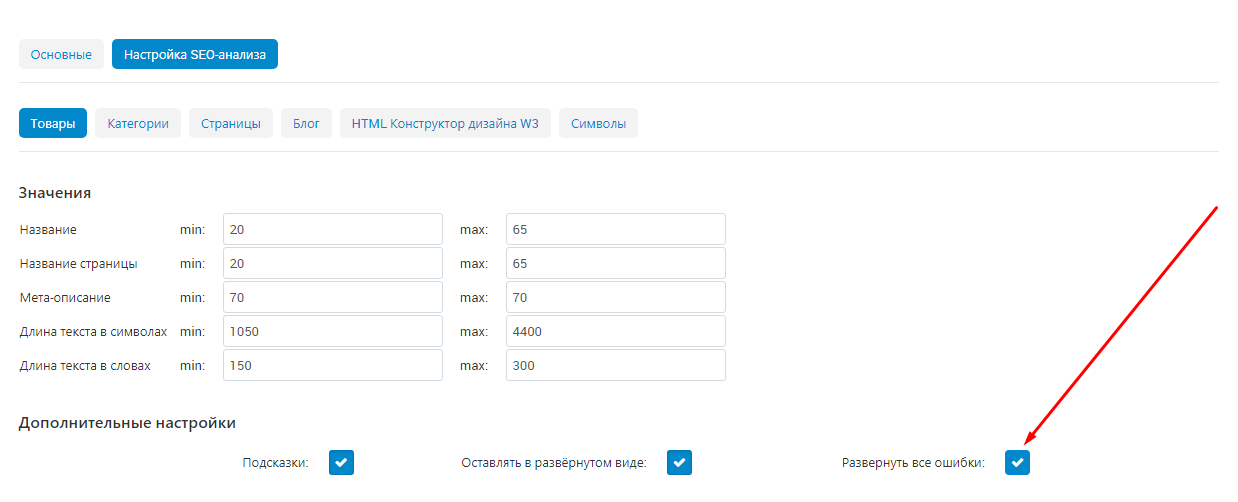
13. Select the "Expand all errors" checkbox to automatically expand all lines of analysis that have errors.
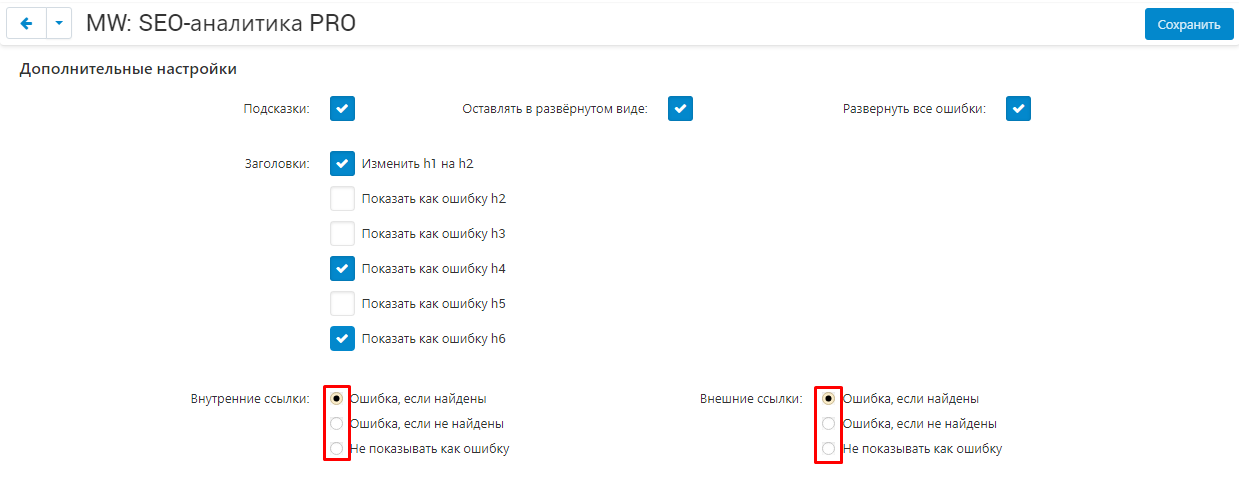
14. Proceed to the "Headings" section. Check the box "Change h1 to h2" so that all h1 headers are automatically changed to h2.
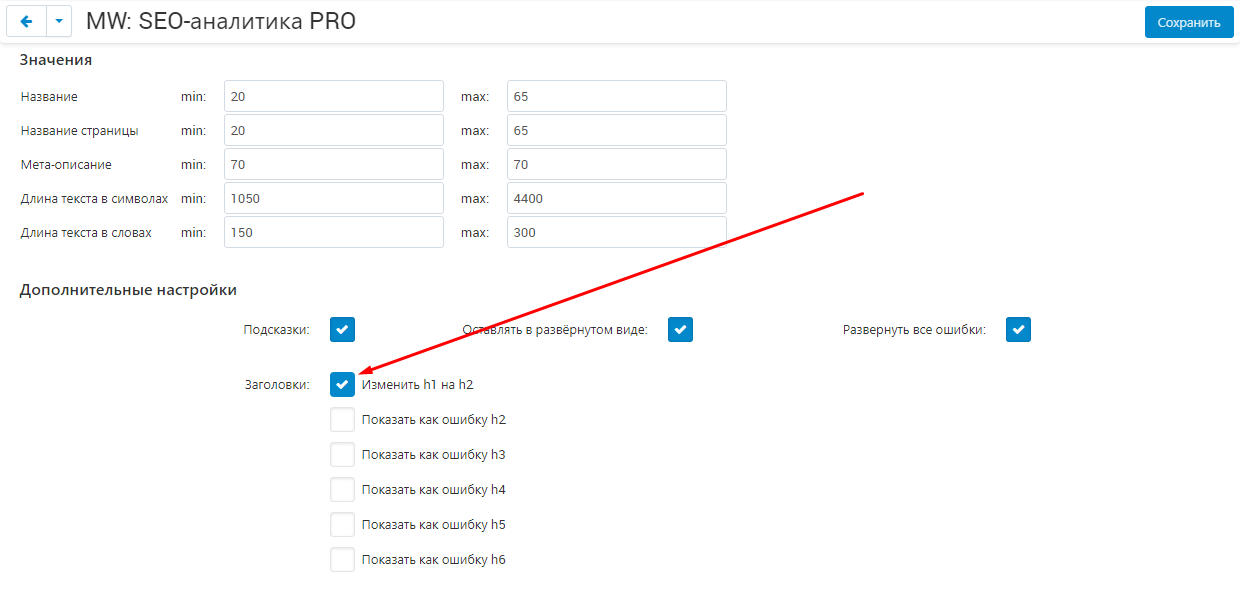
15. Now mark the headings that will be displayed as an error during SEO analysis.
16. For the items "Internal links" (links to other pages of the same site) and "External links" (links leading to other sites), select one of the three options for SEO analysis:
- "Error if found"
- "Error if not found"
- "Don't show as error"
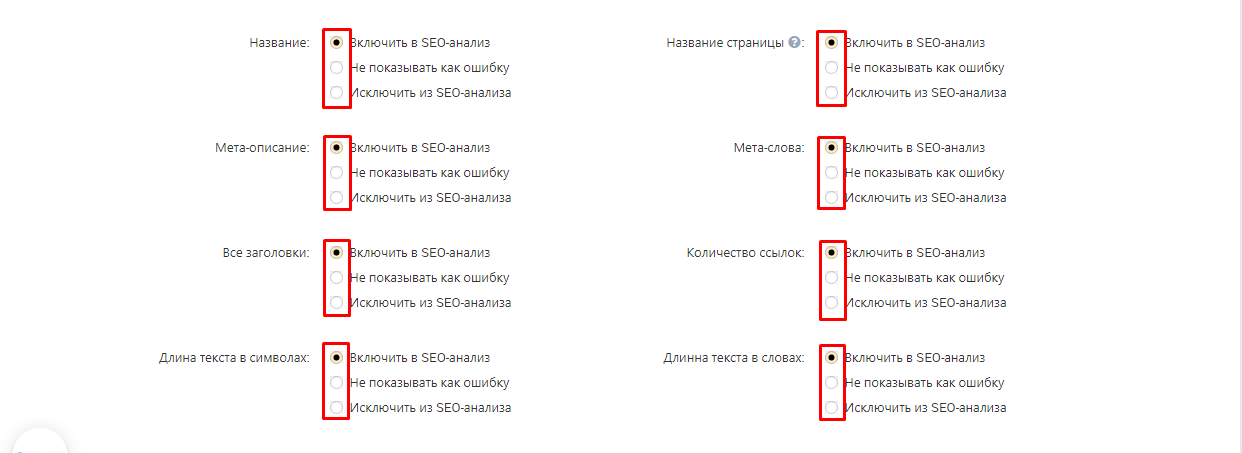
17. For the items "Page Title", "Title", "Meta Description", "Meta Words", "All Headings", "Number of Links", "Text Length in Characters", "Text Length in Words" select one of three options for SEO analysis:
- "Include in SEO analysis"
- "Don't show as error"
- "Exclude from SEO analysis"
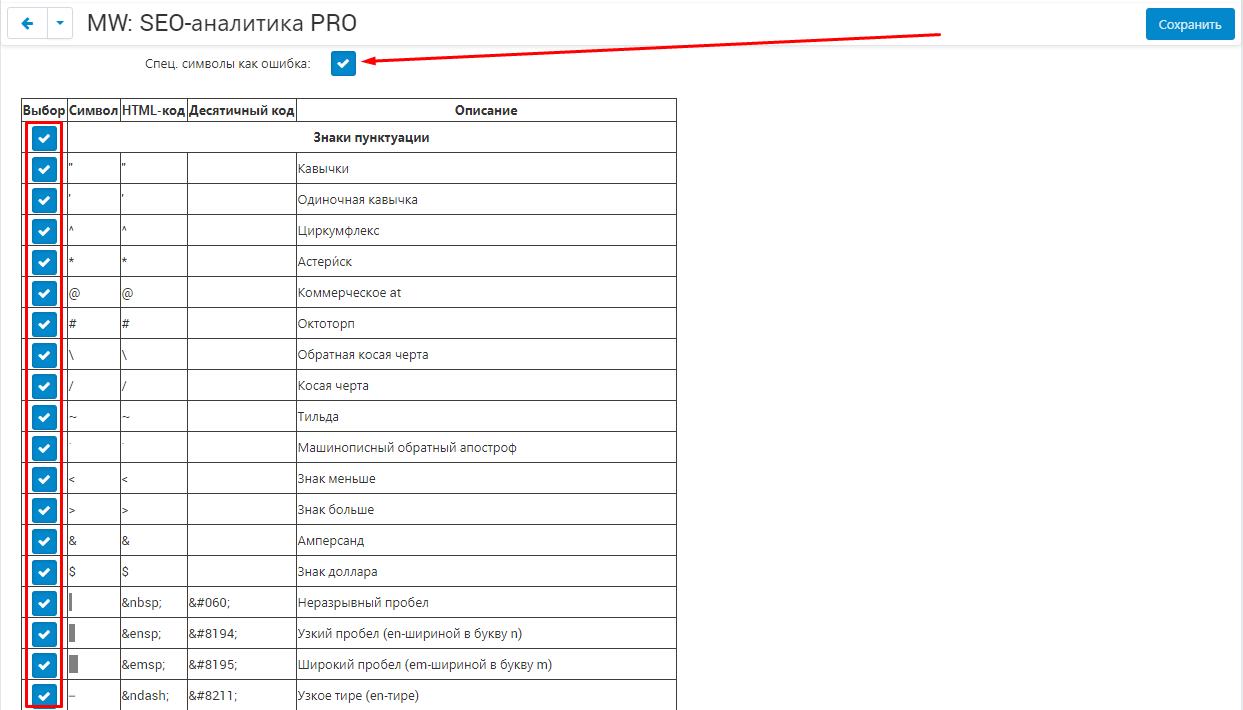
18. Go to the "Symbols" tab.

19. Check "Special symbols as error" so that symbols from the table, opposite to which there is a checkmark, will be displayed as an error during SEO analysis. Also, you can remove the check marks from the table on those symbols that you may need and the system will not recognize them as an error.
20. Save the module settings by clicking on the blue "Save" button in the upper right corner of the panel.

PRIVILEGE
1. To set up privileges, go to the "Customers" tab and select the "User Groups" section.
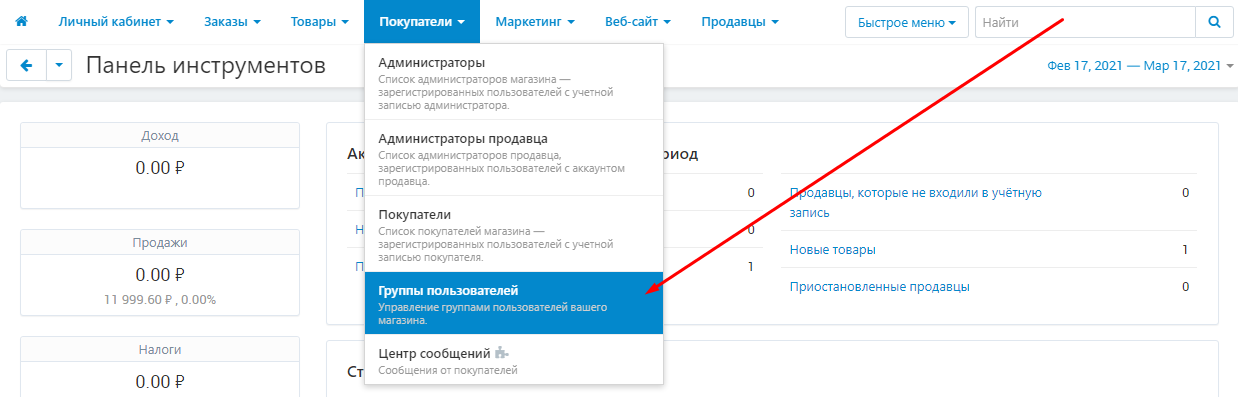
2. In the list that opens, select the required groups. To do this, you need to click on its name, highlighted in blue.

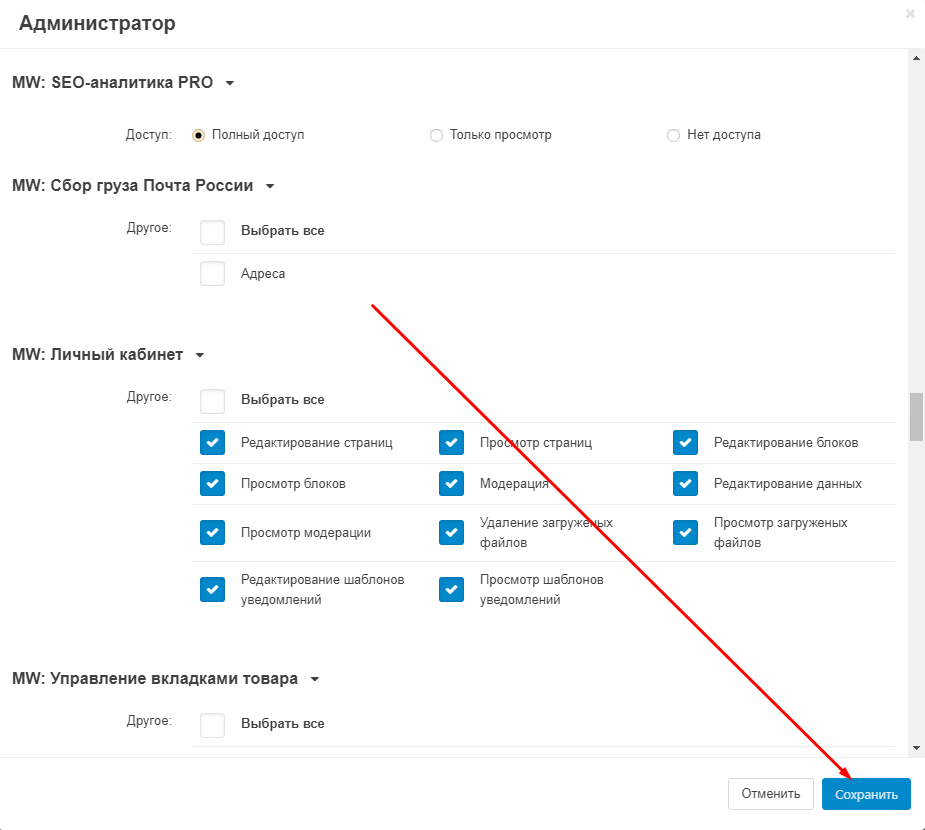
3. Go to the "SEO Analytics PRO" section and select one of the possible access options:
"Full access" - provides access to viewing and editing;
"View only" - opens access only to view;
"No access" - denies access to the functionality of the module.

4. To save your changes, click on the blue "Save" button in the lower right corner.
FUNCTIONALITY OF THE MODULE
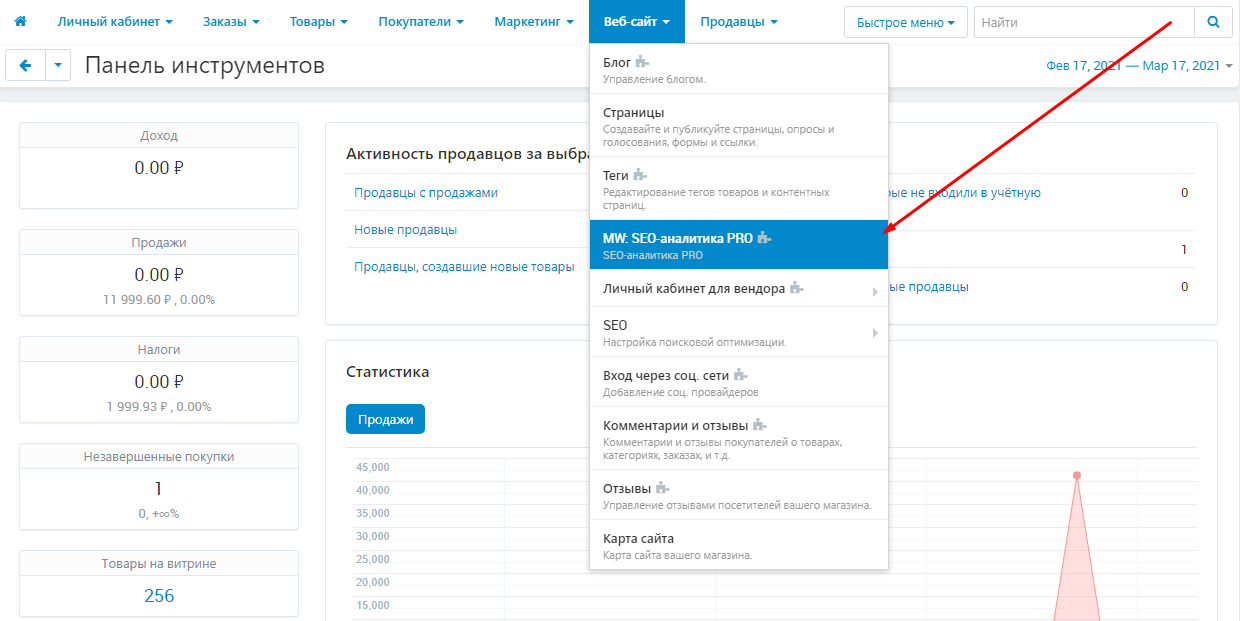
1. To conduct an analysis, go to the "Website" tab and select the "MW: SEO Analytics PRO" section.
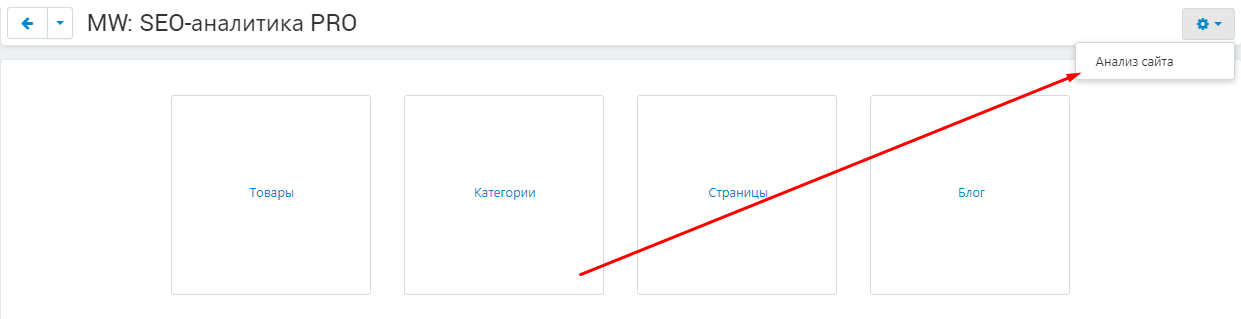
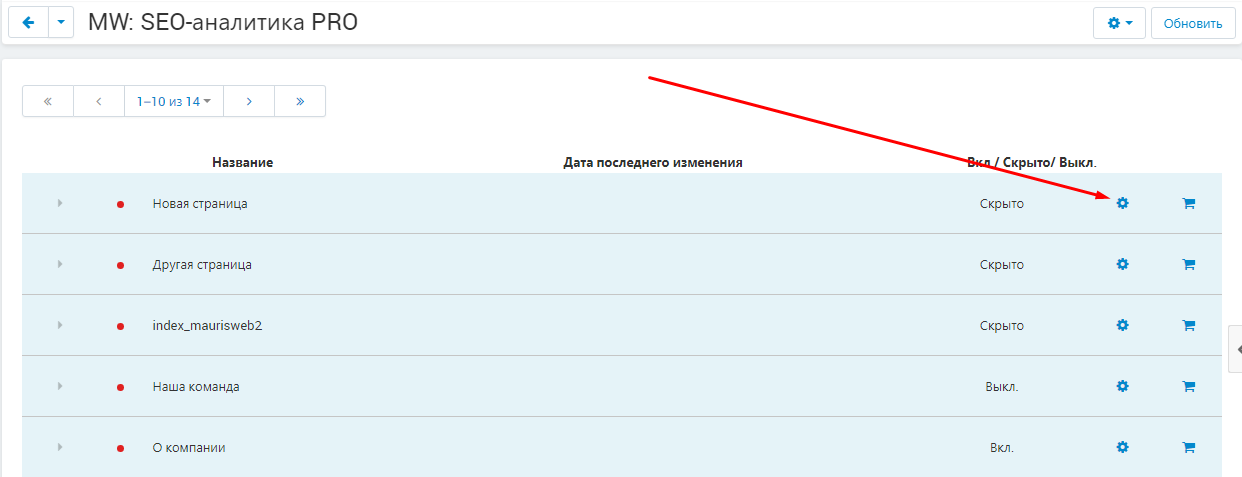
2. On the page that opens, click on the gear-shaped button in the upper right corner. After that, the inscription "Site analysis in progress!" Will pop up. Wait for the process to complete.
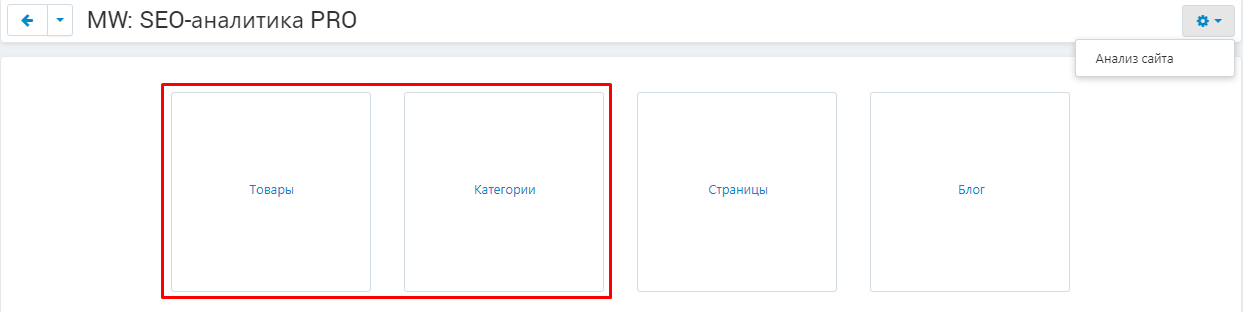
PRODUCTS AND CATEGORIES
1. To view an analysis of products or categories, go to the Products or Categories section. To do this, click on their name, highlighted in blue.
2. To quickly find the required list of products or categories, use one of two methods:
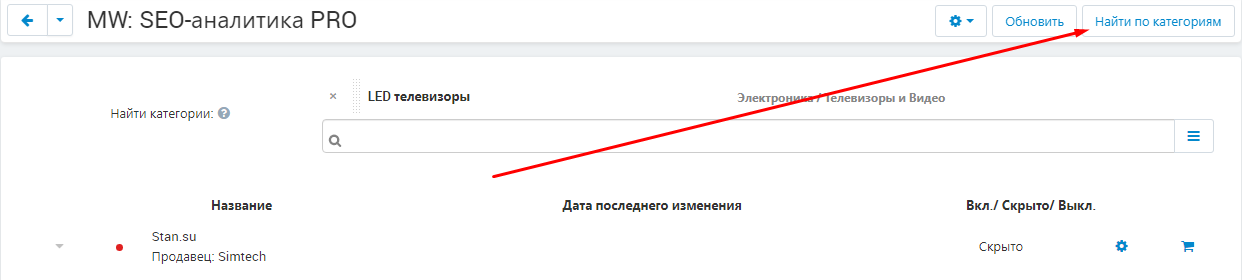
2.1. Enter a name in the "Find Categories" field, add a category, or select from those found.

2.2. Click on the button to the right of the line.

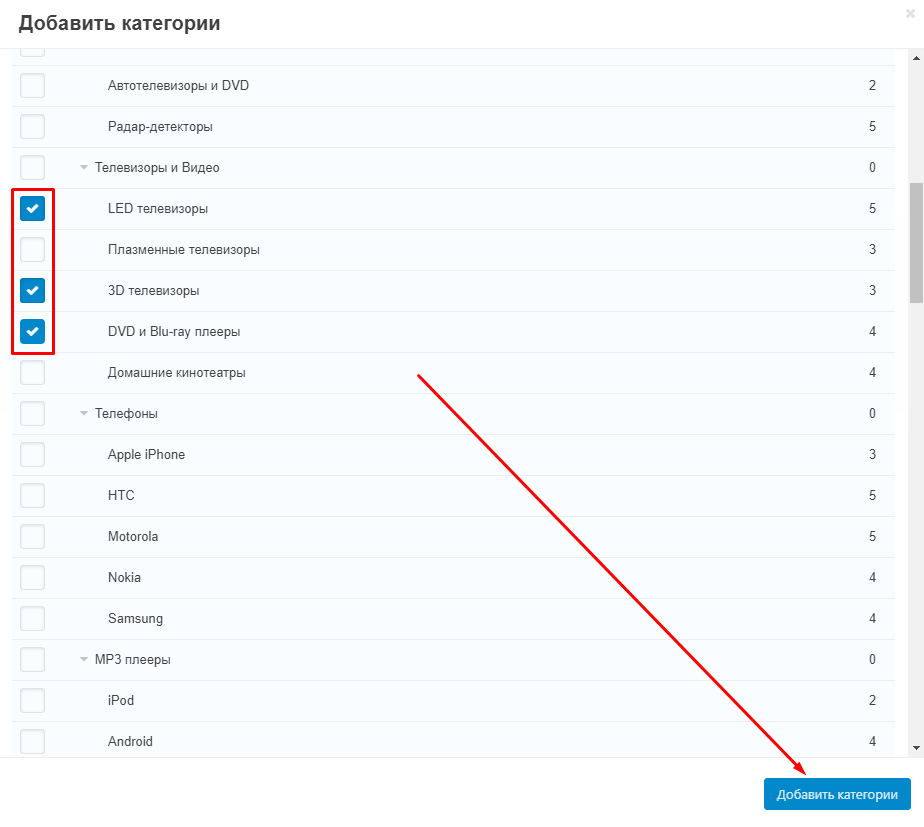
2.3. An additional window will open in which you can select the desired categories by ticking them. And after clicking on the blue "Add Categories" button in the lower right corner.
3. After selecting the desired categories, click on the white "Find by Category" button to open the SEO analysis results.
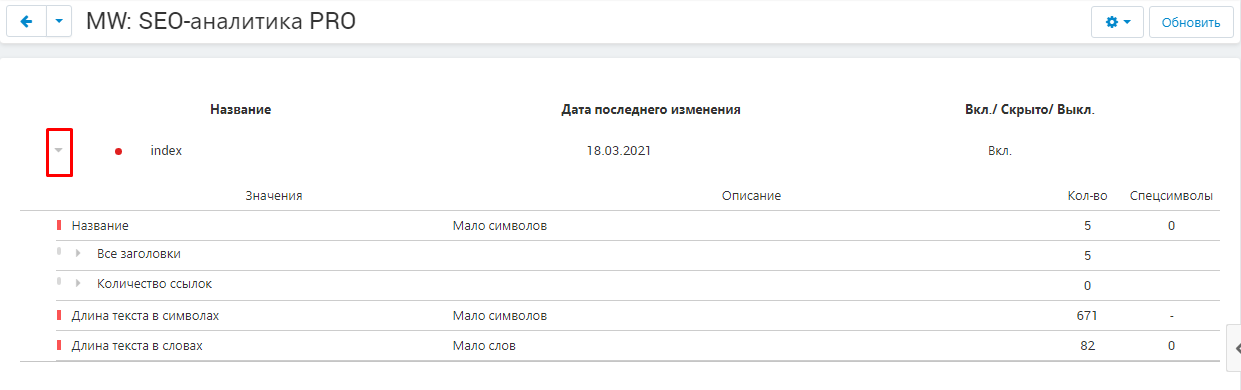
4. The page will refresh. Verified products or categories will be workable, but unverified ones will be absent until they are checked. Lines with errors are marked with red circles.
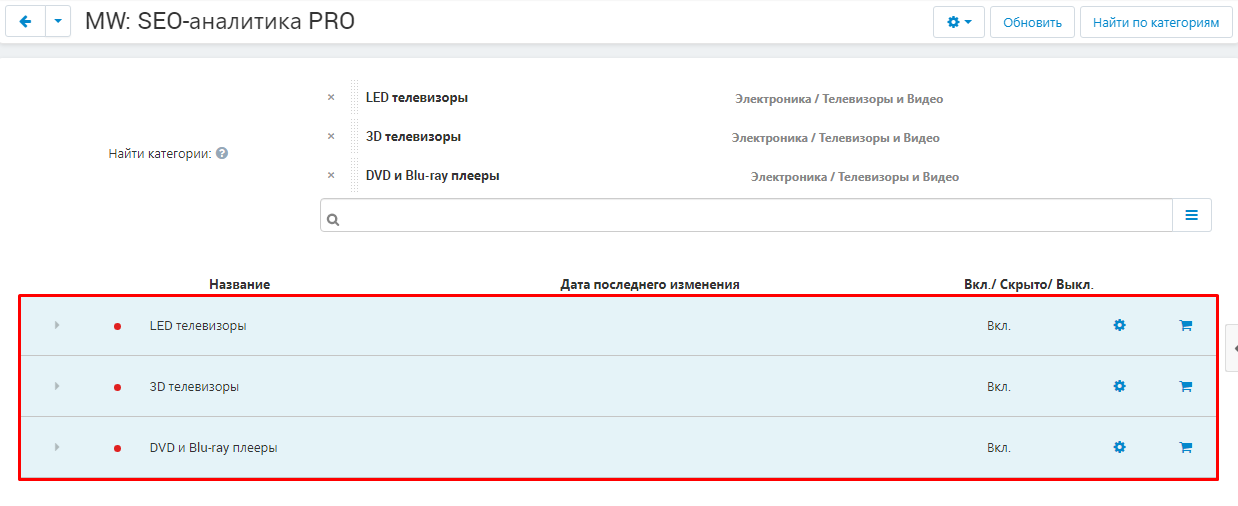
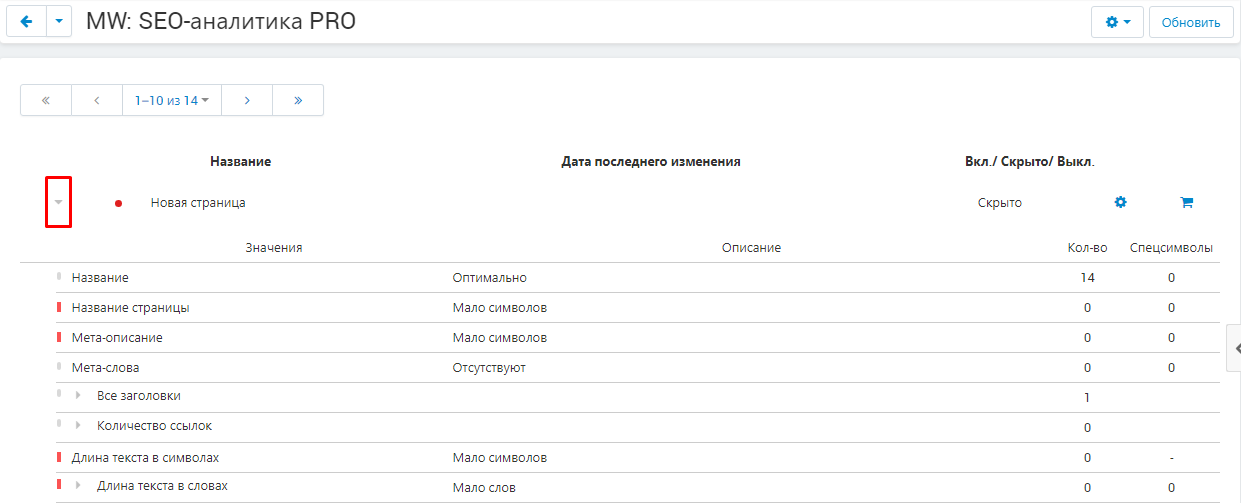
5. To expand the analysis result, click on the arrow to the left of the product or category name.
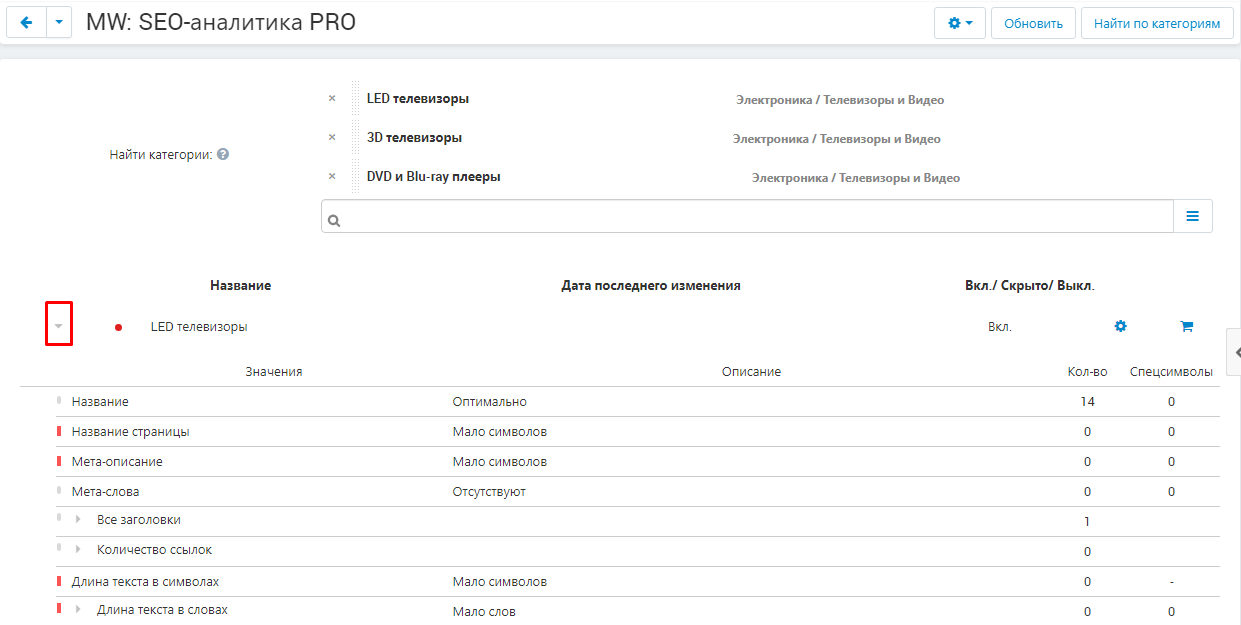
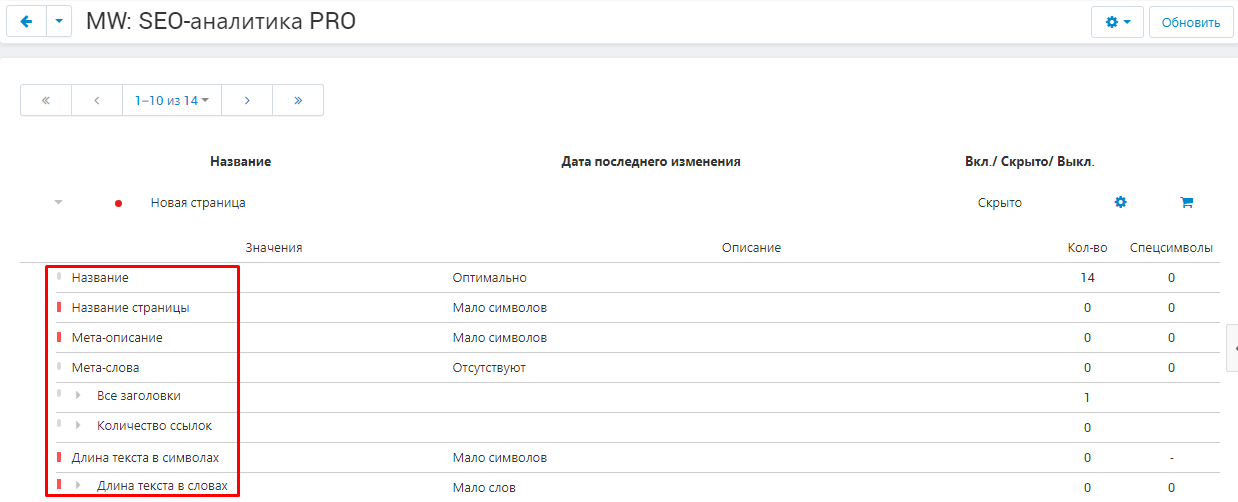
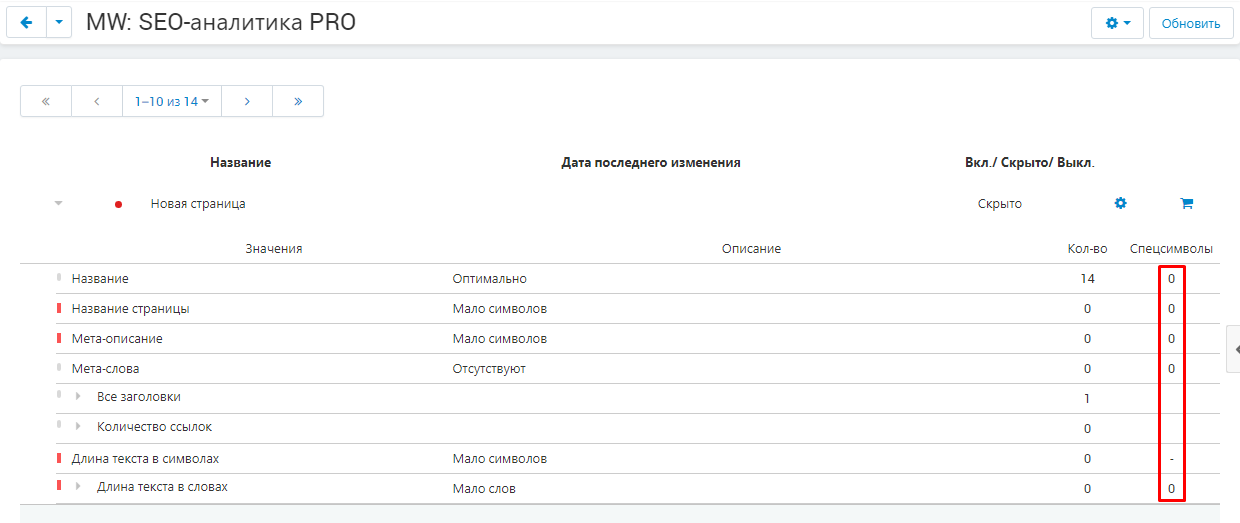
6. The column "Values" lists the parameters for which the analysis is carried out.

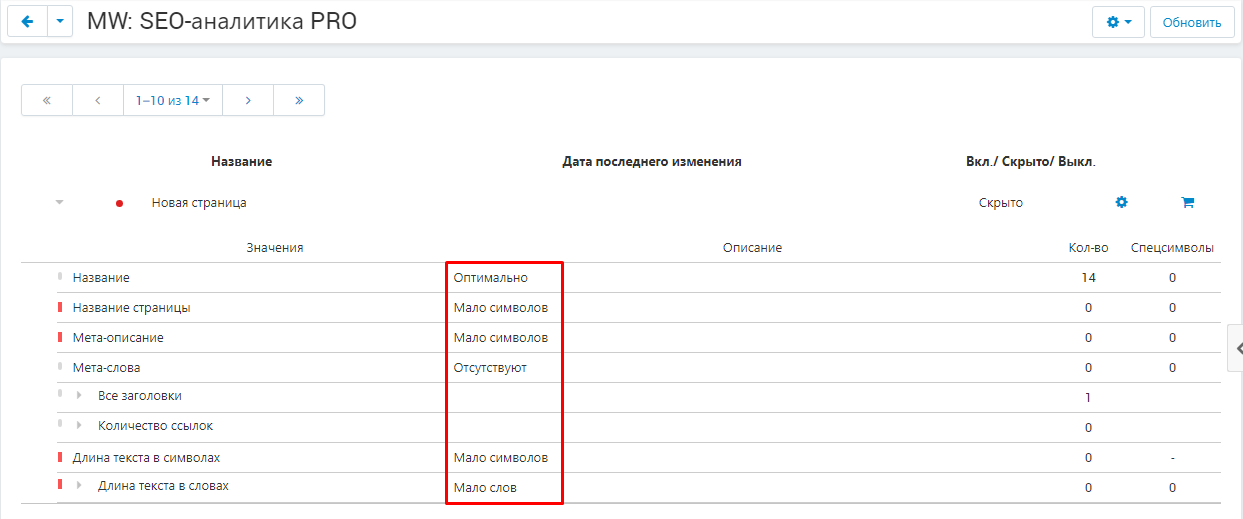
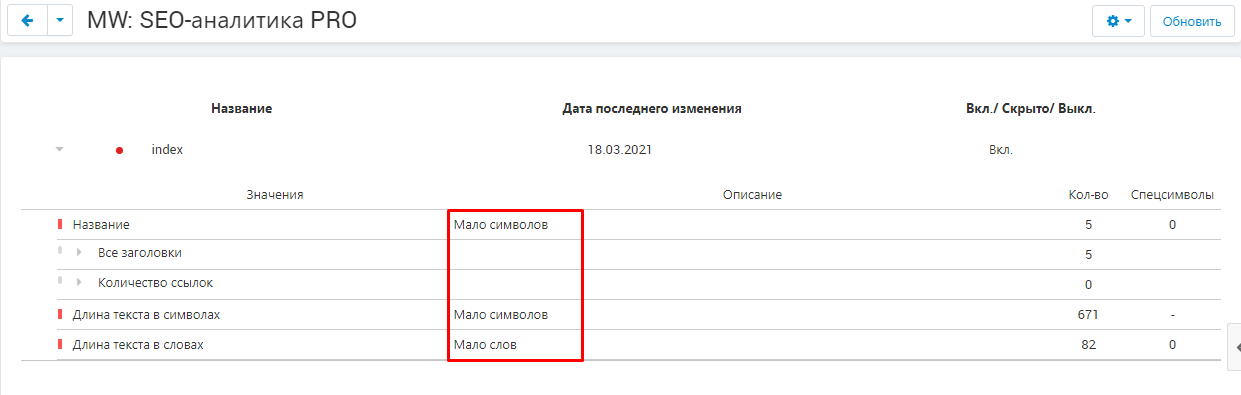
7. The "Description" column indicates the type of error. If there are no errors, the value "Optimal" will be set.

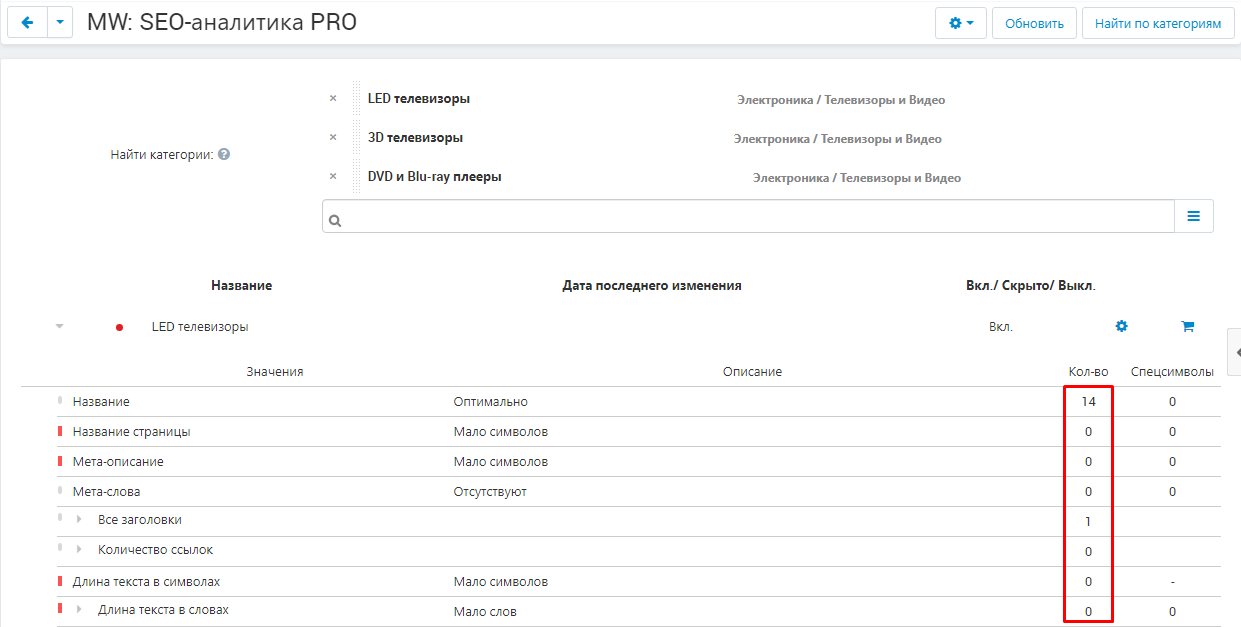
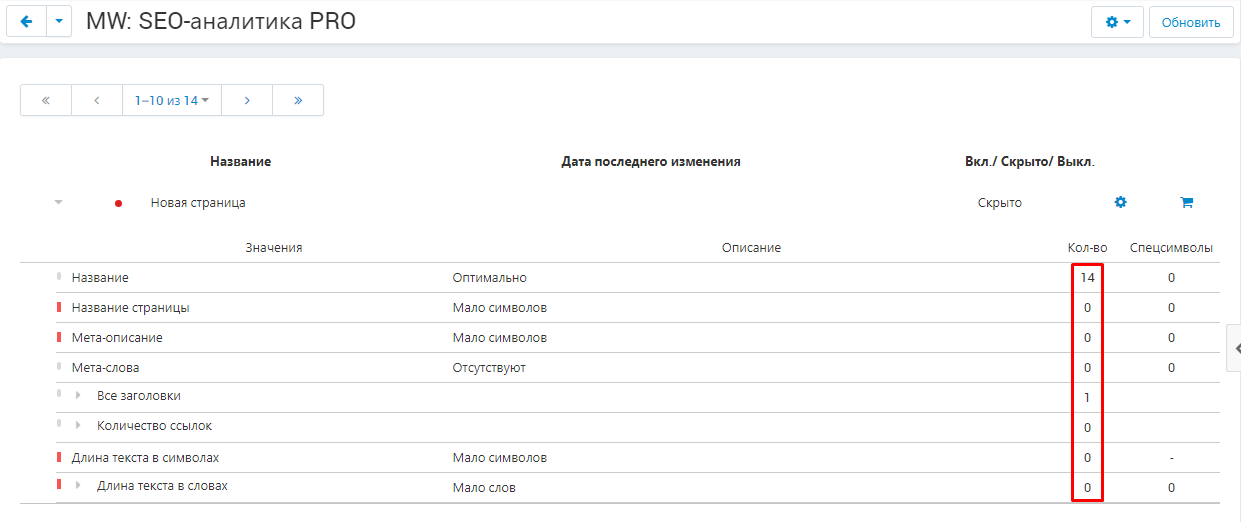
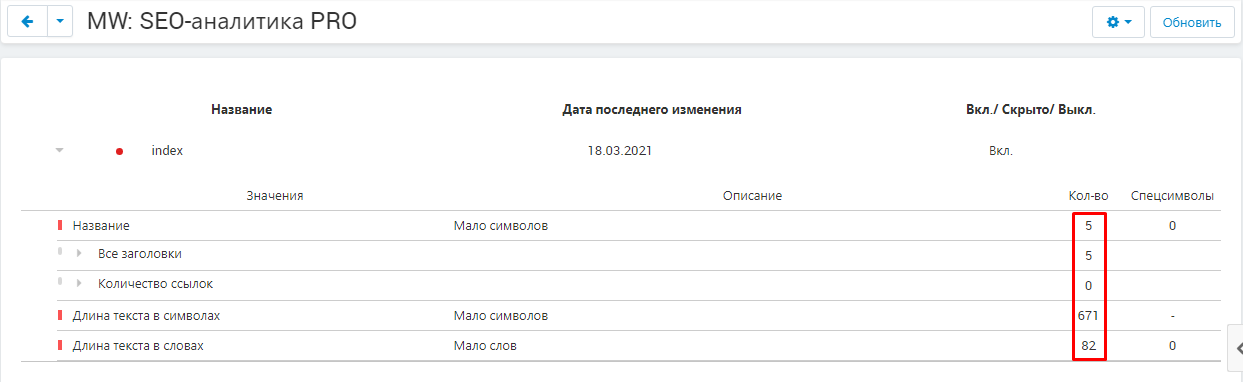
8. The column "Amount" indicates the amount of data in the corresponding value.
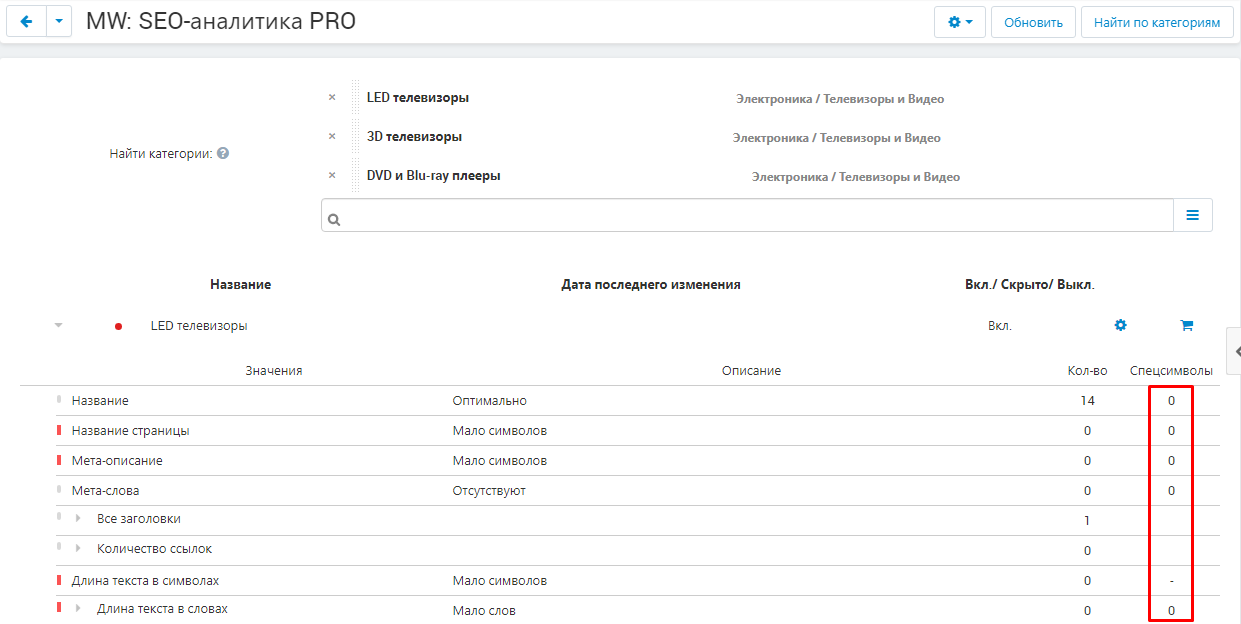
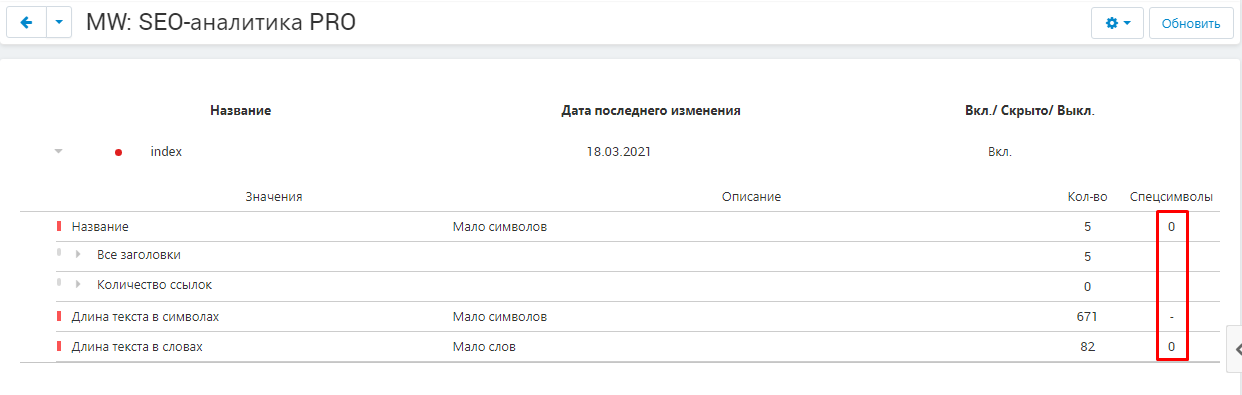
9. The column "Special characters" indicates how many special characters are found in the corresponding value.
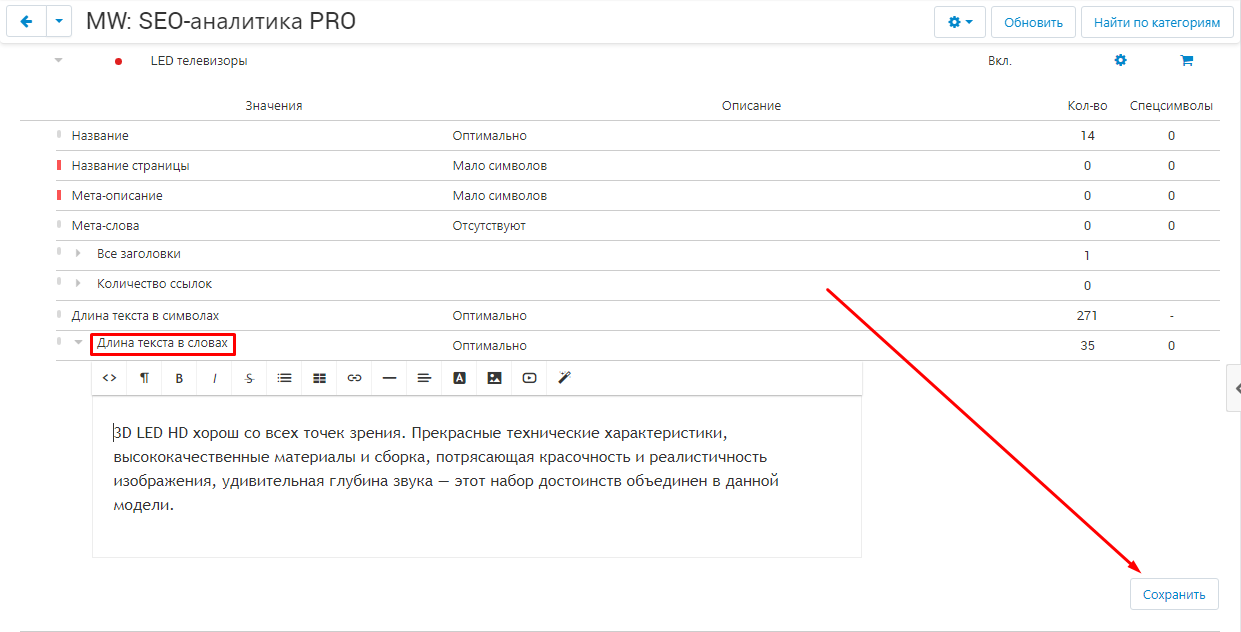
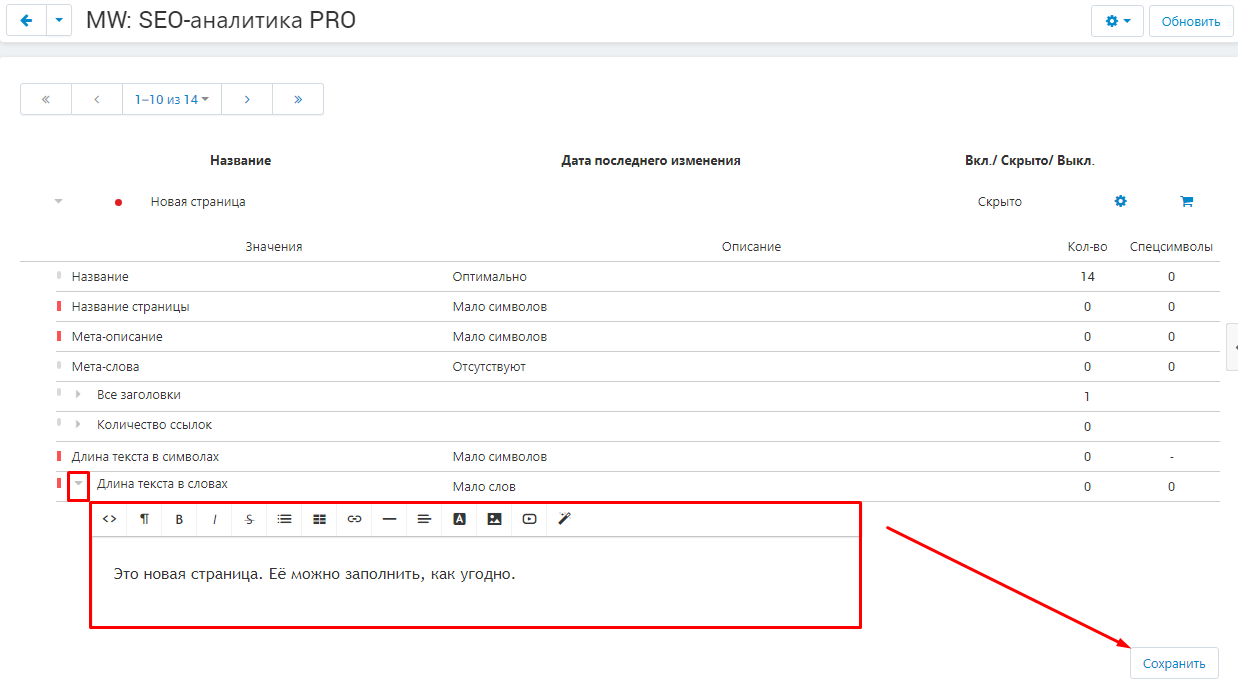
10. Some of the internal partitions can also be expanded separately. To do this, click on the arrow next to the section name. Don't forget to save your changes by clicking on the white "Save" button in the lower right corner of the window.
11. Do not forget to click on the white "Update" button in the upper right corner of the panel every time you make changes to products and categories through the admin panel.

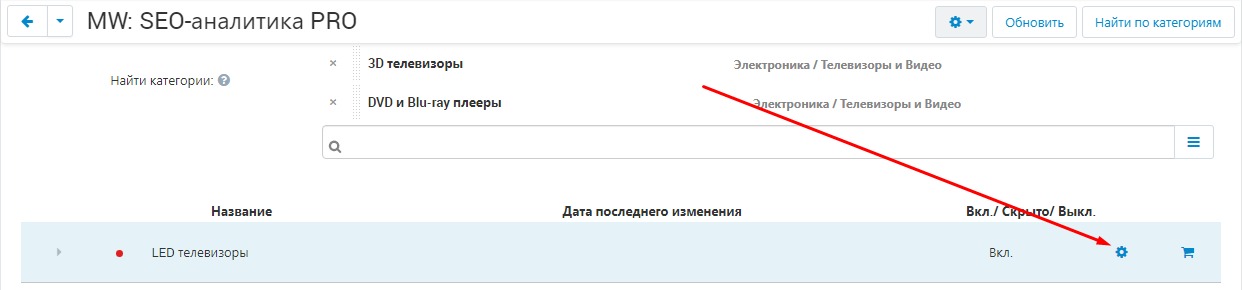
12. To open the window for editing a product or category, click on the blue gear-shaped button on the right side of the line.
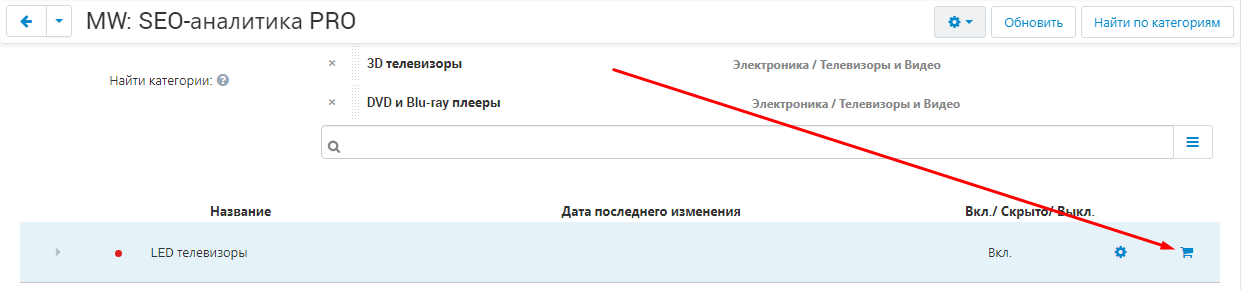
13. To go to the storefront, click the button in the form of a grocery basket.
PAGES & BLOG
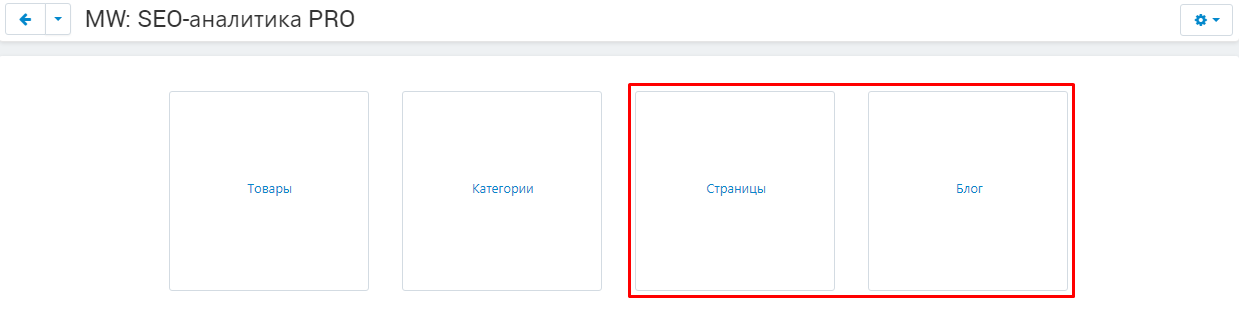
1. To view the analysis of pages and blogs, go to the "Pages" or "Blog" section. To do this, click on their name, highlighted in blue.
2. The page will refresh. Verified pages or blogs will be usable, but unverified pages will be missing until they are checked. Lines with errors are marked with red circles.
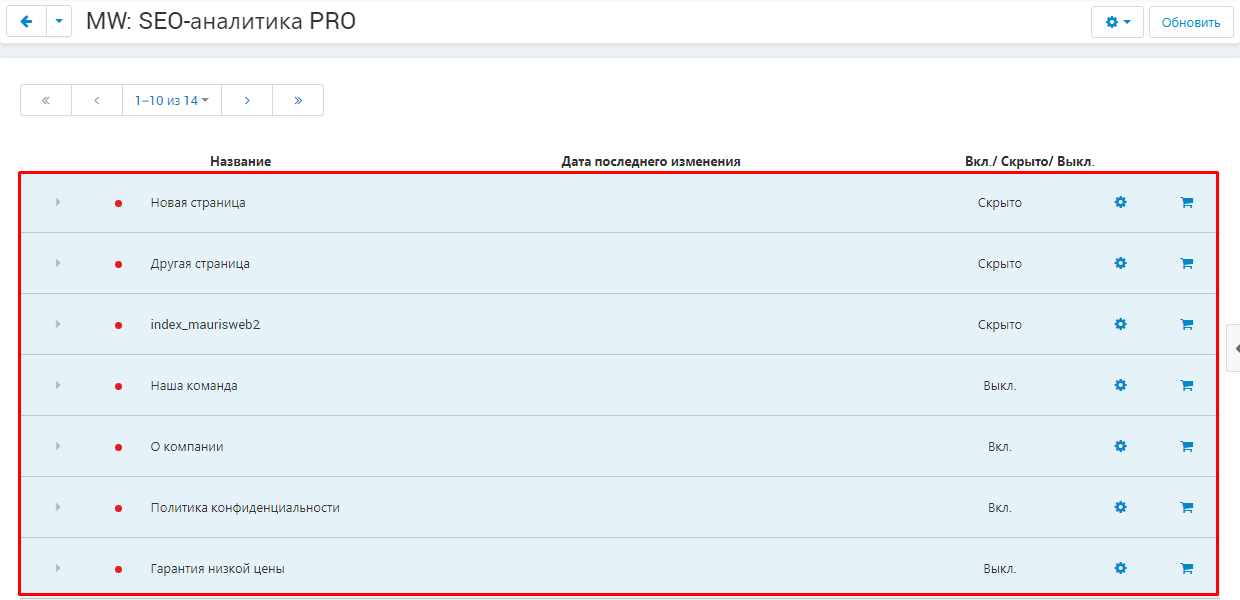
3. To expand the analysis result, click on the arrow next to the page or blog name.
4. The column "Values" lists the parameters by which the analysis is carried out..
5. The "Description" column indicates the type of error. If there are no errors, the value "Optimal" will be set.
6. The column "Amount" indicates the amount of data in the corresponding value.
7. The column "Special characters" indicates how many special characters are found in the corresponding value.
8. Some of the internal partitions can also be expanded separately. To do this, click on the arrow next to the section name. Don't forget to save your changes by clicking on the white "Save" button in the lower right corner of the window.
9. To open the window for editing a page or blog, click on the blue gear button on the right side of the line.
10. To go to the storefront, click the button in the form of a grocery basket.

11. After each update of pages or blogs through the admin panel, click on the white "Refresh" button in the upper right corner of the panel.

HTML DESIGN CONSTRUCTOR W3
1. To view the content analysis, go to the W3 HTML Design Builder section. To do this, click on its name, highlighted in blue.
2. The page will refresh. Verified pages or blogs will be usable, but unverified pages will be missing until they are checked. Lines with errors are marked with red circles.

3. To expand the analysis result, click on the arrow next to the page or blog name. Items that do not correspond to the values set in the "SEO analysis settings" are marked with a red stripe.
4. The column "Values" lists the parameters by which the analysis is carried out.

5. The "Description" column indicates the type of error. If there are no errors, the value "Optimal" will be set.
6. The column "Amount" indicates the amount of data in the corresponding value.
7. The column "Special characters" indicates how many special characters are found in the corresponding value.
8. After each update of pages or blogs through the admin panel, click on the white "Refresh" button in the upper right corner of the panel.
